Sound Design

A key aspect of a good thriller is the sound. To help us understand different sounds and music which might be used within a thriller we listened to a sound clip. While listening to the clip we noted down key words on how we are feeling and what we imagine when listening to it,so that we understand what goes into the background sound in a thriller, this process is called synesthesia. Synesthesia is images you imagine while listening to sounds.

This task proved to be helpful because it gave me a larger understanding to what kind of sounds I may use when I add sounds onto my own thriller.

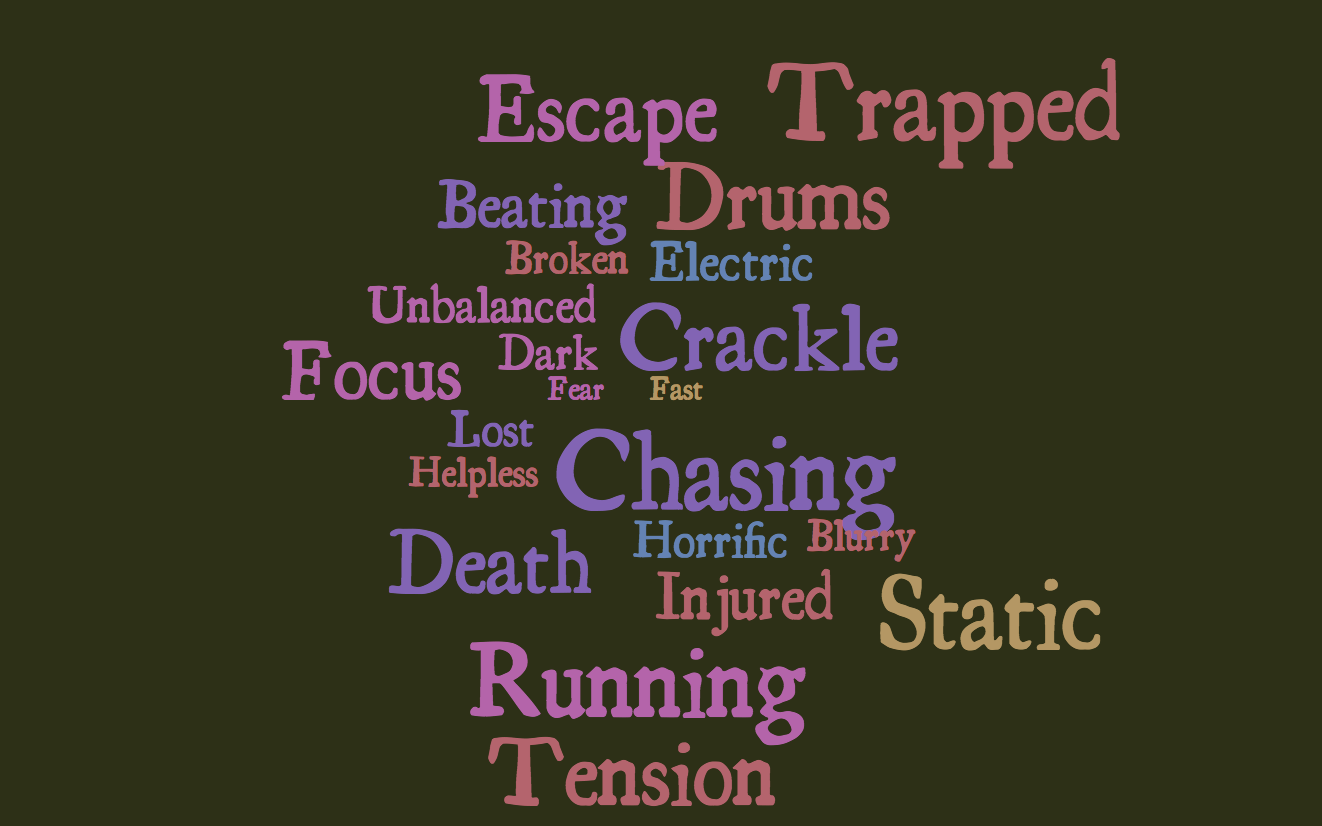
Below is the ‘word it out’ I made to express my thoughts and feelings I felt while listening to the sound clip.

Below is the order of sounds that we think we will use when adding sounds onto our thriller piece.

Here are some sound tracks I have used to up the suspense in my thriller. I used an eerie background sound throughout the whole background and also slight booms and bangs to make my thriller more fearful for the audience.

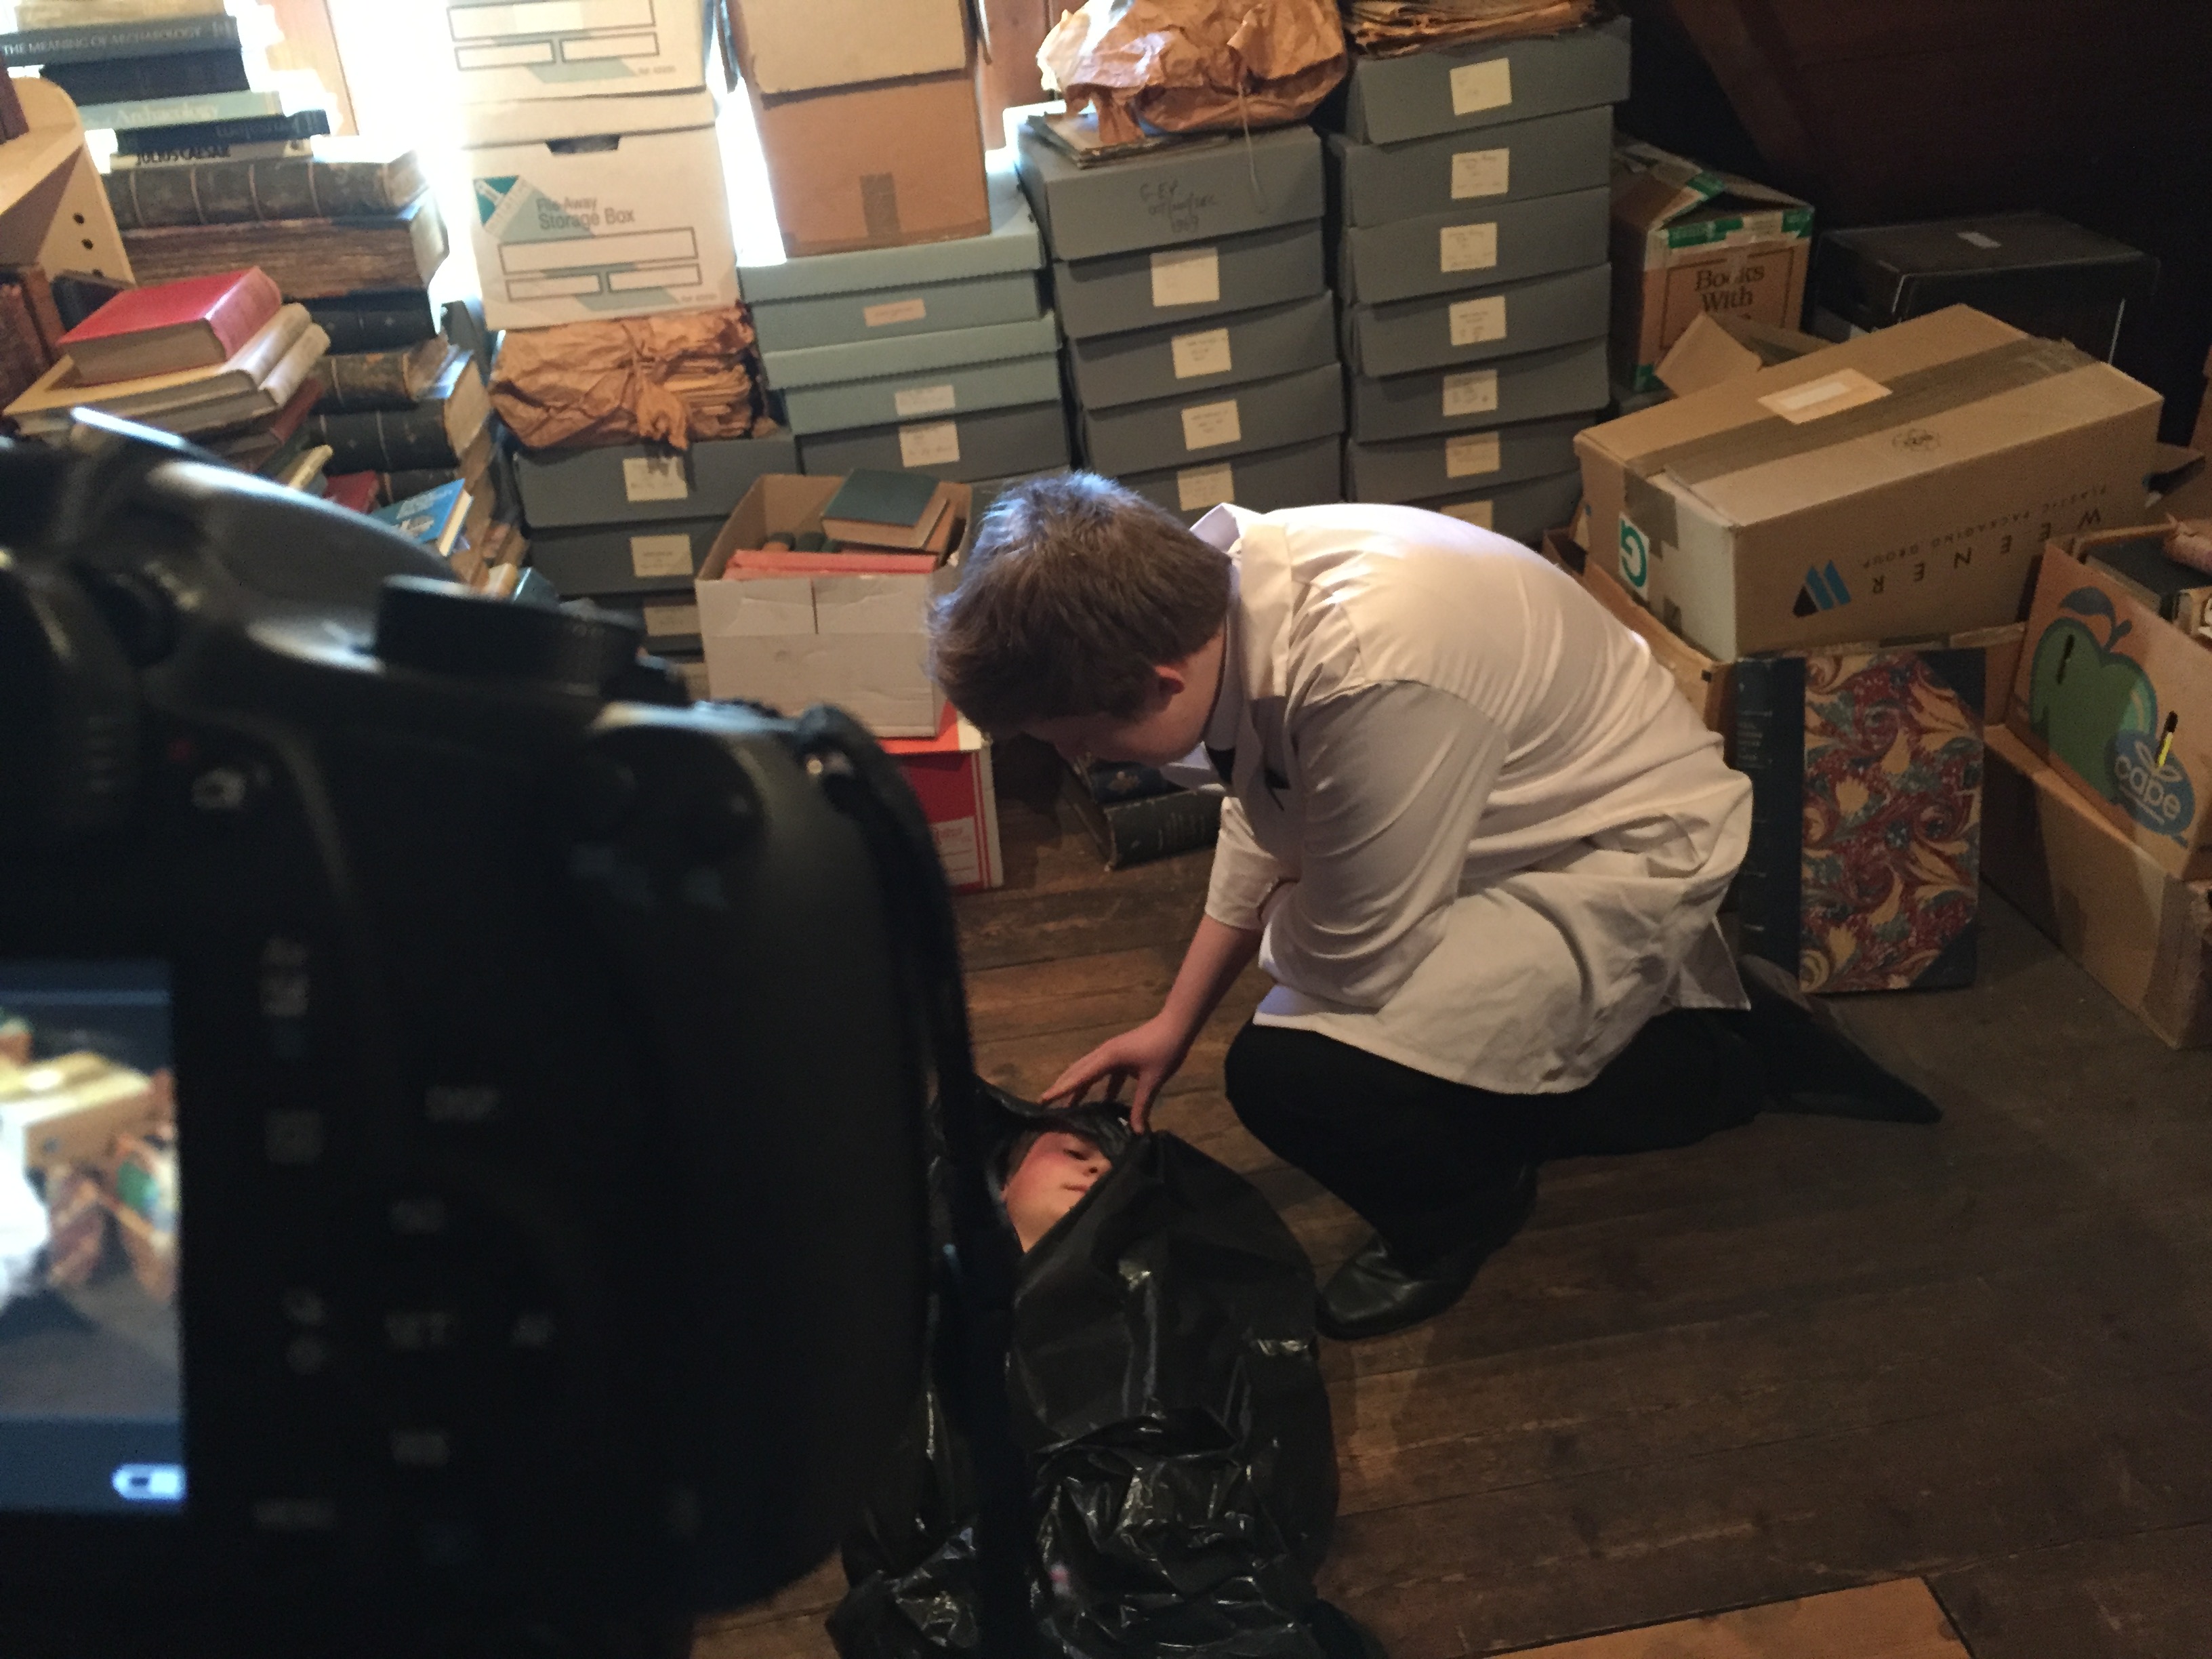
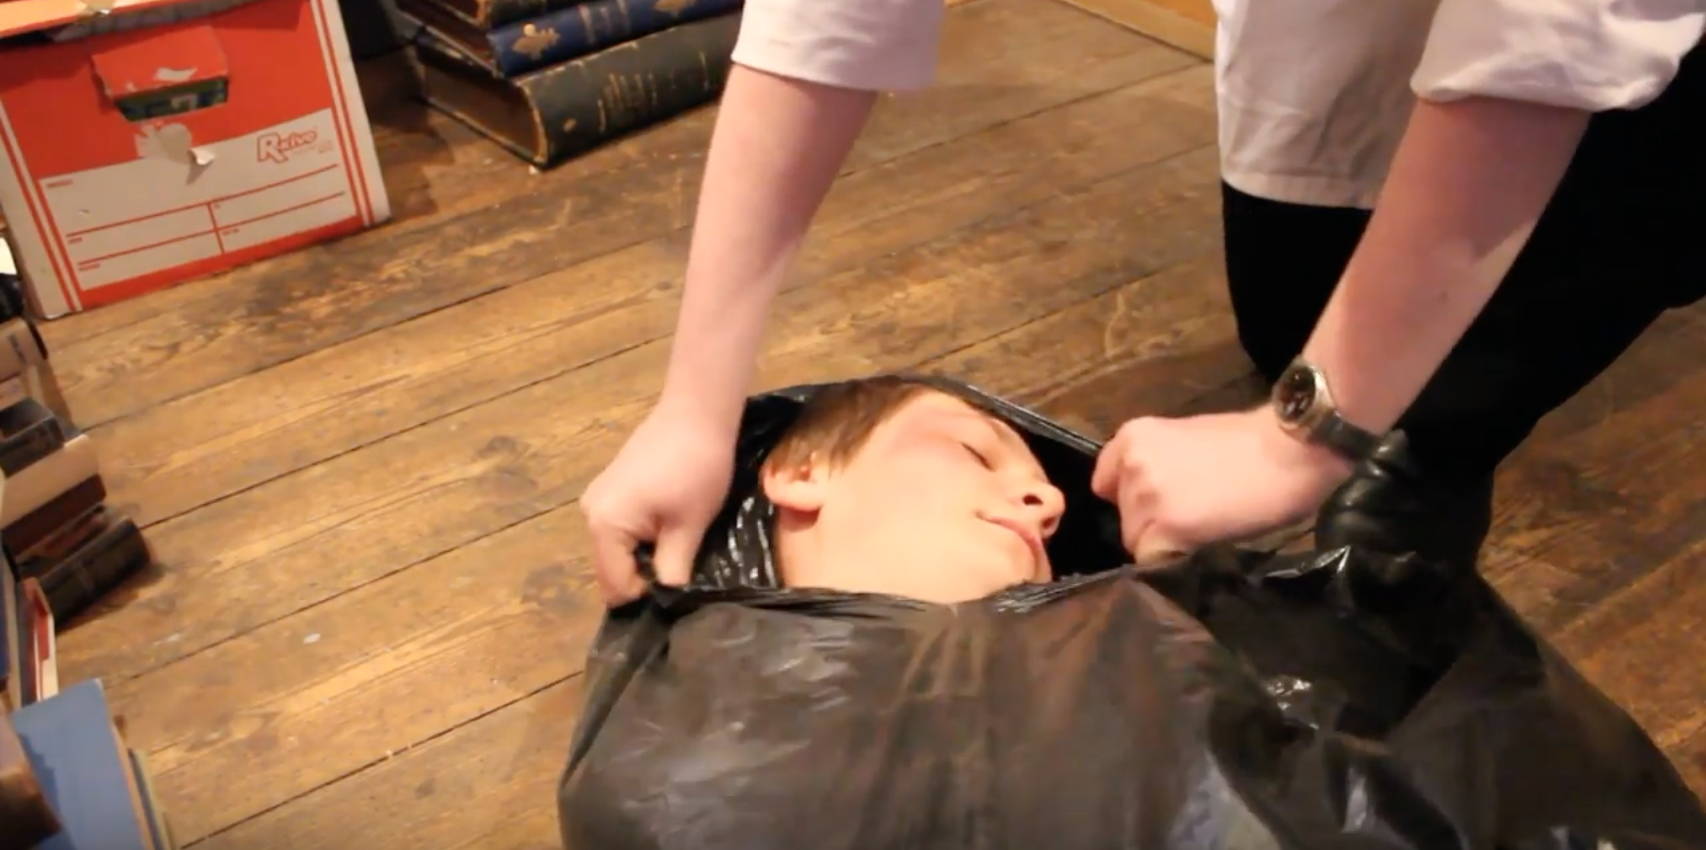
Here are some Foley sounds I have recorded to add natural sounds onto my thriller such as walking and the rattling of the bag that was being dragged and the gloves being stretched and slapped against the skin.

Draft 2 (Edit including titles)

This is our draft 2 of the thriller with the added improvements and titles that we made on after effects which has helped to start finalising our thriller.

Below is the feedback we were given about our titles. We were given our feedback by Alex,Becksley and Caitlin.

They thought that:

  • Our titles worked well altogether.
  • we need to make sure the titles are easy to read and are positioned well.
  • Make sure that we didn’t break much continuity.

Other feedback we have been given to help improve are feedback are:

  • The titles are bit quick.
  • Make our titles fade off even if they have to go over clips,like the fade off with the main title.  
  • The grainy cloud at 0.06 might need to be all the way through or more.
  • Cut when the doctor walks towards the camera at 0.19 is a bit halted so need to fix that by making him walk earlier.
  • At 0.41 is there a close up of the plastic being ripped?
  • 0.57 close up point of view of the diagrams?
  • MOA at 1.41 is a bit odd,do we break the 180 degree rule?
  • Transition back to Harry starting to move?
  • 1.56 Harry’s eyes have a smile in them we could zoom into them more?

Titles Design and Production

Below are some screenshots of techniques we used while editing the titles.

I used the font ‘Stika’ for my titles because it fitted well with the theme of my thriller by looking neat to show the cleanness of the doctors lab coat but it also has pointy edges which makes the words seem mysterious and sinister which therefore ended up looked effective on top of my film.

This is a screenshot of a title being cut down to fit in time with our narrative, we cut it down to have the timings right so that they stayed on the screen long enough but not too long, so that they were easily readable

This is a screenshot of my main title. We used an animation that made the writing disappear away from the screen so that it makes the sequence feel more suspenseful and thrilling. It was important to use the right animation to ensure our thriller looked creative and crisp and that it fitted with the narrative.

Titles research and planning

We have been researching various title sequences from the opening of films to identify what titles an order we will place onto our thriller piece. In our research we timed how long each title stayed on screen and also how the background music changed with each title. To help with our work we used a website called Art of the title.

Please click on each image to view our work.

Below is our handwritten analysis for the film Fury. We noted down when each title was and what the title was dedicated to, we also studied what sounds were playing in the background to build the tension and prepare the viewers for the narrative. We lastly studied which transitions the titles have to enter the screen.

Secondly we researched 300 and Panic Room for their use of titles. We used a document to write down the order they came in and also the transitions which was used for each title and then how long the main titles last on screen.

The research has been very helpful in helping with the planning for our title orders and the duration of each title.

This is our title order plan we will use in the creation of our thriller.

Draft 1 (Edit including transititions and filters)

This is our completed first draft for our thriller opening:

Below are screenshots of the feedback we were given to improve our thriller in the second draft.

I can see that they clearly enjoyed our colours and mise-en-scene, but our targets for approving in the next edit would be:

  • Improving the match on action.
  • Maybe adding effect to the lab coat.
  • Add more shots to engage the audience to the narrative.

Editing Process

In this post I have included various images of processes we have taken while editing our thriller. We have added these features to make the thriller more engaging for the audience and add more tension onto the scene.

Dip to black transition

In this screen shot we have added a dip to black at the end of our scene. The dip to black makes the scene fade away at the end making it seem a little more eerie.

dip-to-black

Match on action

This is an image showing a moment of match on action. Match on action adds sense and tension onto the scene by giving a clip more meaning and understanding.

real-match-on-action

Snipping tool

We used the snipping tool to cut down part of the shot to make it shorter and more interesting for the viewer.

snipping

Rough Cut (Basic edit of narrative)

We have now put all of our footage onto the computer. After viewing our footage we then had to create a narrative rough cut, to do that we put together clips with minor editing to create narrative sense and help us decide which clips to edit out in our draft one.

This has helped us to understand where to go next when we go to do fine editing because we know understand how the narrative works.

This is our final rough cut:

To improve when fine editing I need to:

  • Use smoother transitions to help create a clearer narrative sense.
  • Only use the best shots to keep the thriller exciting and intriguing to look at.
  • Add diegetic and non diegetic sounds to add tension and create a overall distinctive atmosphere.

Shooting Day Evaluation

My location for my thriller was the Guernsey Priaulx library. The library had 3 floors, the third floor looked run down and old fashioned and this was where I filmed my thriller. The room I used was filled with old books and files, this looked great for the back ground and added a nice element onto our mise-en-scene.

I am going to asses some of the high and low points of the day and also give myself some targets to focus on in future filming.

High points of the day:

  • We filmed a lot of well thought out good clips.
  • We had to use our initiative and think of the best shots to take.
  • It was a good task to improve my teamwork skills.
  • Our mise-en-scene looked good on set.
  • The shooting went smoothly.

Low points of the day:

  • The cameras battery was low meaning some shots had to be rushed.
  • The lighting wasn’t the best.
  • We were limited of space because of other groups in the location.

Targets for future filming:

  • Make sure the camera is charged up full.
  • Use auto focus to make sure the shots are all in focus.
  • Bring extra lighting equipment to make better lighting.


Here are some pictures we have taken when we were out shooting.

img_3969

img_3970

img_3968

Here are some screen shots of shots that we like and think worked effectively.

screen-shot-2016-12-09-at-14-19-11 screen-shot-2016-12-09-at-14-16-19 screen-shot-2016-12-09-at-14-17-06 screen-shot-2016-12-09-at-14-18-09 screen-shot-2016-12-09-at-14-18-27 screen-shot-2016-12-09-at-14-18-41

I think these shots illustrate:

  • Good framing within the door.
  • Bright interesting colours.
  • Intriguing mise-en-scene.
  • Clear in focus shots.

Risk Assessment

We all filled in the risk assessment sheet so that we understand the dangers while filming and to keep us safe. It is important to take the risk assessment seriously and act responsibly about it. Below is the risk assessment we used before we went out filming.

Please click on the photo to enlarge it

screen-shot-2016-12-07-at-13-53-34

Production Meeting Agenda

We made a production meeting agenda document to put down the information that we will need when going to our filming location. We included what costume and props we will take for each character to dress up as to make the mise-en-scene look interesting and creative.

This is our production meeting agenda.