January 23

A new Improved Contents Page

Above is my new and improved contents page. I have made sure to keep the colour scheme for my writing the same as my scheme for the double page spread so that the writing is clear and the colours don’t get too messy, although I outlined the pastel coloured writing in black because otherwise the colours faded into the background. I have changed the bottom image and added a colourful gradient to keep an element of pop to my magazine and also made sure that where my magazine title is mentioned, the same font and colours have been used as the ones on the front page. Below is the peer feedback I received.

January 21

Draft of Content Page

Here is my first draft of my contents page.

I need to:

  •  Include a page number
  • Catchy captions
  • Change the images in photo shop to reflect my articles
  • Keep my colour scheme going in my writing
  • Add in some rockabilly icons and images
  • Change the background colour to black to reflect the rock aspect
January 16

A New Improved DPS


Here is my new and improved double page spread. I have taken on board the feedback I was given and changed the page number to the bottom right of the page as well as added in captions for the images to inform the reader. I also changed the line spacing to make the columns more uniform and easy to read. The biggest change I made was to the colour scheme, I referred back to my 1950’s mood board and found a colour swatch that made my double page spread more interesting and vibrant.

January 15

So what is a Contents Page?

My contents page need to be eye-catching as well as clear and easy to read because it contains information that aims to draw my target audience in and direct them to what they want to read.

It needs to include:

  • A menu- for reader to find what they want to read
  •  Page numbers
  • Page titles
  • Photos
  • A catchy heading
  • interesting design features

I also will keep in mind the ideas of Blumler and Katz as well as AIDA.

  • A- attract
  •  I- interest
  •  D- create desire
  •  A- call to action

-Entertain    -Inform/Educate    -Social Interaction    -Personal Identity

January 15

Feedback and Reflection on Draft DPS

Feedback:

  • The use of a white background is the most compatible with the red and black colours for the fronts I used.
  • The use of a gradient in red for the image of my star is effective and eye-catching

Targets:

  • I need to fix the line spacing in my last paragraph
  • Add in a page number at the bottom of the page
  • Put captions with the images
  • Maybe add drop shadows behind the images to help them to stand out more
January 15

Draft of Double Page Spread

Here is my first draft of my double page spread.

  • It contains two images, one of my main star and one of her and her friend to give an impression that the article is about social aspects of her life as well as her work. I used red, black and white for my colour scheme as it fits in well with my genre of the 1950’s and the red and black stand out against the black.
  • I made the quotes in the article stand out by emboldening them and colouring them red, as well as making the font larger.
  • I placed a gradient on the main image of the star to add a modern pop vibe to it to underline key features of the genre and portray the narrative as interesting and contemporary despite that fact the the artist is a 1950’s singer.
December 18

A New Improved Feature Article

After receiving feedback from my teacher I decided to change the introduction of my article and write it in the third person in the hope that it gives the reader an idea of what the autobiography is about and give some context to the story. I also listened to my voice memo and changed some words to help it make sense and added more varied adjectives so that my article is more interesting and exciting to read.

Targets:

  • Add in paragraphs for structure
  • Maybe add in a concluding paragraph in the third person
December 18

Second Shoot Contact Sheet(s)

My second photo shoot with my models at Castle Cornet was successful because I am now able to add modern theme to my magazine because I used Lauren and dressed her as a pop artist, but kept Adelaide in 50’s themed clothing.

The setting was effective because it illustrated an outing with a friend. This was portrayed by the mid shots and long shots coupled with the natural setting and body language that I asked my models to convey. I also took some photos of Adelaide inside in emphasized 1950’s Rockabilly clothes.

Here are my favorites:


December 17

Design Skills 1

In order to create a good quality and eye catching magazine cover I used Photoshop and Indesign to help improve my images and become more creative with them.

Here are some tools I used on Indesign to help achieve desired results:

Above is a gradient tool that I was able to use to add the effect to the background image. In order to help the red stand out to convey my 1950’s theme I had to make the pink leopard print background paler.

I also used the line tool to add dimension to my poster to make it more eye-catching and help the writing stand out so that my audience would be more interested in my magazine.

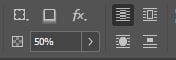
I used the fx tool to help the lines become opaque and blend in to the page, I was able to change the opacity of the lines precisely by changing the percentage.

Before I uploaded my image to Indesign I used Photoshop to help perfect my image.

I used the spot healer tool to help make my model look flawless and have a smooth complexion for my magazine cover.

I also used the dodge tool to whiten things such as the eyes and teeth in order to perfect my model and the burn tool to darken the red clothing and lips to represent her star image as a rockabilly.

Using these tools I have been able to represent my chosen genre because I have added retro effects such as a faded background image to my poster, and darkened colours such as red which helps convey my chosen narrative.

December 9

First article draft


Below is my finished first article draft, along with a reading of it aloud that I completed in order to identify mistakes and areas for improvement for my second draft.


Article Draft 1

Targets:

  • I need to proof read sentences and add in commas and full stops so that the article flows more easily
  •  Write it as a biography so make it seem as if the reader is more included in her life.