Music Video – Draft 4

Our draft 4 of our music video is inserted below. We received feedback in conversation with our teacher and previously had feedback from our peers – this wide range of people who are feed backing on our video, along with ourselves, will enable us to have a broader variety of pros and cons, meaning that we can make our music video the best it can be.

(Fails to play on blog – have to open new window via the black box at the top right)

What went well

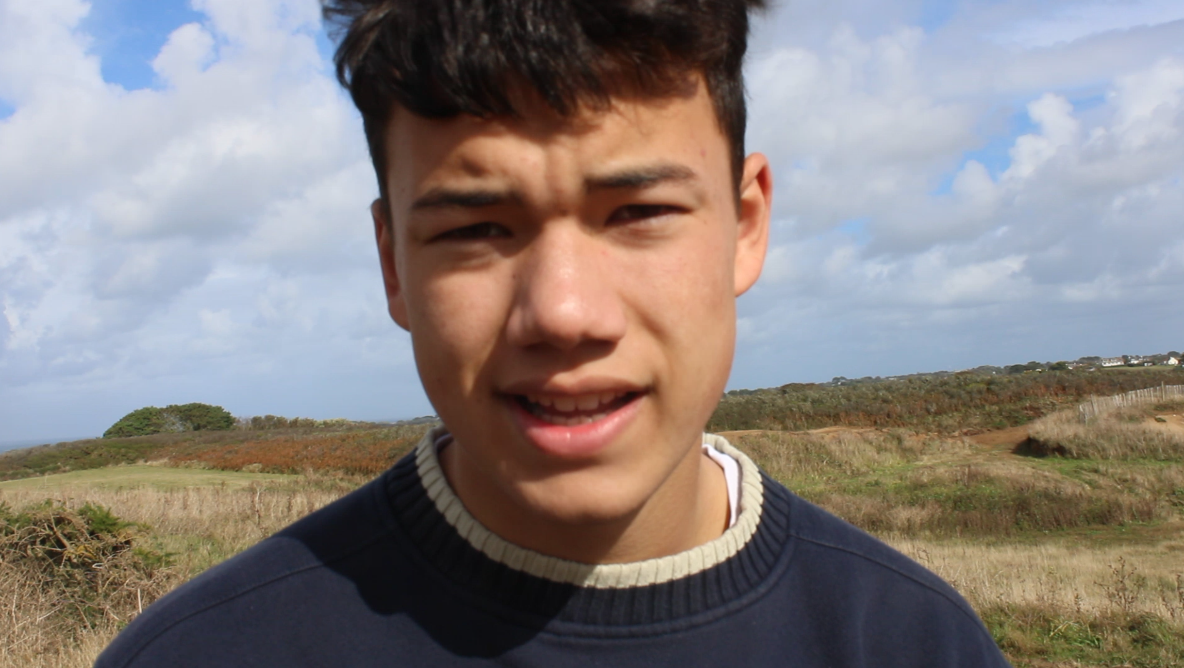
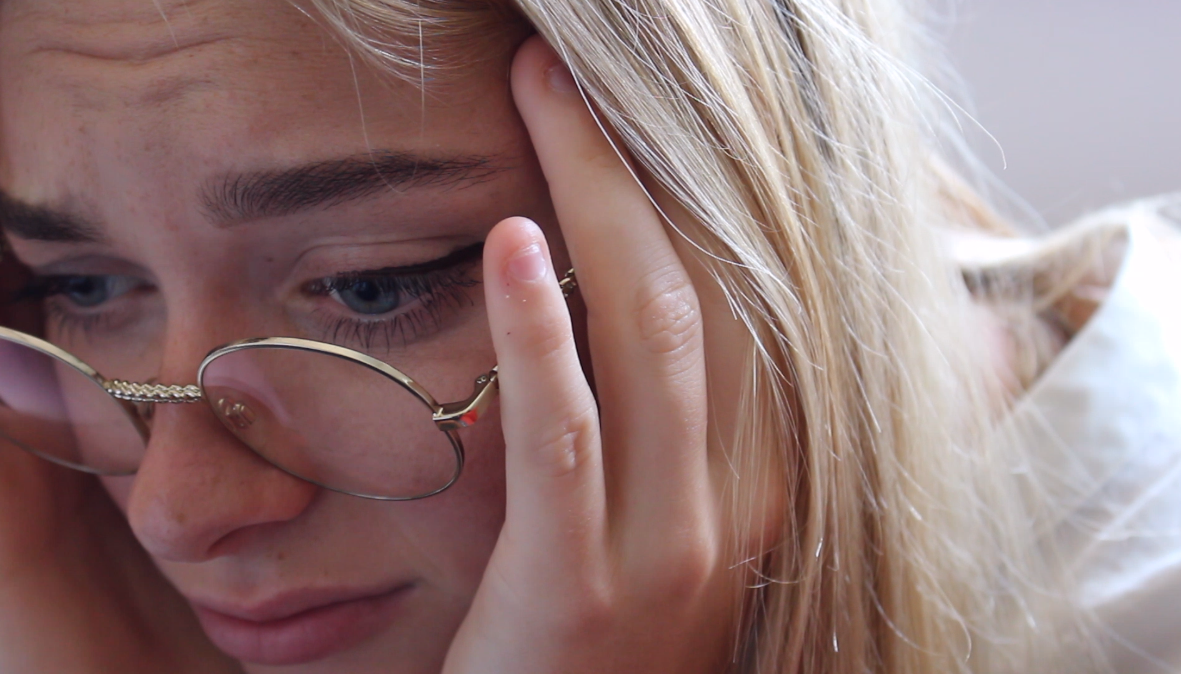
  • The stare at the camera at the beginning of the video is effective as it creates a connection between the performer and the audience
  • Editing to the beat is accurate and allows the audience to remain engaged throughout
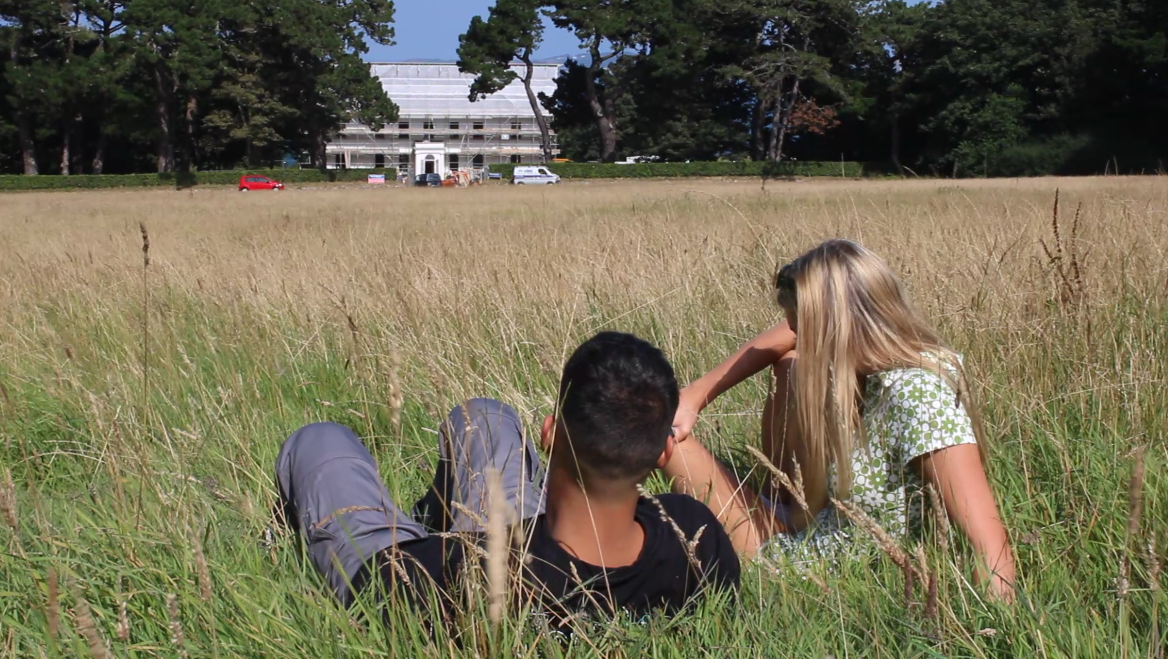
  • The change in storyline when the suitcase is being packed adds attentiveness for the audience – the bag packing sequence works very well
  • The edited to the beat clips of Lukash on the dirt hill are effective and show a variety of techniques in relation to editing to the beat
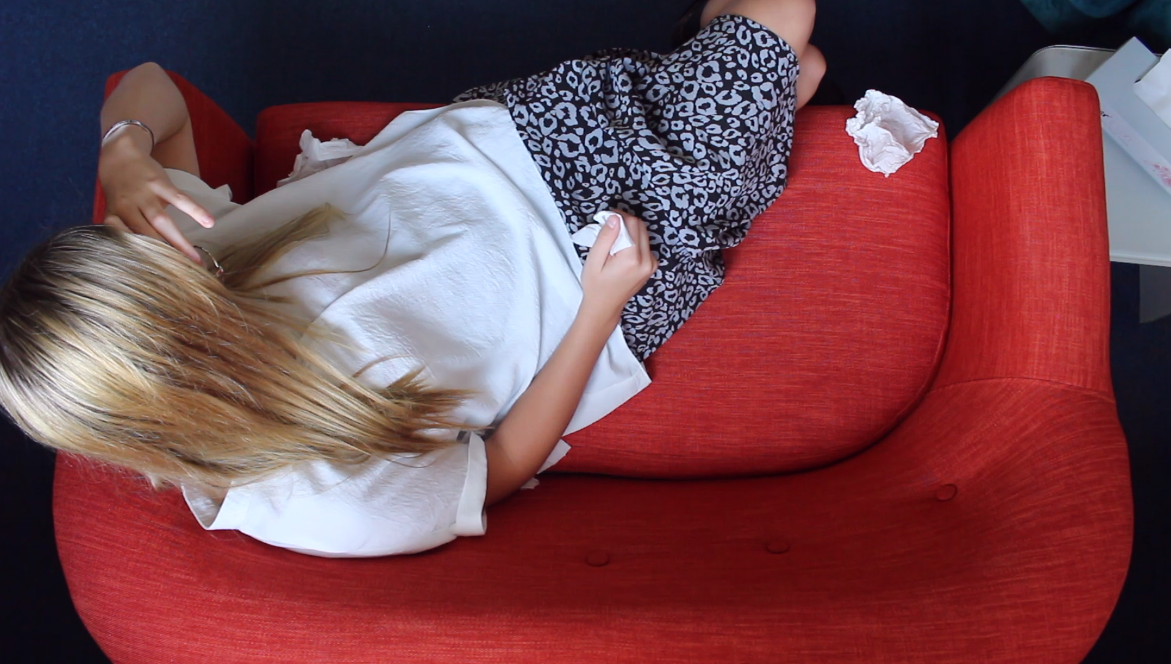
  • The shots of Aimee lying on the bed after Lukash has gone communicates her loneliness to the audience well
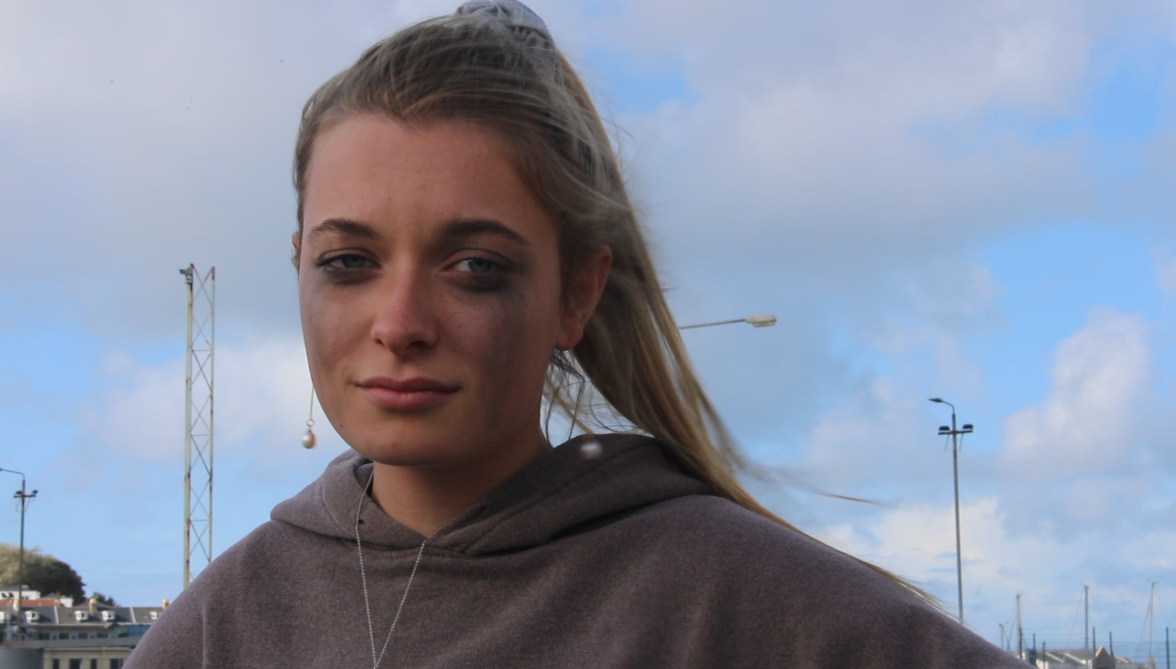
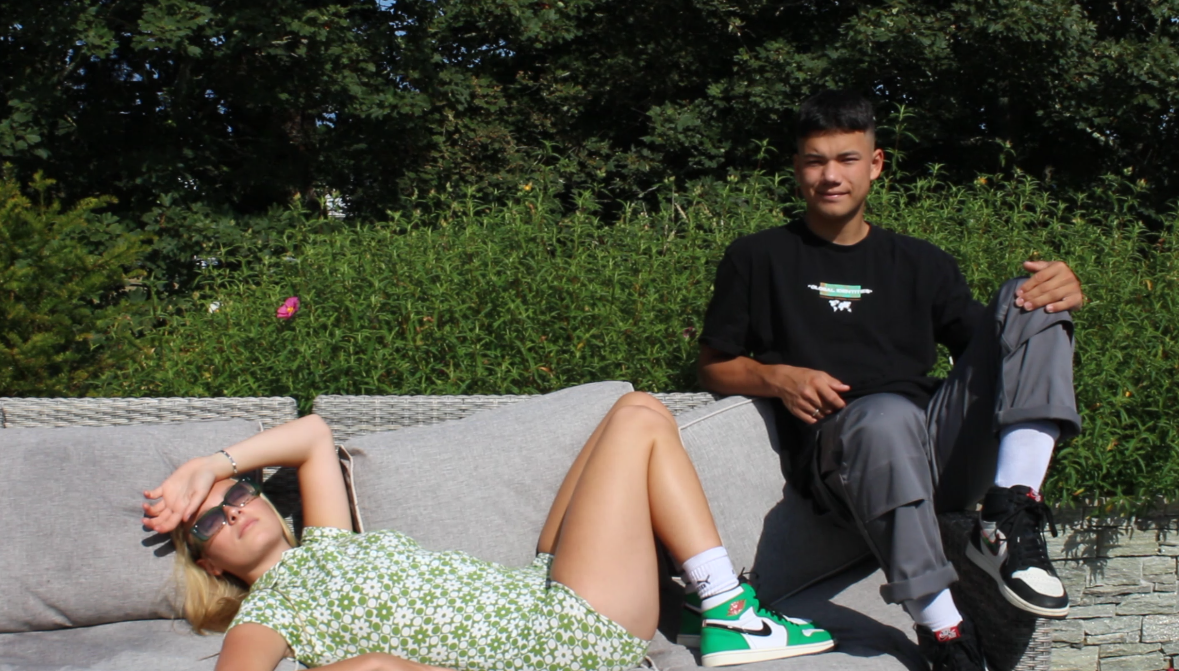
  • The mid shot at the end of the video adds continuity to the entirety of the video

Adaptations to make

  • At the beginning have the clip of Aimee distressed, to the therapist, back to Aimee. This will create continuity / strengthen their relationship for audience consumption
  • Performers in distance in the field – remove
  • Add in some canted angles to create more interest for the audience
  • Lukash on hill – have some similar edits post production to make it more interesting and engaging for the audience
  • There is a sudden swap from the lovely memories to something going wrong in the relationship – colour correct? To signify the different times in relationship
  • To create more of a dynamic, cut between the long shot of Aimee throwing to Aimee throwing the clothes towards the camera
  • Scale in to Aimee throwing the clothes – emphasise a difference in shot distances
  • Long nodding scene of the therapist – shorten it
  • Scale on to Lukash lip syncing ‘Flo where did you go’
  • No point in the pan in the bedroom as it is not panning towards anything except a blank wall – remove
  • Scale in on Lukash lip syncing in the greenery
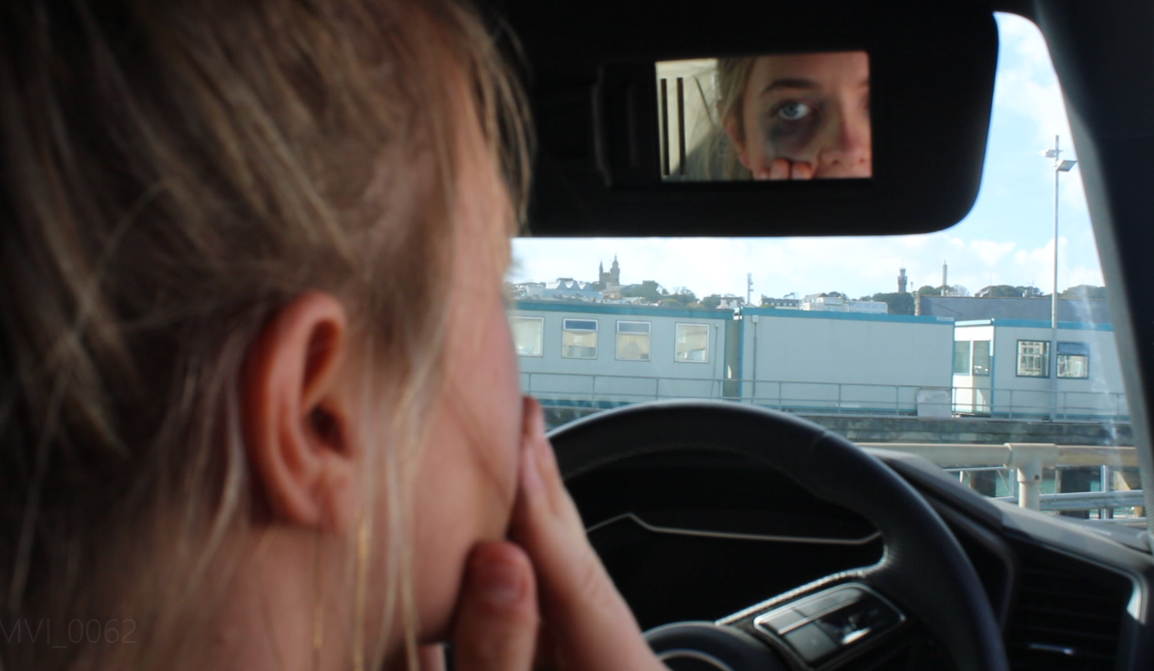
  • Continuity is wrong at the boat scene – needs to be Lukash running over the crossing then Aimee’s point of view, then have Aimee run across
  • Scale in to Aimee rocking at therapy at the end

Music Video Draft 3

Below is draft 3 of our music video. This is by far the longest draft that we have produced so far and this is due to the number of shoots that we have carried out between draft 2 and now. The locations that we have included in this draft are much more suitable to our genre and it has much more of a narrative sense now. However, an issue that we have come across after watching this draft back is that the end of the video does not sync up with the music. We are unsure why this problem has occurred but obviously we are working on fixing it as soon as possible.

Pros of editing, filming etc

  • Now that we have recorded numerous more shoots and developed from our previous targets from other shoots, we have now got footage in the video that includes a variety of shot angles and distances – as well as considering the composition and framing of each clip
  • Our narrative now makes sense and all of our footage is chronologically feasible – this has massively improved our video as we now have something that the audience can consciously follow
  • Our performance characters have communicated the correct emotions throughout all of the recent shoots – making our music video’s narrative more realistic, which is conventional in our genre

Things to improve on

  • Fix the syncing issue at the end of the video – establish the root of the problem
  • Fill in the black spaces throughout it – this may require another small shoot to be carried out, or alternatively we may be able to cut the song so that we have less space to fill
  • Add colour correction filters to the clips of the two of them happy together – this will help the audience to distinguish the difference between the reminiscent past that the girl misses so badly
  • We may need to add in some fades or flashes at some points in the video as this will keep the audience engaged with more exciting visuals

Reviewer / peer feedback

Things our peers think went well

  • Good pace of edit
  • Good range of shots
  • Editing was to the beat where appropriate
  • Quick editing kept the audience engaged
  • Good amount of angles

Improvements that we have been advised to make by our peers

  • Could have some visual effects to make it more engaging
  • A few shots of the singer last a bit too long
  • Narrative could be established earlier on – didn’t realise it was about a break up until the end – maybe have a dedicated break up scene that we see throughout the video
  • More variety of costume
  • Narrative a bit unclear – may need more narrative footage
  • Edit the exposure and colour correct some shots

Shoot 5 Relection

These images are clips taken from the footage we captured in our shoot 5. We needed to get across the anger that the girl was projecting towards the boy due to him ending their relationship. This was the most necessary part of the narrative that we had to film so that the entirety of the video makes sense to the audience. We needed to get close ups for connection to the audience as well as a variety of shots to aid audience engagement.

This shoot was our final shoot of the narrative for our music video. The location that we chose for this shoot was Aimee’s house because for this scene we were trying to communicate the ‘break up’ between the two characters – the boy had to pack a suitcase so we thought a bedroom was the best location for this. I think that regarding the variety of shots and acting, this was one of our best shoots yet. This is also due to the detailed shot list and storyboard that we wrote up for this shoot. Despite this, the lighting in the bedroom – at certain angles – was very underexposed so we will either have to scrap those clips or try to saturate and brighten them when we upload them to Premiere Pro.

What went well

  • The acting from both of the performing characters fitted our storyline brilliantly and this should allow our video to make much more narrative sense and keep our audience engaged throughout
  • We finally managed to get lots of close ups in this shoot and when watching them back you can immediately sense a difference in the connection with the video itself
  • The variety of shots that we got meant that we could choose which footage looked best together – we also got a variety of angles of the same shot, which when put together work very well and enable the narrative in particular to flow much easier than before

What we need to adjust

  • The Mise en Scene wasn’t that thought out – although we had the correct props that fit into the narrative, the costumes did not reflect this
  • In the shots facing the windows, the lighting, as mentioned before, is very underexposed – therefore making the clips look very dark – whether this is something that we can fix in Premiere Pro or not is something that we will have to establish very soon

Shoot 4 Reflection

Here are some images from the clips that we recorded at Pleinmont. This shoot was much more successful than our previous Pleinmont shoot as it was not raining and our performer knew the lines of the song much better than before. We also decided that we needed the entirely of the performance of the song completed at this location as the pervious lip syncs in the LED lit room did not fit the genre and had bad lighting throughout. Along with the performers knowledge of the song and our shot list that we wrote, this allowed our shoot to be much more efficient and organised.

Below are images from our boat terminal shoot. As we completed this shoot after already filming a performance shoot we will admit that we did not spend as much time on this one – and I think that is why some of the shots that we got were not up to standard. Despite this, the variety of shots that we got were very worthy of being in the video.

For our fourth shoot we made the decision to re-film our performance shoot (shoot 1) due to the weather conditions that we were faced with at the time. As well as this we needed to get more narrative shots at the boat terminal in Town. This part of the narrative will help the chronology of the whole music video as the audience will now be able to understand that then boy is leaving her to go elsewhere, not just breaking up with her. By reshooting the performance and gaining more narrative footage, we should have a lot more to work with while editing.

What went well

  • Due to our performer revising the lyrics more thoroughly, the lip syncing had improved massively, and allowed us to film more of the lyrics than we previously could
  • The variety of shots that we got at both location shoots were significantly better than our previous shoots – again we had a shot list and storyboard for these shoots
  • We managed to do two shoots in one day – showing our communication skills and how organised we all were
  • By gaining more narrative footage, our embedded anecdote is starting to come together
  • The bettered lighting in these shoots made a massive difference in how the shots themselves eventually look

What we need to adjust

  • The shots filmed at the boat terminal were not the best ones that we could have achieved so we will either have to edit what footage we have to the best of our ability or do a small reshoot of the clips that need improvement
  • To ensure that we have every clip we could possibly want and make sure that they are carried out exactly how we want them we need to remember to record every shot 2-3 times each – this will allow us to pick and choose certain parts of each angle/shoot
  • Need one more shoot to cover the remainder of the narrative to join it all together – this shoot will need to consist of lots of close ups to connect to the audience more, as this is what we were lacking within these two shoots

Shoot 3 Reflection

Below are a few snip tooled images from our third shoot. We focused on the narrative again with this shoot as we believe the narrative is the part of the video that needs to be adjusted and improved upon the most. The narrative is the most important part of our music video to get right because if the audience doesn’t understand the story of the video, it is pointless them watching it. An easily understandable music video keeps the audience engaged and excited.

For this shoot we decided to do additional narrative filming. Our previous draft lacked texture in the video and we found that a solid narrative would make it much more engaging for our audience. A therapy room where Aimee expresses her sorrows to her therapist fits into the type of narrative performance we are aiming for. The atmosphere in the room, as well as the clothing the two girls wore, and the props that we used, all fit into the Mise en Scene of the scene, adding another layer of engagement to it. The angles and various shot distances that we managed to get from this shoot were improvements from our previous shoots. This is because we wrote up a shot list prior the shoot meaning that we were much more organised and wasted no time.

What went well

  • The room, costumes and props fitted the theme of a therapist
  • Aimee’s acting helped to support our narrative – she clearly portrayed the pain that our character is meant to communicate
  • The variety of shots that we managed to get were consistent and the close ups will especially allow more of a connection with the audience

What we need to adjust

  • Props are an important part of narrative so we may need to re-film or edit the clips so that there is more of a focus on props like the tissues for example
  • As a group we have decided that we will need to carry out another shoot in this location so that we can re-shoot clips such as the wobbly tilt of the ‘therapist’, as well as get more content of Aimee’s distress to insert into later on in our video
  • Putting subtle colour correction filters on these clips might help with the narrative sense – bright but low saturation filter to show that it is current but melancholy

Teacher Feedback – screencastify

Our teacher has created a screencastify on our draft 2 so that we can assess the feedback we are given and work upon it to make our music video as successful as possible – it has been embedded below.

What worked well

  • Good angles of sofa in the therapist shoot
  • Aimee breaks the fourth rule – she comes out of character which works well and can be done more frequently throughout the video
  • Low angle of Lukash on the hay bales is effective
  • Good mirror shot – works well and doesn’t have camera in it either which can be hard to do
  • Good energy with edit on beat
  • Performance footage was better in the outdoor location at the abandoned bus
  • Close ups of Aimee in therapy worked really well to convey her emotions

Targets for improvement

  • Even though the tilt judders it works well so we will have to redo it amongst our other shoot
  • When Aimee puts her hands to her head we should cut to a close up so that there is more connection with the audience regarding her grief
  • Get rid of the performance clips infant of the blinds inside
  • Jump cut performance shot of Lukash on the hill? – keep audience engaged
  • Play with the colour on the hill shots?
  • Missing parts of the video – both narrative and performance – need to carry out more shoots, especially more performance as the interior shots that we have are no longer going to be part of our finalised video
  • More shots can be stabilised using a tripod / a tracker
  • Crop out the bushes on the clip of Lukash on the hill
  • Get Lukash (the performer) in interesting positions – moving through frame? don’t have him in middle all the time as it can get boring as a consumer – play with the angles and framing of the footage
  • Create a short story to include within the video – make an ending – have it so that the audience are consistently engaged and understand the videos narrative in chronological order

Music Video Draft 2

Below is our second draft of our music video. In this draft we have added in an extra shoot of the therapy session in relation to our narrative. There are a couple of gaps in this draft as we are still waiting on carrying out another shoot of the performance as it is clear that we need more lip sync clips. Due to the fact we have still got one more shoot to do, we have also only completed a short amount of our video. We are working hard to get the entirety of the video finished in the time frame that we have.

Here is a music video created by a previous student that is similar to ours in terms of ratio of narrative to performance, additionally the narrative of this video can be related to ours.

This is a templated assessment of how we can give feedback about the video. I have put asterixis in the boxes that I think are the most appropriate for this video. It gives a rough idea of what went well and what can be improved upon, however if it was a real assessment more detailed feedback would have to be given.

3 Things that were done well

  • There are numerous close ups of the performer and included in the narrative which is incredibly important when it comes to filming as it allows the audience to engage more thoroughly with the performer
  • The composition of the clips have been effectively used, especially the rule of thirds – this helps with the engagement of the audience and the aesthetics of the video itself
  • In the narrative there are montages included and this aids the audiences understanding of the narrative and keeps them engaged

Targets for improvement – what can we incorporate into our video?

  • We can include more close ups and a wider variety of shots in our video as that is something we are currently lacking
  • Making the narrative clearer is also something we need to work on and we can achieve this by; firstly doing another narrative shoot to add in a small anecdote as seen in this music video, and possibly making the edits between the clips clearer so that the audience doesn’t get confused
  • Ensure that we have a tripod for all of our shots as although we want some of them to be handheld, they are slightly too wobbly and therefore have an overall negative impact on our video – as seen in this video, using a tripod helps massively with the quality

Shoot 2 Reflection

Below are images from our second shoot. As this shoot was focused on the narrative of the video, we aimed for shots that revealed a bond between the two characters. By conveying this connection between them through shots like these, it will enable our audience to engage more with our narrative and show a more juxtaposed idea of this connection against the isolation that both characters communicate once their relationship has broken.

This was carried out as one of our narrative shoots and we decided to shoot it at locations that we thought we could use to our advantage to convey this connection between the girl and boy. Aimee’s house, a field nearby and a cliff path were our chosen places to shoot. The majority of the shots we captured came out how we planned, communicating the correct Mise en Scene to our audience, however we now feel that we needed more close ups to allow our narrative to become more intimate in the eyes of our target audience.

What went well

  • Our communication skills improved for this shoot and due to this we were able to save time and get more shots in the time frame that we gave ourselves
  • From our reflection on our first shoot we then understood what shots were ‘money shots’ and which ones were not going to work so well
  • We were more prepared for this shoot in terms of make up and costumes – this helped with our organisation, leaving us with more time to arrange a variety of shots

What we need to adjust

  • Most of our shots were either mid shots or long shots with additional zoom – this will need to be changed in upcoming shoots as the variety of shots is what keeps the audience engaged throughout the video
  • It is now urgent that we do one final shoot regarding the performance aspect of our music video as we do not have enough lip syncing footage to cover the entire video
  • Get a tripod that is not broken so that our shots are completely still to match the conventions of music videos

Specsavers Feedback

We were lucky enough to have two men from Specsavers come in and watch through what we have of our music videos and give us feedback based on what they saw. They spent a lot of time with us one to one in order to support us to create a more successful music video. What they taught us was incredibly helpful and we will be taking these observations on with us as we continue to develop our video. Below is what we gathered from this experience and what we have been advised to work on for our final video assessment.

What we learnt

  • Layers – we can use this technique to put each of our shoots into separate layers, it also enables us to change the label to a different colour. This will massively help with our organisational skills on Premier Pro
  • Adjustment layers – we can add these layers in above individual shoot layers that we want to be collectively changed. For example, if we want to put a specific colour filter on a whole shoot, you just need to add the unique filter to the adjustment layer above it
  • Photoshop – using Photoshop we can create images / drawings, and with a transparent layer, we can import them into Premier Pro on top of our footage. This will help us with our music video as we can now create a cam recorder appearance in Photoshop and import it on top of our footage
  • Key frame – this allows imported images from Photoshop to cut in and out of our selected footage, using the opacity tool. We can make the key frames ‘hard’ so that imported images don’t fade in and out, they just effectively flash. We can use this to make the red dot on our Photoshop designed cam recorder, appear to flash more realistically
  • Time stamp – this is another technique that we can use to make the cam recorder appear more realistic. It can be inserted in the centre at the bottom of our selected footage
  • Lumetri colour – this tool allows us to change the filter on selected clips. We can also copy and paste the filter onto numerous other clips at same time. This saves time and enables us to create a differential between the reminiscence clips and the performance footage, this way our audience will hopefully have a better understanding of our narrative
  • Curves – this is another technique we can use to blend colour onto selected clips

Targets based on feedback

  • Create an extensive shot list – this will aid our organisational skills and make it so that we don’t waste any time trying to think of what to do next. Additionally, making ourselves abide to a time scheme keeps us busy and forces us to be proactive and efficient
  • The video as a whole can be confusing to the audience because the narrative is split into two, and we also have the performance aspect. To aid this we need to make a more noticable difference between the reminiscent clips and the performance. Changing the colour of the clips will be the main way in which we manage to achieve this contrast
  • Get more of a variety of shots and transitions – the shot list will help this
  • Shoot a short story of the girl and boy to insert throughout the video. This will engage the audience more as instead of the clips jumping from location to location with no chronological sense, a small anecdote within the video will conceivably encourage a more attentive audience

YouTube tutorials that may help


Music Video Draft 1

Below is our groups rough cut of our performance and narrative shoots. There were advantages and disadvantages to this shoot – the locations were ideal however we needed a much wider variety of shots and the weather was not what we intended for one of our location performance shoots. We will be re-filming in these locations as we believe they convey the idealized Mise En Scene for our alternative genre.

Pros of editing, filming, etc

  • While filming we all contributed by each using the camera and thinking of new angles and shot ideas to include. This was also the same for editing as we all cut and inserted and cropped clips individually
  • Our communication was good while editing as we could all agree on what clips to cut, which ones to keep, and where to place them in the video
  • As the chorus is the most significant part of the video we had to ensure we filmed many clips in varied locations at the sites – and we successfully achieved this
  • We have varied shots throughout the rough cut which help to contribute to the effect that the video will have on our target audience

Things to improve on

  • Due to the fact we did not manage to film all of the lyrics, there are not as many clips of him singing as we wanted in our rough cut, having an overall negative impact on the product – to improve this our model needs to know the entirety of the song prior filming
  • We need to consider editing more whilst we are filming – for example, shooting shots for jump cuts to heighten the editing process – this will keep our audience engaged
  • While filming we must ensure to keep referring back to our narrative and performance story boards so that we don’t waste time thinking of new shots
  • We could do with having more close ups and extreme close ups to keep our audience engaged