Test Shoot – Lip Sync

In this test lip syncing shoot below, we created a small extract of a music video using the music that we are going to use in our actual music video. This test shoot was to experiment with a variety of shots, transitions and editing to the beat. Due to these techniques it was fairly easy to accurately represent our star image to our target audience – an aesthetic, laid-back, youthful vibe.

4 Positives

  • Transition works well with the flowers, a fade wasn’t needed
  • The filter that we made fits our genre – retro and saturated
  • Location and aesthetic was ideal for the video that we wanted to achieve
  • Camera skills and techniques were effective

4 Targets

  • More transitions could have been added
  • The first double edit to the beat is slightly off so that could be improved
  • Could have had more of a range of camera angles
  • The back lighting in one of our video clips was too dark

Focusing forward, from this test lip sync, I now know what makes a successful music video and what doesn’t. For example, in our shoot we established when editing that we didn’t have a very wide range of camera angles. This meant that when we were choosing which clips to use, we had to reuse some of them in order to fill the clip. In the future for our real shoot, we will now bare in mind that we need as many camera angles as possible. Richard Dyer explains that stars have to be both ordinary and extraordinary. This means that we will have to portray our star as ordinary – to allow the audience to relate more, but also as extraordinary – allowing the star to be idolised by the public. Through our varied shots, transitions and Mise en Scene, and from the insight into what shooting a real music video is like, I feel our group is now on the right lines for making a successful music video.

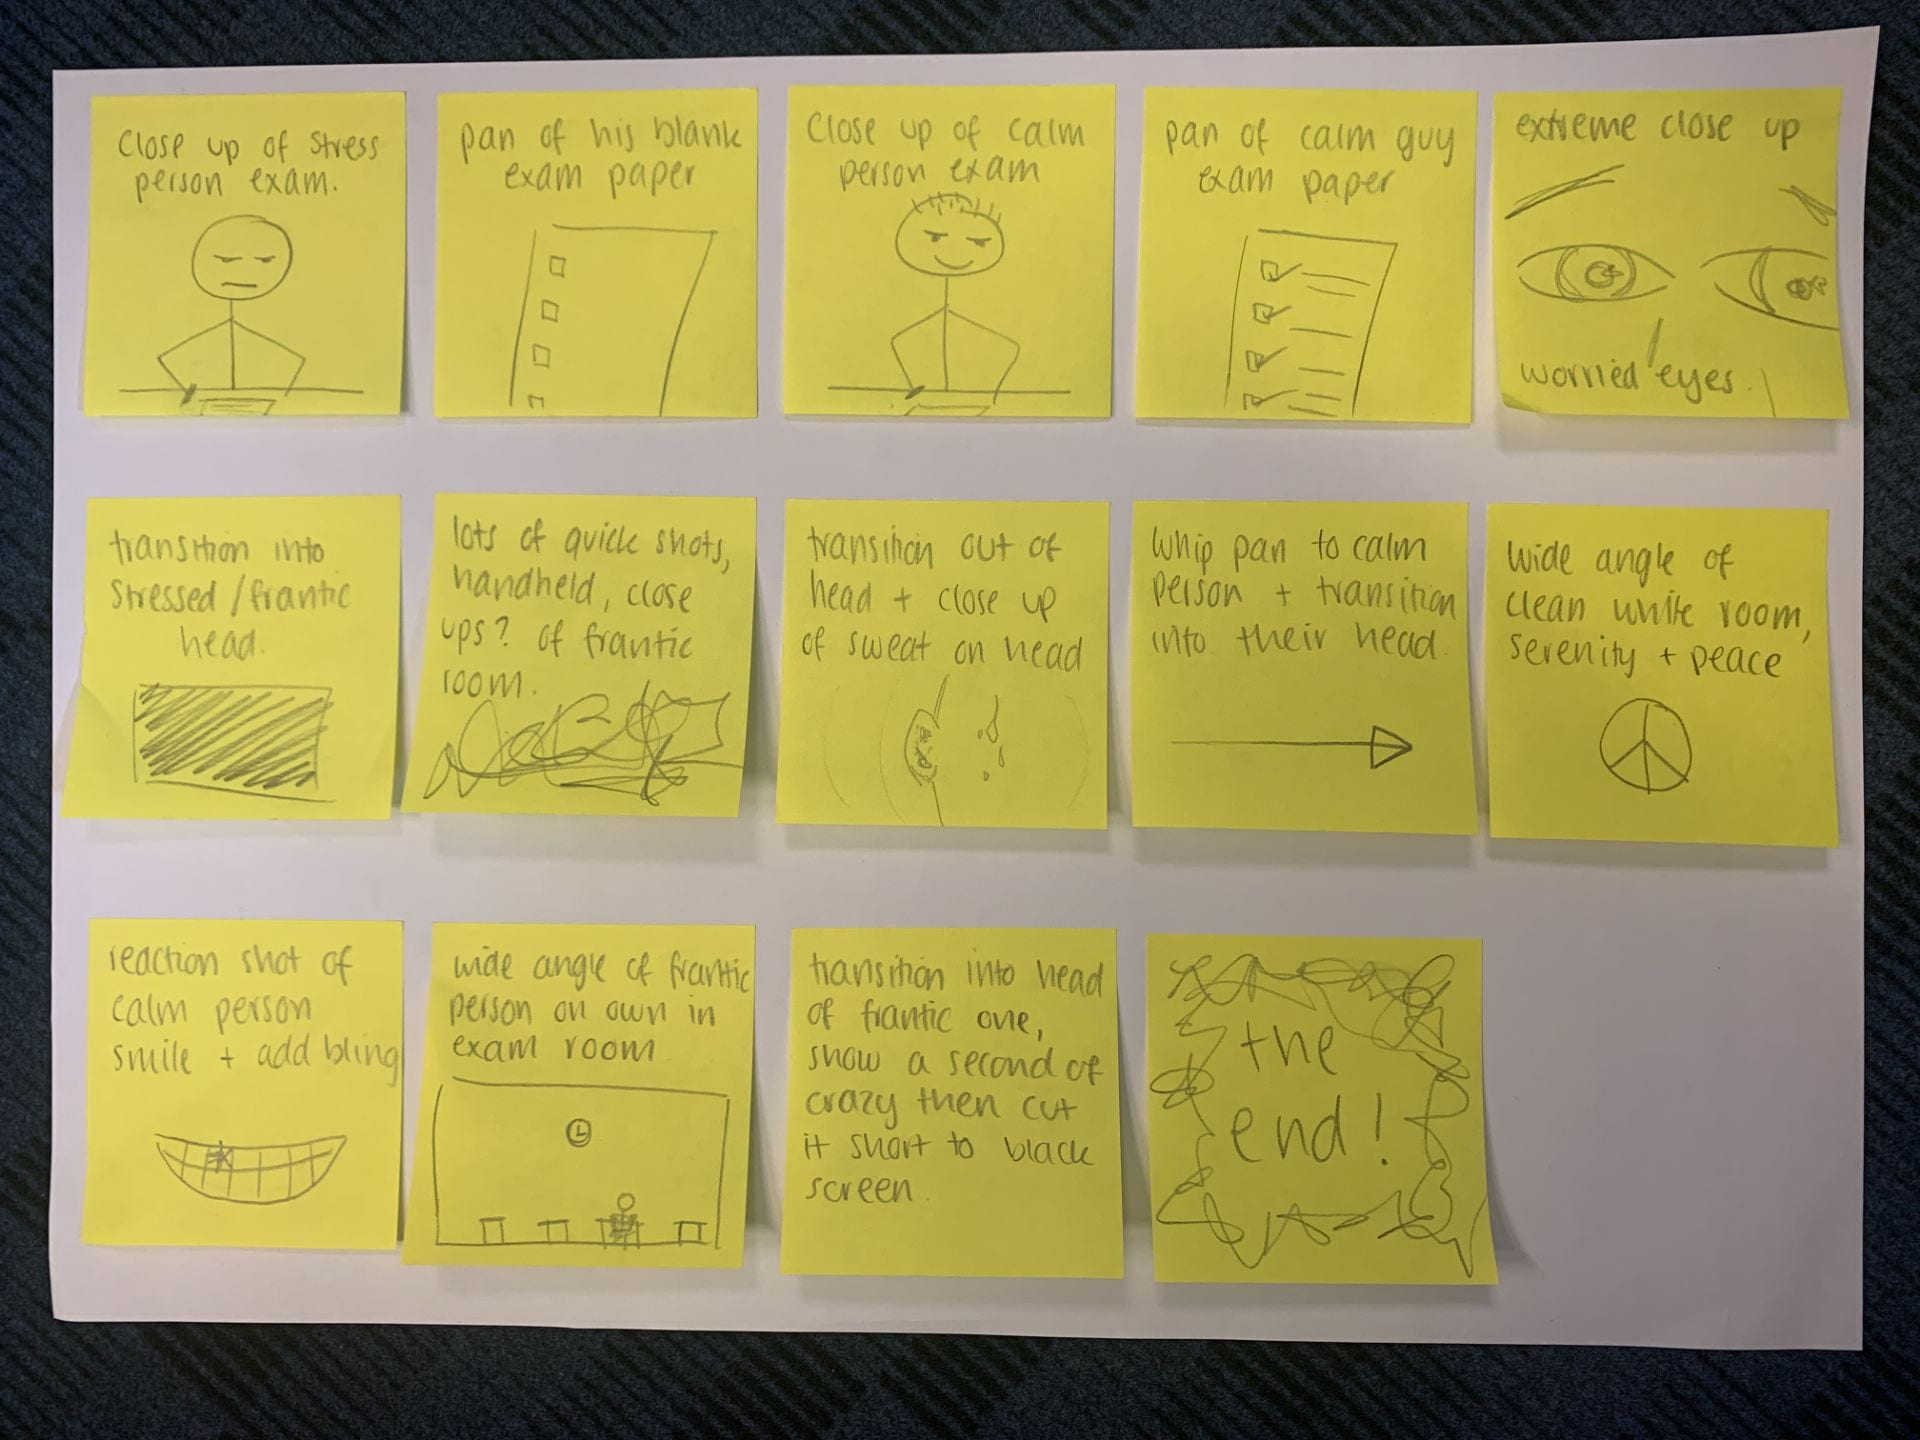
Prelim Task Mood Montage

Planning

For our montage we got the category of ‘frantic/chaos’. Through this montage storyboard plan we have included a variety of shots in order to convey the themes that were given. As our montage must communicate two very different atmospheres, it is crucial that we use varied filming techniques – cutting to close ups for example – to fully emphasize that the environments are very different. After that there are edits that must be made to convey the correct narrative sense – eg. putting a bling effect on the reaction shot smile.

Final Montage

In order to fully understand what it takes to plan and film a music video, it is important to have some experience in something similar – hence this music montage that we put together. We learnt how to film a music video, at the same time as developing our knowledge of performance and narrative combined with various camera shots and angles.

After creating this music montage, so that we know what we can improve upon, it is crucial to analyse what we have done;

Strengths

  • Good camera angles/shots
  • Clear narrative and performance throughout
  • Good planning of transitions, so they were fairly smooth

Weaknesses

  • Only used one location so not much variety
  • Some of the transitions could be merged a bit better
  • Few random clips near the end that are not meant to be in there – confuses the narrative

Creating and editing this montage will massively help me when it comes to the production of my music video. I have learnt a number of things that I can take forward with me into future products. For example, I now know and understand how various camera angles/shots, and performance can tell a narrative with the star. In addition to this, the form of the narrative is also key. The video cannot be disjointed when it comes to editing (cutting to clips, missing parts out) as the audience can become confused. In Premiere Pro I leant to snip shots and successfully transition from one clip to another. This will help me in my production of my music video as I feel I have wider knowledge of the tools and skills I need for editing and what performance and narrative techniques work best for a consistently understandable video.