Contact Sheets and Evaluation of shoot

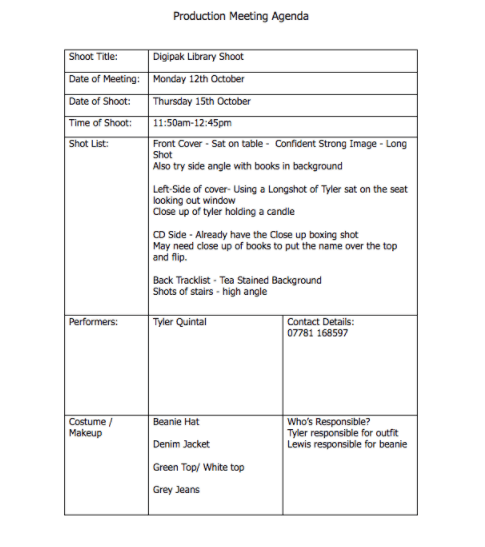
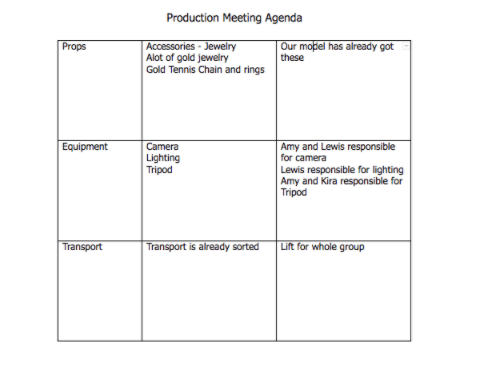
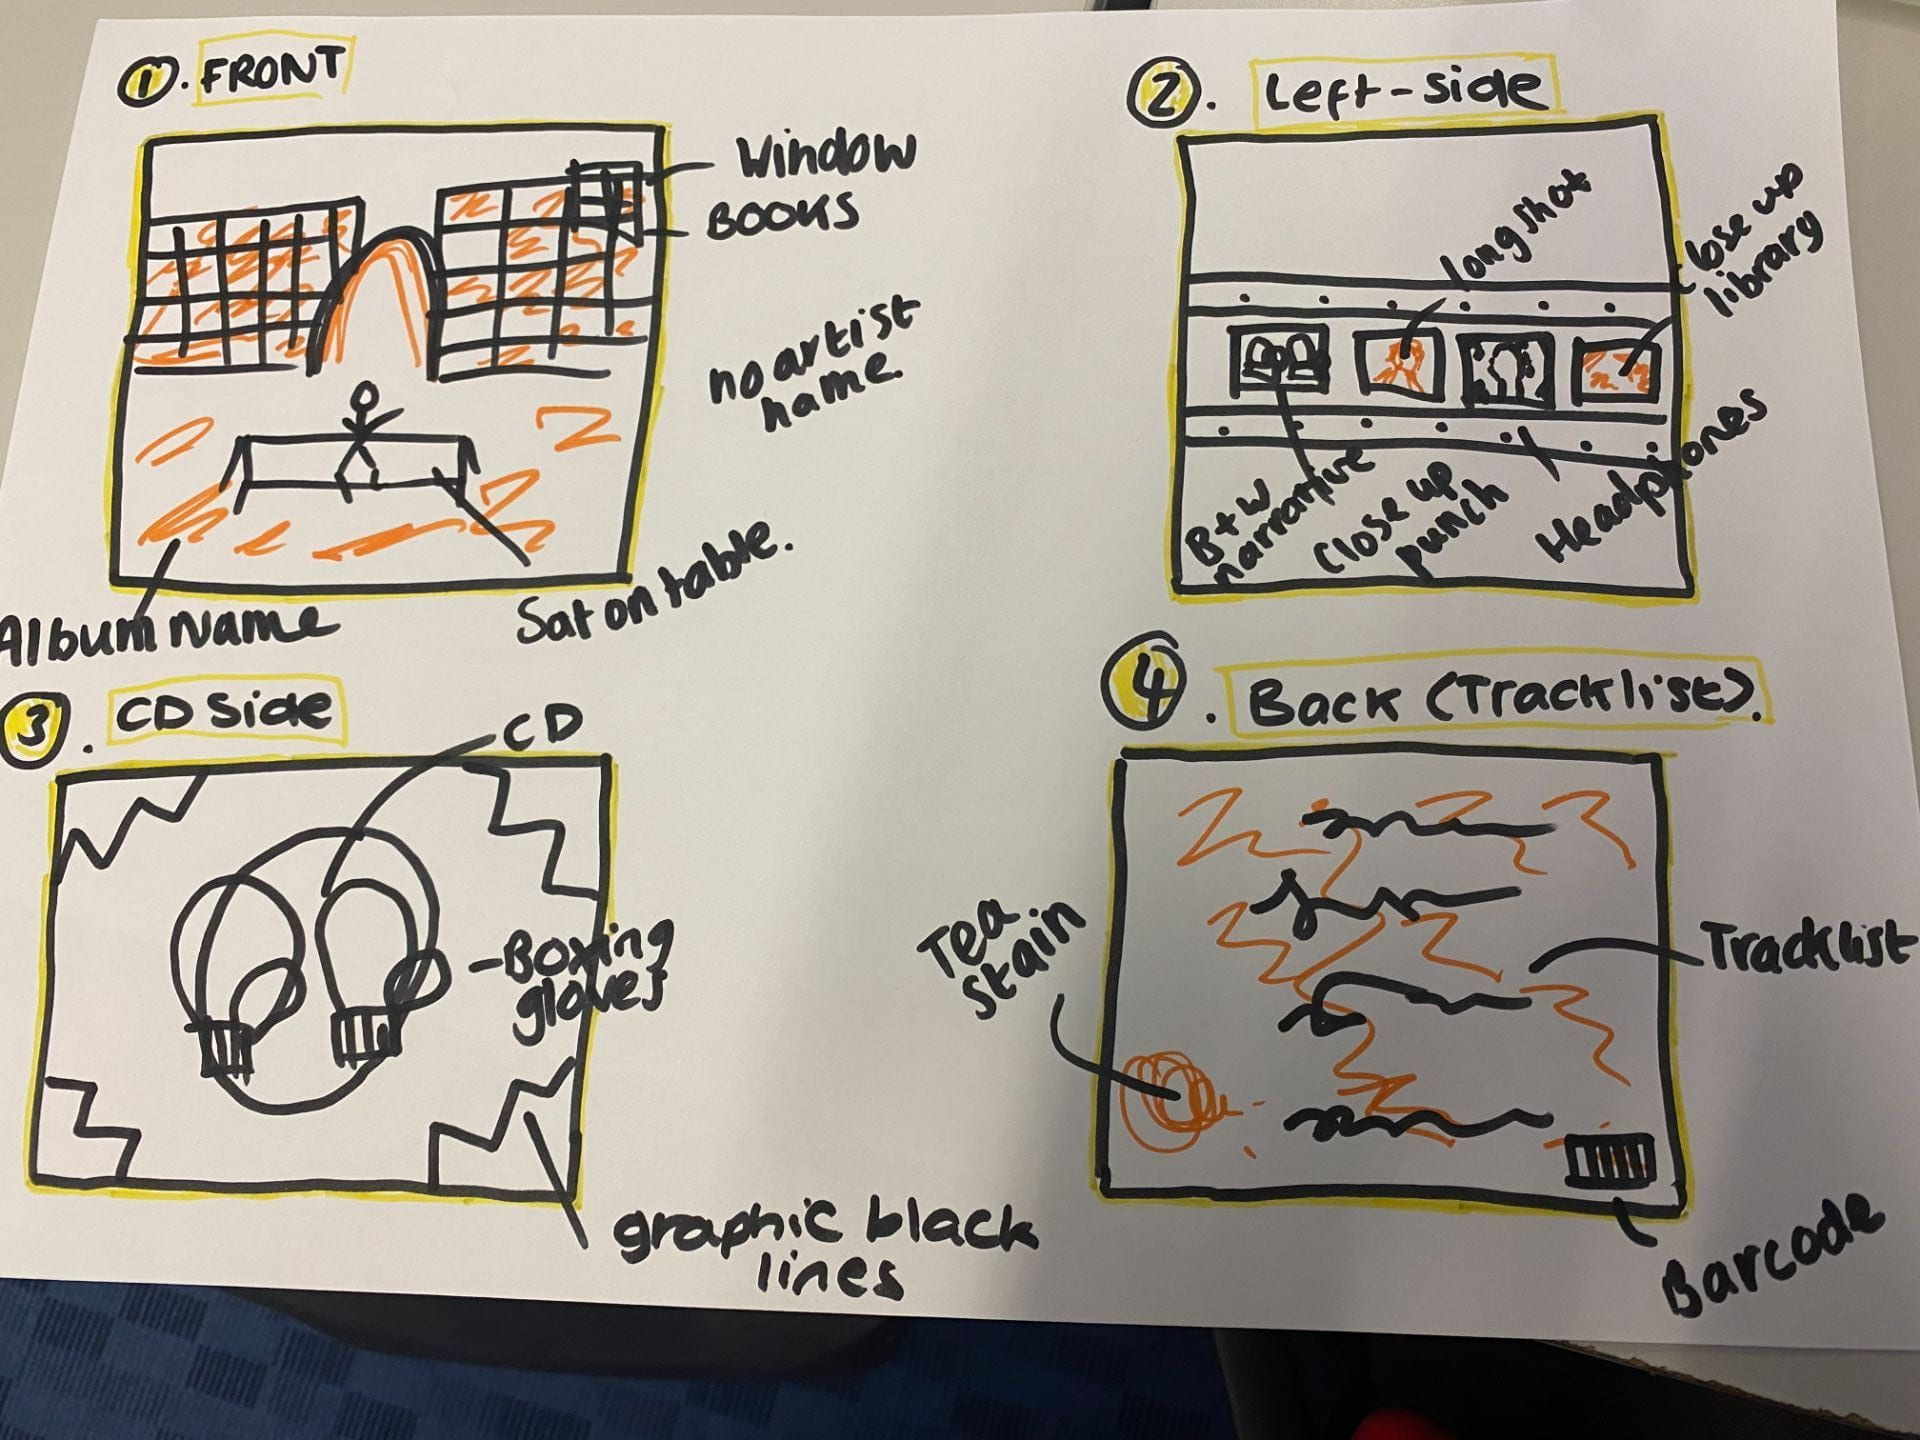
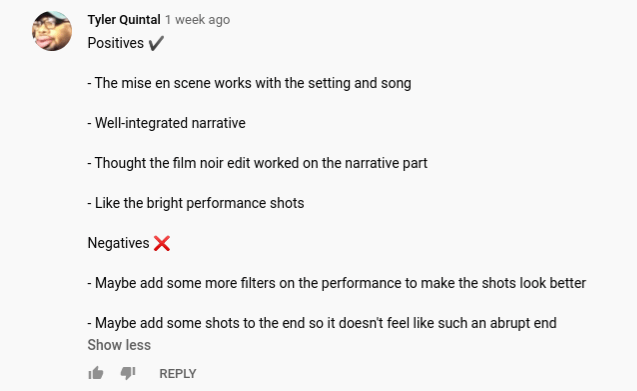
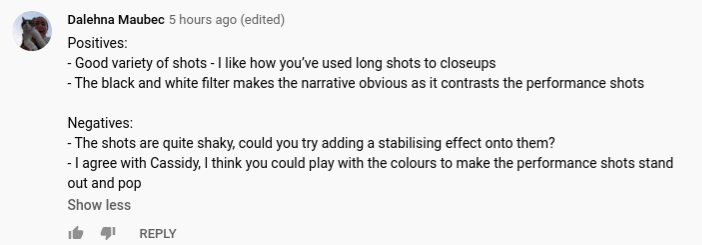
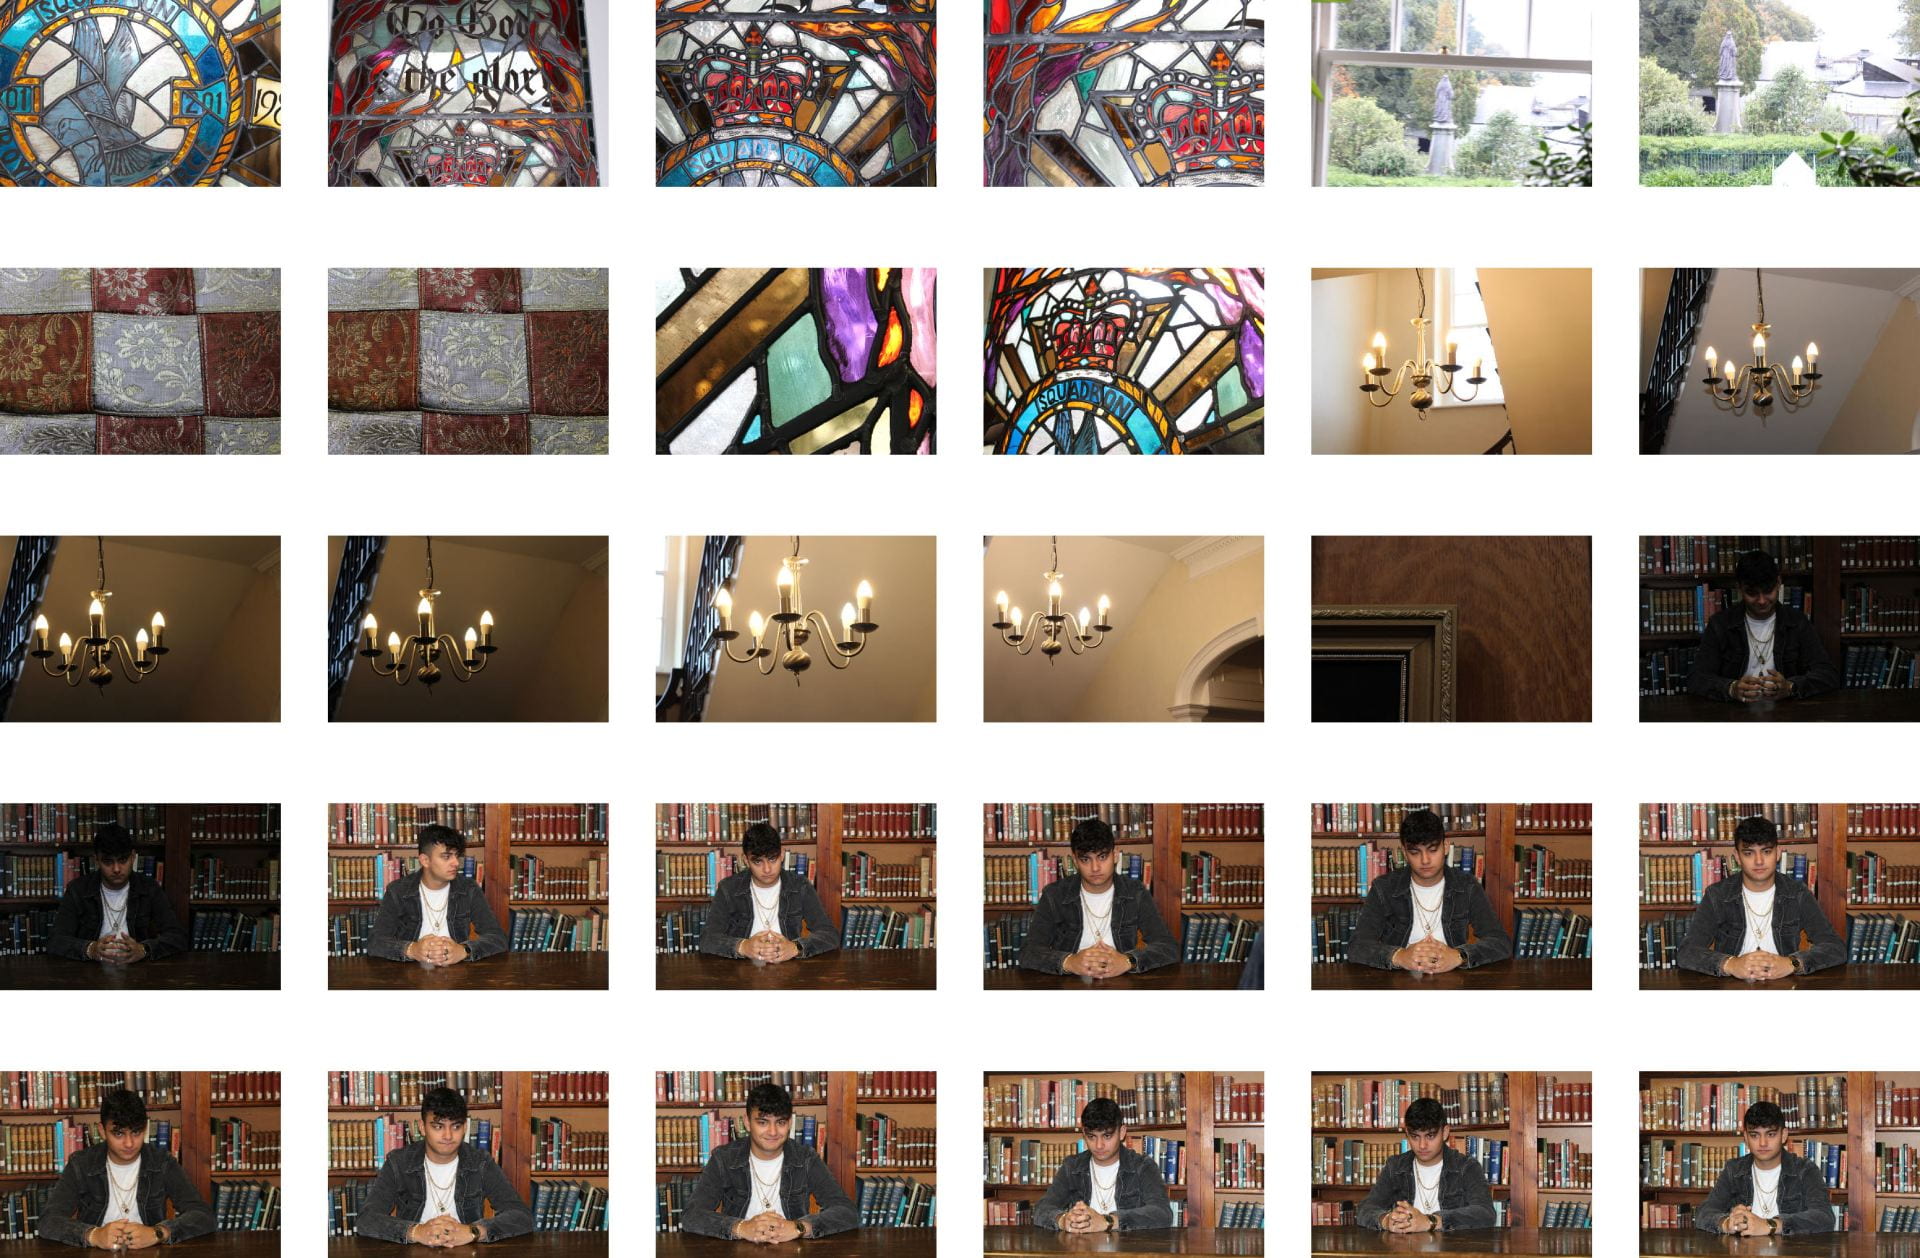
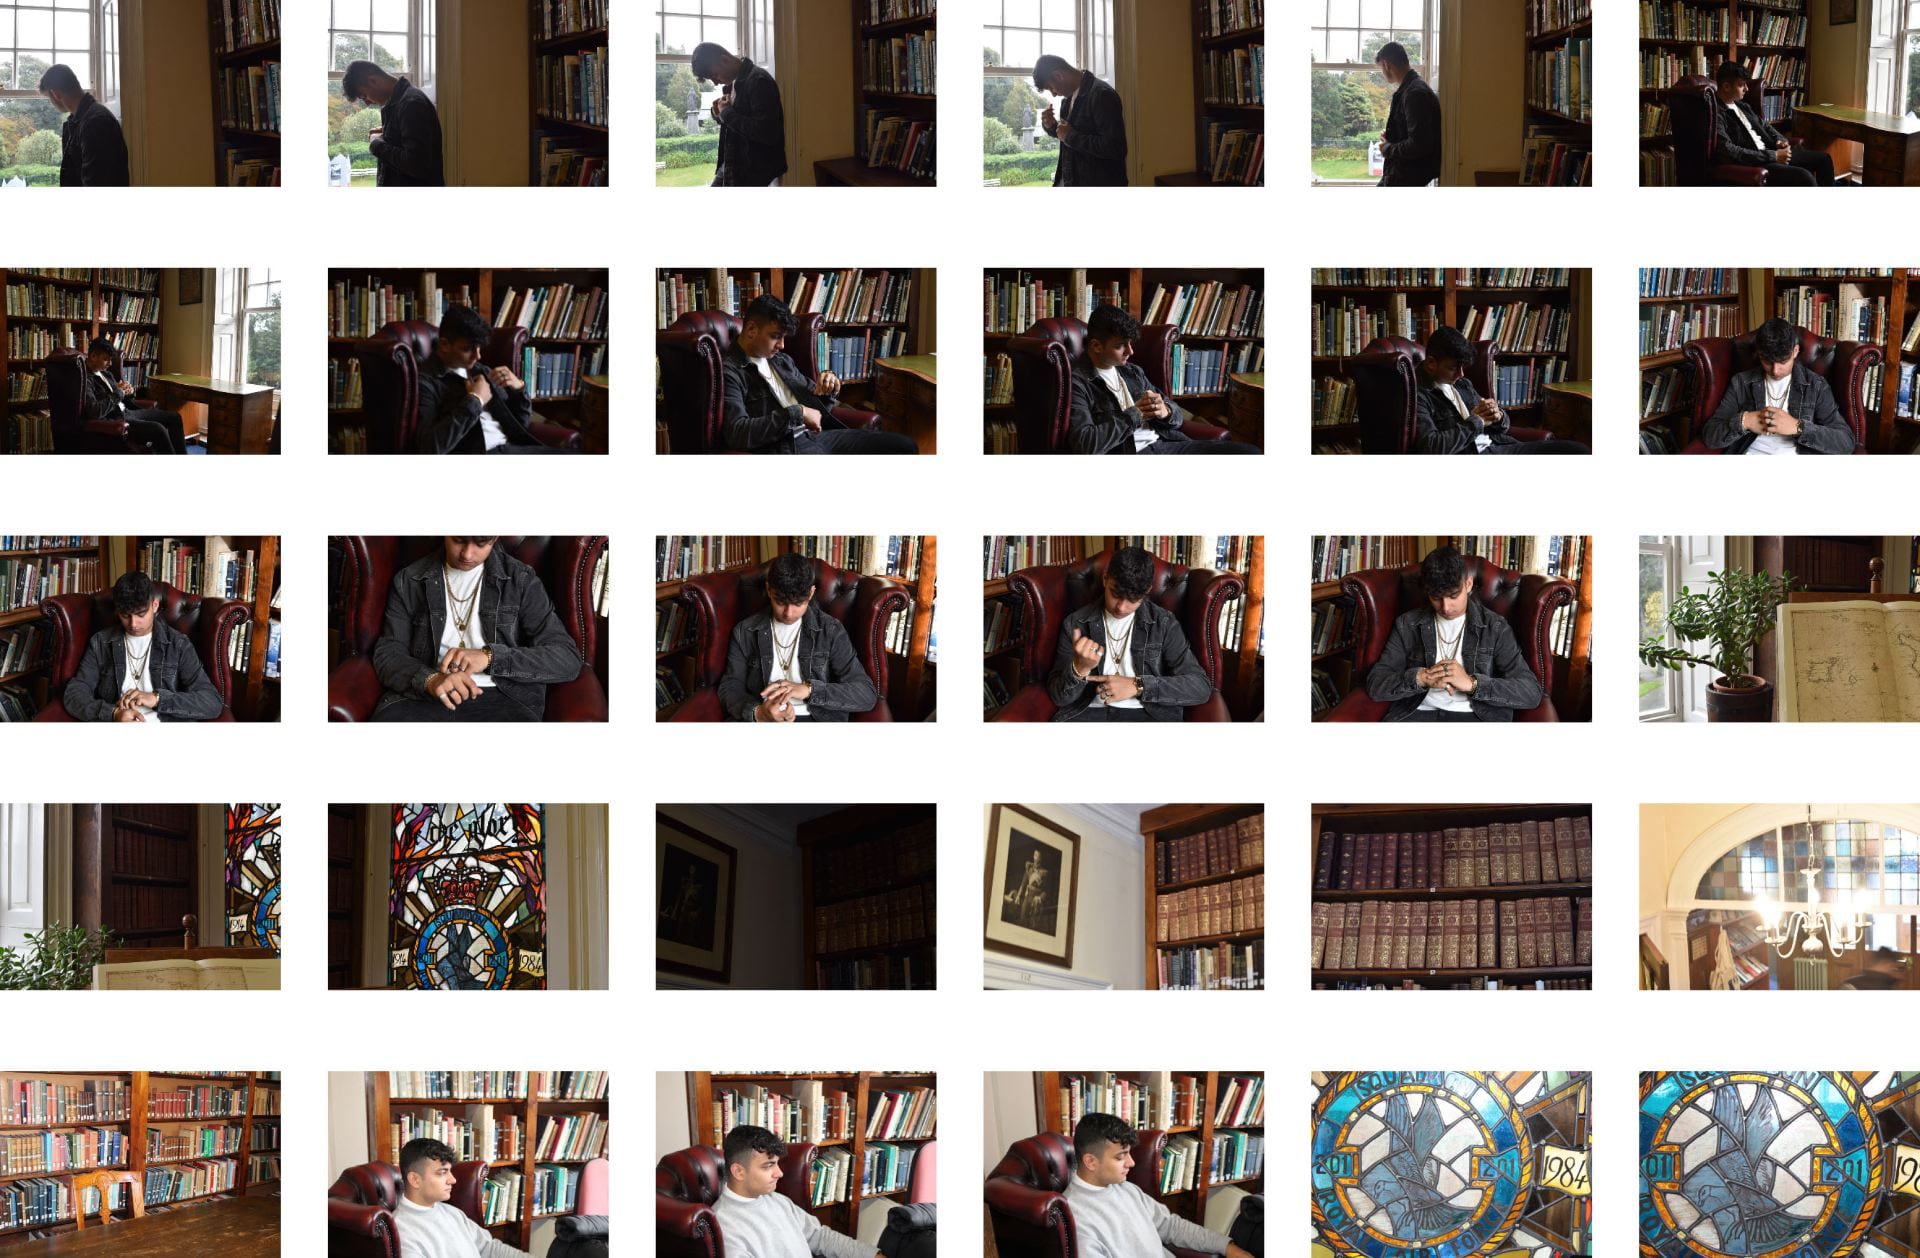
As a group we went to the Priaulx Library to gather images to use on our digipak. We used our production meeting agenda and hand drawn mockup to set up our shoot for the shoot and here are the shots we got from this.


Evaluation of shoot:

Overall the shoot went successfully and we are really content with how it went. We created images that work successfully with our preferred star image as we achieved all of the shots we aimed for at a range of angles. The lighting of the different shots varied from each camera we used each but we used this as a positive as it allowed us to play with the different lighting to portray the themes as we wished. In particularly our production meeting agenda and risk assessment sheet allowed us to be aware of the potential risks that we need to keep in mind as well as reminding us of the costumes and equipment we will need to be prepared to bring. This meant that the shoot could run smoothly and we would have no problems with forgetting equipment. From this shoot, we now have a clear idea of how we want our digipak to look as well as possible effects we can include on our image.


Photoshoot / Design Production Meeting and Risk Assessment

In preparation for my shoot for my digipak, I created a plan for the aims and details of my shoot as there are endless decisions to make, from picking the mis-en-scene, to choosing the best location and equipment. I understand that it is essential to gather different and unique shots in order to have a wide range of choice to make my digipak successful and appealing as possible. Below is my Production Meeting Agenda, which contains all the information I will need for my shoot, as well as my Risk Assessment which displays any possible potential hazards I may face and how to control these.


Hand drawn mock up

To plan out each side of our digipack we drew a mock up to annotate the designs with the conventional technical elements (barcode, song titles, publisher etc) but also labelled the designs with how the Media Language of print will help encode the star image and metanarrative of the performer including font, colours, design, graphics, illustration, framing etc. The mock up portrays a retro location and a juxtaposition for our star. The urban street artist in an old fashioned library portrayed unconventional and challenging assumptions.

Front Cover- Library ( A retro location and a juxtaposition with the star) Mid shots, Close ups and Long shot- Mysterious Strong Image. 

Inside left- Images for polaroid, see different side to the model – Long shots, mid shots, close ups.

Inside Right- Close up of boxing gloves or maybe jewellery, showing rings, necklaces

Back Cover- Textured paper, quotes featured with tracklist


This hand drawn mockup will benefit our production of our digipack as it has allowed us to plan the different conventions and the type of images we want to display on our cover.

Branding Moodboard

After completing our marketing strategy and considering how genre is reflected in the design of a Digipak. We created a padlet moodboard which accumulated lots of ideas for our digipak. We also have lots of inspiration after looking at other digipaks to see the conventions used and ideas that we like and what will be appropriate for our genre. We’re focusing on the sense of self reliance, introspection and style to the image. He is to be looked up to – extraordinary in that sense. through his digipack to reflect the songs in his album . It was also important for us to figure out what other aspects we need to include such as type faces and colour palettes. We have decided to use a dark palette with elements of gold tones throughout to present the emotion of his warm and laidback personality.

This task has been beneficial for the production of our digipack as we are discovering new ideas and gathering inspiration that is conventional for our genre. For example, I now know what typefaces, colour schemes and mis-en-scene I should be considering to use when we make our own digipack.

Made with Padlet

Made with Padlet
Made with Padlet

Digipak Conventions Analysis

Before making our own digipak, it is important that we assess examples to develop an understanding of the conventions used not only in a generic digipak but one with a similar genre to ours. I decided to look at Khalid’s ‘American Teenager’ digipack as he is also a contemporary R&B artist. I thought that this album portrays the same star image to what we are trying to portray in our own digipack and found it visually intriguing and interesting to talk about. I have focused on all of the different conventions he used on his album cover and will consider these conventions when creating my own digipack.

From this task, I have learnt that It is important to remember that using colours, fonts, designs, register, tone, framing, composition will all convey and sell a story. I learnt that this is a mini textual analysis on how media language is used in this album cover to convey an idea, genre, brand, image. This task really helped me out with picking apart the key features and conventions of a digipack. I know this will help me in the production of my very own Digipak and for when I start to analyse text for more media essays.

Our Mission Statement – The Package Brand

Before we start planning the print and web elements of this promotional package. We need to be clear and understand about the mission statement for our whole campaign. For our integrated marketing campaign we needed to ask ourselves these questions for each section:

Who is our Audience?  Who they are (demographics)

  • Who they are (demographics)
  • What other media they consume and participate in.
  • What their values attitudes and beliefs (ideology / psychographics)

A Call to Action

  • How do we want the audience to engage with our star / album
  • How will they invest time and money in our star / album

Who are the competition?

  • Three similar bands / artists.
  • What are the trends in album designs of similar stars / bands?
  • What does their website look like?

Your USP (Unique Selling Point)

  • Is our star already established or trying to establish a new presence in the market?
  • What is our star image & how are we trying to innovate / develop that image?
    • Are we mixing up elements of different genres?
    • Are we trying to re-brand your star?
    • Are we emphasising the ordinary or extraordinary?
      • Remember according to Dyer meta narratives include both.

Your Mission Statement.

  • Include an agreed mission statement that includes the central idea that will unify our brand.
    • This will include ideas represented in our music video, but must also bring in a wider range of ideas that we will develop as we make a 3D Moodboard.

We thought more holistically about the album and created an integrated advertising campaign below:

Music Video Draft 4

This is the draft 4 of my music video, where throughout the process of making this I had previously drafted 3 other edits, in which I obtained feedback on each one to reach the final edit of the video. From obtaining feedback from peers I was able to reflect on what was successful in the music video and what else I could do to improve the edit and make it more appealing to the target audience in order to create audience interaction.

The aspects of improvement :

  • The lip syncing has been improved, so it is more in sync to the audio.
  • The pace of edit, there is more of a consistency through the clip when editing to the beat.
  • Filters- consistency of black and white filters in the narrative parts of the video- making it consistent theme wise.
  • Included more punch bag montage shots with horizontal flips.
  • Played with the colour from performance clips
  • We used dissolve at the end to make the video have less of an abrupt ending

Summary of Feedback:

  • Interesting angles, in particularly the hand held shots as it adds perspective.
  • Clear narrative- the same performer defines the emotions.
  • Lip syncing was perfected.
  • The symbol of the ring ties the video together.
  • Experiment with colour on the performance clips.

Overall, I am pleased with what my group and I have created and I believe this video has been successful where we created the ratio of 50:50 of narrative to performance. It has been successful portraying the intensity conveyed in both the narrative and audio and the unique, bold and distinct editing and pace of edit has contributed well to the sombre themes of emotional instability from heartbreak.


Music Video Draft 3

We have created a Draft 3 from the feedback we have received from our visitors from Specsavers, Mr Gregson and improvements we have decided as a group.

What’s changed since our Draft 2?

  • We thoroughly went through the lip-syncing in order to correct the imperfections where the time was slightly off.
  • Shortening clips and removing unnecessary and repetitive clips such as the model wrapping his hands before the fight as it was quite tedious to watch and we replaced this worth including montage shots.
  • We spent time making sure the clips were edited to the beat at the right times.
  • Used positioning and scale to zoom in shots to fit the space and cropped out any unwanted objects in the background.
  • Experimented with different colours and filters e.g. used black and white effect for narrative clips until to extenuate his feelings of sorrow and suffering from his heartbreak.
  • Removed the existing transition as they didn’t quite fit the style of video and came across comedic.

We chose to seek feedback from other media students and asked them to leave their comments on our draft 3 as we considered that it’s important that as a media producer we are seeking feedback and trying to get impartial audience comments in order for us to make improvements that we may had not seen ourselves. Below is the feedback we received:

Overall, we were happy with the feedback we received as it allowed us to consider new ideas from people with different opinions and also reminded us of the positives of our music video.

Targets for improvement we gathered from our peers include: 

  • Start with a closer angle as when the artist starts to sing it will create a more personal connection with the audience.
  • Add more colour editing and change the lighting at certain points of the performance clips to make it less bright and overexposed because it would make them pop and stand out.
  • Increase the saturation throughout the video within the narrative when he is starting to feel more uplifted instead of abruptly going straight back into colour.
  • Possibly add some more filters on the performance to make it more engaging and alluring.
  • Add a few more shots to the end of the music video so that the ending isn’t as abrupt.
  • Replace the shots which are quite shaky or attempt to add a stabilizing effect onto them.
  • A few areas where the lip syncing is out and doesn’t match up.
  • One clip within the narrative which is not in black and white nearer the start (0:32)

Teacher Feedback – screen castify

To receive a second opinion Mr Gregson recorded a Screen castify of our music video. This was useful as we can watch the video over and take notes of the improvements we need to make on our video to make it as successful as possible.


Positive feedback:

  • Strong footage.
  • Good use of successful frame within a frame which conveys his confinement.
  • Clear performance and some really successful clips throughout.
  • Good use of jump cut at the beginning.
  • Range of different shots e.g. close ups and long shots.
  • Good sequence at 2.46 of the montage of the boxing club.

Areas for improvement:

  • Ensure the narrative is clear as it needs to fit the serious and somber theme.
  • Make sure to edit to the beat to relate to the song.
  • Keep using the different shots of the ring throughout the video as it is the main symbol of his anguish.
  • Play with the narrative and distinguish it from the performance by playing with effects and colour.

I am pleased with the comments Mr Gregson gave for our video as we can now use his comments to improve on our video and reflect on what we have done successfully. To develop our video we will use his constructive feedback and creative ideas to talk together as a group on areas where we should change and improve. We will start by duplicating our draft 2 to make our improvements as we can go back if we are not happy with our changes. We will also add in the suitable shots that were recommended in certain places and correct the colouring of each shot to distinguish between the performance and narrative. As well as ensure all of the lip syncing is perfected and edit to the beat and add transitions and effects that fit with the serious and somber theme of the music so the two link together.

As a group we agreed we thought Mr Gregson’s idea of changing the colour of our narrative to black and white was a great idea and could work successfully in our video as it would distinguish between the narrative and the performance. It would also make it clear to the audience that Tyler is dealing with the emotions of a heartbreak and the sorrow and anguish that comes with this process, as he is feeling that there is no colour in his life. We would also like to experiment with the idea of colour coming back into the narrative at the end of the video after he has let his rage and resentment out on his opponment. This would reflect that he is left almost relieved and comforted from his fight as the intensity helped elevate his mood by taking his mind off his grief.

Specsavers Feedback

In order to help us with the editing of our video we got some advice from a Specsavers employee to help us with possible affects and creative ideas that we can add into our video. In preparation for his visit they prepared a tutorial to make our workspace on Premier Pro easy and simple to use for our editing stage.

They also explained to us how to achieve different affects to help our video become more creative. This allowed us to explore and experiment more with affects on our video and understand fully how to do this.

His advice included:

  • Finish our new edit in order to start adding more effects.
  • Set the tone and exposure of each video to the same so it doesn’t look unusual and so the video all looks brought together.
  • Think about possible creative affects to include.
  • Split narrative and performance on different rows.
Skip to toolbar