From the making of my magazine, draft to draft, I learnt a lot more skills from the software we were using, both of which allowed me to create a finished product that has an authentic and presentable look. It allowed me t give my overall finished product a more professional feel. Below are some of the skills and tools I developed:
 The stroke tool – This tool allowed me to give different texts and shapes boldness and definition. This gave my magazine a better design and added more graphical design features to show the the creator (me) cared about the product in hand. This gave the end product a more professional feel and it gave anchors to texts and images that were just floating in their spots on the page.
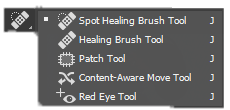 The spot healing brush tool – This Photoshop feature was essentially an airbrushing tool, replacing blemishes on pictures and replace them with a more consistent overall colour. This helped give my magazine a well produced look and showed that the small; features were edited and moderated with care and precision to help make them look authentic.
 The arrange tool – This tool allowed me to arrange the order – front to back – of the content on the page. It allowed me to move graphic design features behind pictures and text to give a 3 dimensional look to the pages in the magazine, making it look like a magazine which was worked on a lot and cared about.
 The eyedropper tool – This tool was in both indesign and Photoshop, and it allowed me to select a part of an images colour that I wanted to use elsewhere – in text or in any graphical design features. This allowed me to keep a consistent colour scheme for each page as colours from my pictures match or worked well with colours that I copied or chose for the text and graphical design features.