My finished product: TRIPLE 6
In order to answer Evaluation Question 1 ‘In what ways does your media product use, develop or challenge forms and conventions of real media products?’ I created a Prezi which you can see below:
In order to answer Evaluation Question 2 ‘ How does your media product represent particular social groups’. This blog post helps me to understand the importance of the representation of characters in media products. This evaluation question represents broad social groups and character types such as:
- Age
- Gender
- Status
- Villain
- Victim
For this question we focused on topics such as:
- The character (clothes, props)
- Location (where and when was it set)
- Camera (framing shots and techniques)
- Sound (sound effects and music)
- Editing (match on action, eye-line match)
- Narrative (enigma)
Please ensure subtitles is turned on in order to view the written text:
Evaluation question 3 (EVQ 3): What kind of media institution might distribute your media product and why?
In groups we created a slide show using google slides(document below) to answer EVQ 3. Our slide broke the question down into sub-questions in order to answer and analyse the question in enough detail.
Our groups slide show:
Evaluation question 4 (EVQ 4): “Who would be the target audience for your product?”, this question was used in order for us to figure out who belongs to our core target audience.
In order to answer EVQ 4 we created a slideshow using google slides on it it explained our decision for our target audience; it also had the target audiences demo and psycho graphics. On the slide we created notes in which we could read from and speak over when it came to recording our VoiceThread.
VoiceThread below:
To answer Evaluation Question 5 ‘How did you attract/address your audience’ in groups we created a directors commentary in Adobe Premiere Pro.
We looked specifically at 4 MICRO FEATURES:
- CAMERA
- SOUND
- EDITING
- MISE-EN-SCENE
Please click play on the video below to watch our directors commentary to answer Evaluation Question 5:
In order to answer Evaluation Question 6 ‘what have you learnt about technologies from the process of constructing this product’ I created a table, on it was a display of all the technologies me and my group have used throughout each stage of the production process. By using these different technologies it has allowed me to make the thriller I wanted to make, these technologies have enabled me to experiment with different lighting and editing techniques e.g. making the shadow of the antagonist darker.
To answer Evaluation Question 7 ‘ Looking back on your preliminary task, what do you feel you have learnt in the progression from it to the full product’ we created a video summarising what we have learnt throughout the entire project.
Throughout this process I have learnt many useful skills that I could use in future production. I have learnt about the following categories:
- Sound Design
- Planning
- Editing
- Filming
- Colour/Gradient tools
- Acting on feedback
- Ideas development
My draft 3 has the feedback that was suggested from our peers after draft 2, we have implemented some of the targets we set ourselves and improved the thriller in the process. Draft 3 also includes our music and foley sounds which adds to the suspense of the thriller and makes it have a more professional and authentic feel. The sounds have added suspense where it is needed and created dark sinister connotation where it is best suited e.g. the shadow at the end.
Please click on the screenshot below to view the screen recording and voice over of the feedback our teacher gave us:

The feedback is summarised below:
Not enough diegetic sound at the start to set an atmosphere. The wind whilst the characters are walking is too loud and should be turned down, could do with being replaced with something like birds chirping or just a general outdoor atmosphere. There is not enough of a build up for the main title. Not enough enough diegetic sound whilst the characters are walking. The change of pace with the non-diegetic music is good when pulling the rope. Dialogue sounds a bit distant, could do with either being louder or re-recorded. Needs more significant ending.
Targets based on the feedback we received:
- Add some diegetic sound and the start in order to set a better atmosphere.
- Turn down wind whilst the characters are walking at replace with birds chirping or a more general atmospheric recording.
- Try to build up the sequence to the main title.
- Add some more diegetic sound whilst the characters are walking.
- Re-record or increase the volume of the dialogue.
- Make the sign appear more clearly at the end and maybe add a sound effect to make the ending more significant.
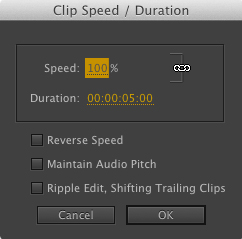
Our group decided to edit our sounds and soundtracks using Adobe Premiere Pro(the same software used to edit the video sequence). We used tools such as speed and duration, master volume and transition fades. The speed and duration was useful when trying to sync both the video clip with the sound, it was also useful when creating a deeper more eerie sound the lower the percentage of the speed the lower the sound. The master volume allowed us to increase the sound at more tense parts and decrease sound at less tense parts. The transition fades allowed us to increase the sound gradually so it was a smooth transition instead of an uncomfortable jump.

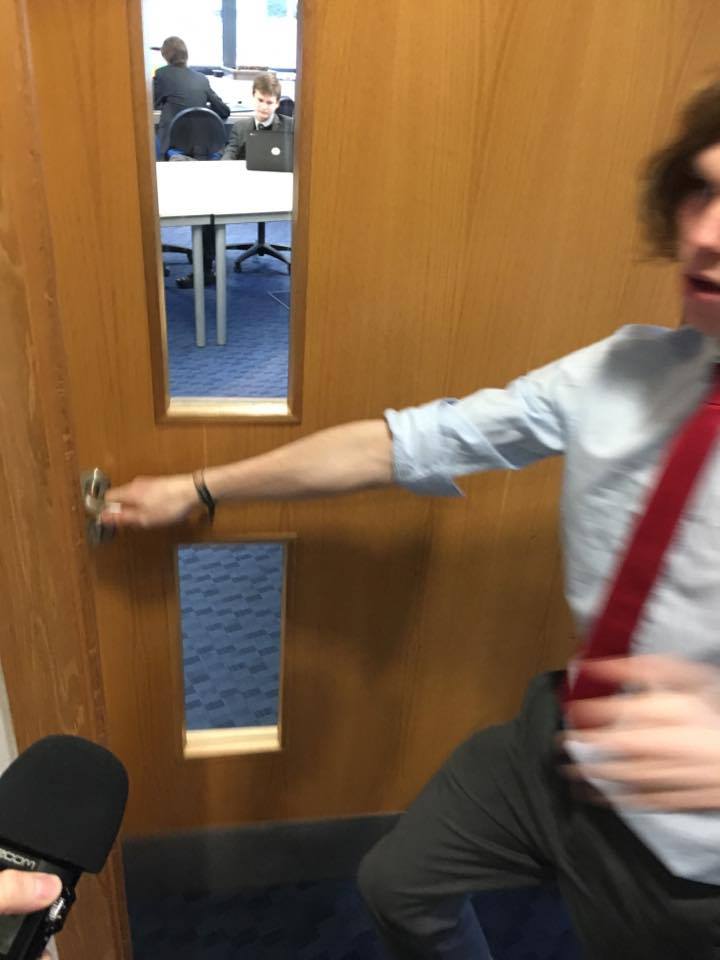
These are the photos that we took while we were recording our Foley sounds of:
- Dialogue
- Door Slam
- ‘Clang’ for metal hitting the door


© 2024 Alex Gill (Media AS)
Theme by Anders Noren — Up ↑
Recent Comments