Category: Music Video
Music Video Draft 3
Below is our Draft 3 edit of the video and the feedback we received from peers;
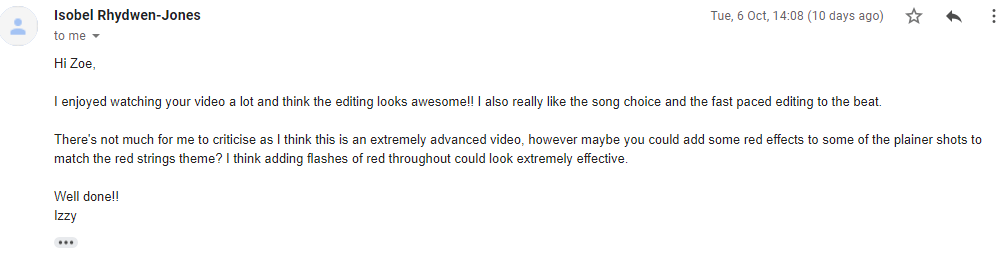
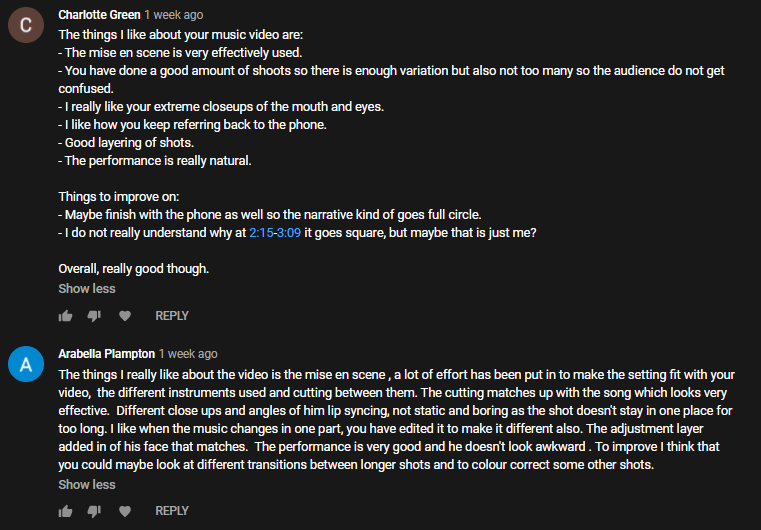
From this and my own ideas, for the next edit I’d like to aim to work on the colour correction of shots, include some of the red filter demonstrated earlier on my blog, as well as include more TV footage from a new shoot to demonstrate what we’ve learned from the Specsavers visit, as well as some general touch-ups in terms of cutting speed and transitions in places in order to match the energy level we are aiming for.
Teacher Feedback – Screencastify
After submitting our draft 2 we received video feedback from our teacher, going over areas that worked and areas for improvement, we picked up the following from this;
- Good mise en scene and shot variety
- Good energy and pace of edit, conveying a relevant level of energy
- “It just works”, successful in having a good flow and purpose
- Use more closeups of the board and telephone
- Generally fill in gaps, especially the gap at the beginning
- Use a faster editing pace from 0:12 onward
- Amend export settings
To summarise, we could emphasise and give more power to the editing in places by using faster paced cuts, as well as needing to make sure we have a more of the song as a whole completed, maintaining high energy throughout.
Music Video Draft 2
Below is the second edit/draft of our music video, whilst not fully complete, its a start at as trying to actually put footage together to a significant section of the song and allows us to get used to working with Premiere Pro.
Notes to improve from here;
- Export settings- need to make sure we export using the H.264 format to ensure that we retain the footage quality.
- Cut speed- would be preferable to try and have a faster edit speed to fit the energy of the song better, as well as opportunity to show more parallels between the two characters and show our ability to edit-to-the-beat
- Background- some clips clearly show the studio setting/background around our star, this will need to edited out to make the setting feel more believable and the audience more immersed
- Have full song edited, not just a small section
Design Skills 2
After out meeting with Specsavers teaching us how to implement features with after effects, I was captured with the idea of having a tv shot with our own video playing on said tv.
In order to get a better idea of this, I thought I would experiment with the visual effects I’d like to have playing on the video embedded in the tv, giving it a VHS footage effect to create a more convincing and immersive viewing of the footage.
Looking into this, I came a cross a video tutorial on YouTube;
Following this I was then able to apply the presets and effects to some footage that we’d taken in order to test this theory and see how the effect would work, as this video included free to use downloadable presets and overlays, I implemented these in premiere by going to Effects > Presets (right click) > Import Presets…
From here I could import the VHS colour fringing and grain preset and apply it to my footage, as well as import the image overlay to create the 4:3 aspect ratio border and apply the VHS shake effect to the clips too.
Overall, I’m happy with how this looks, whilst in the final project I may some slight alterations to make the footage appear clearer, and maybe include some more visual distortions to emphasize heavier elements of the narrative, I’m happy with this experiment and feel that this will work well in our project.
Specsavers Session – After Effects
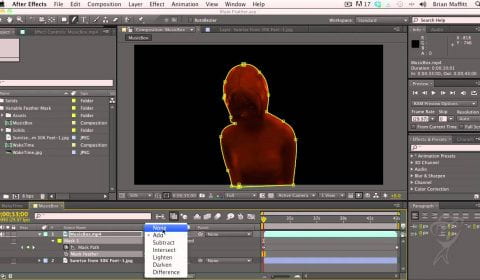
During our lessons we were lucky enough to have a visit from some industry professionals who gave our group a brief talk about how we can use Adobe After Effects to add more complex movements and visuals to our video. They talked through a range of ideas we could incorporate, showing us how to use keyframes and create more fluid, natural looking movements with them by using the ease in/out keyframe style. However the feature they inspired me the most with in terms of applicability to our video was the use of masking to integrate videos into an environment.
The example they used was a tv screen; with a base image/video of a still tv screen using a pen tool you trace around the edges of the screen to create a mask. You can then crop this mask out leaving a transparent area where the screen was, allowing you to place another video behind it to make it appear that it is playing on the tv. You can make this appear more natural by feathering the mask edge, adjusting colour correction of both clips and adding a slight shadow around the edge of the screen.
I feel that this could be a really valuable addition to our video if utilised successfully, and would love to include it in order to demonstrate our range of editing skills.
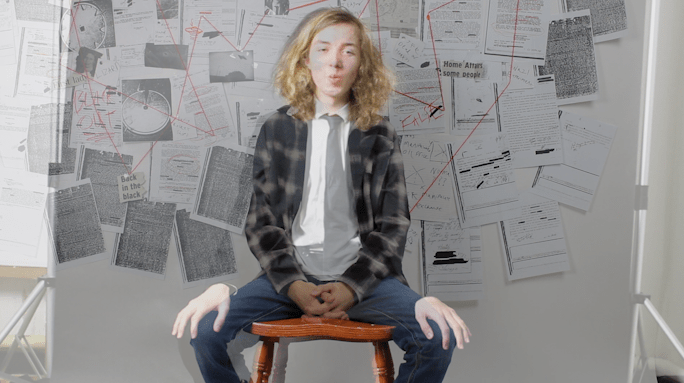
Shoot 4 Reflection (Narrative)
After a handful of previous unsuccessful shoots we made sure to go into this next one with a solid plan, and this definitely worked in our favour. Following a visual shot list from the animatic we made and having set up with some well planned and distinguishable mise en scene we managed to spend our time efficiently and got a lot of successful shots. The advantage of using the school studio also meant we had access to good lighting and a disposable paper backdrop, which proved useful when it came to the finale shots of the narrative wherein our character rips down his notes in a manic frenzy. Overall, I feel this shoot was definitely our most successful so far, whilst not perfect, as some shots may have been more rushed and directing unclear in places, I feel that this will do well for our video and provides plenty of content for editing.
Design Skills 1
Here are a couple examples of skills I have used within this project using Premiere Pro;
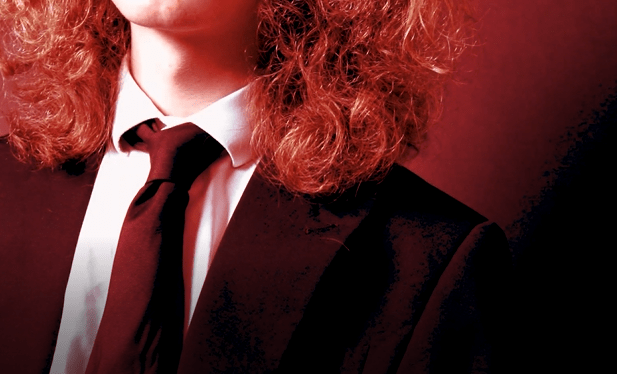
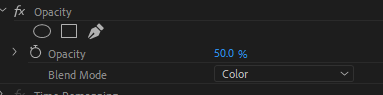
Blend mode –
In order to create the red effect shown in our colour test clip, I created a solid red colour layer above the footage and under the opacity tab changed the blend mode to colour, creating this tint.
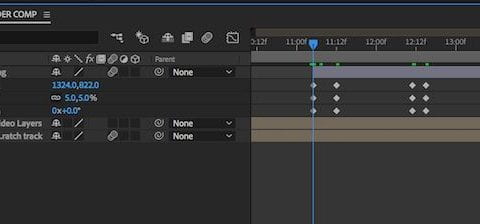
Opacity –
I have also used the opacity tool to overlay shots and line them up in order to create a visual match in places, I overlaid one layer above the other and changed the opacity to 50%, allowing me to line up the images and then cut between them to create the visual match effect for the video
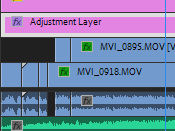
Adjustment Layer –
A feature of Premiere which I have found a lot of use for is implementing an adjustment layer above clips, this allows me to apply filters and colour correction to everything below the layer, particularly useful when there are multiple different clips below due to fast edit speeds.
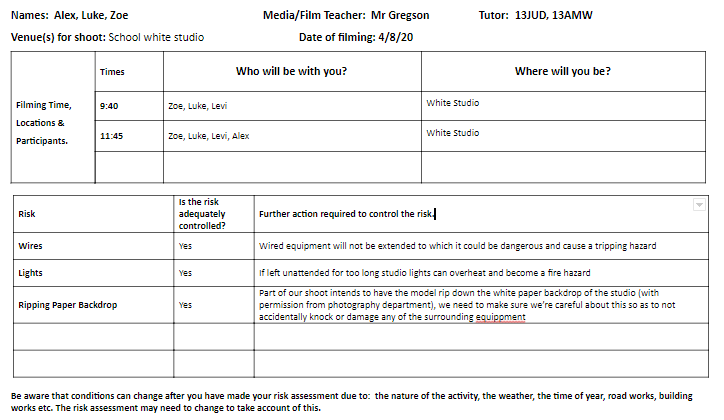
Risk Assessment for Shoot 4
We also completed a risk assessment form for this despite it taking place on school grounds to show are awareness and acknowledgement of risks nonetheless, as we would be spending the majority of our day on this shoot.
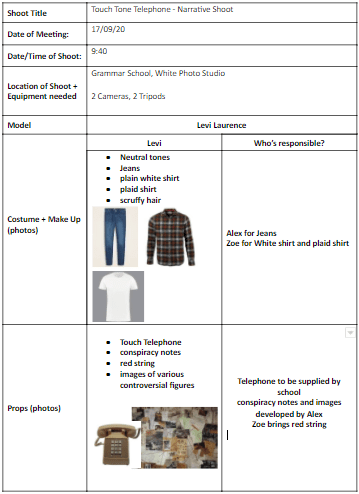
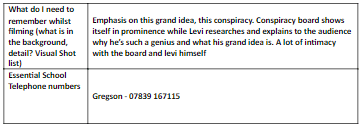
Production Meeting for Shoot 4 (Narrative)
As this was a bigger shoot for us and hopefully the last one needed we made sure to fill out a PMA to ensure we were fully prepared for it