Double Page Spread and self assessment

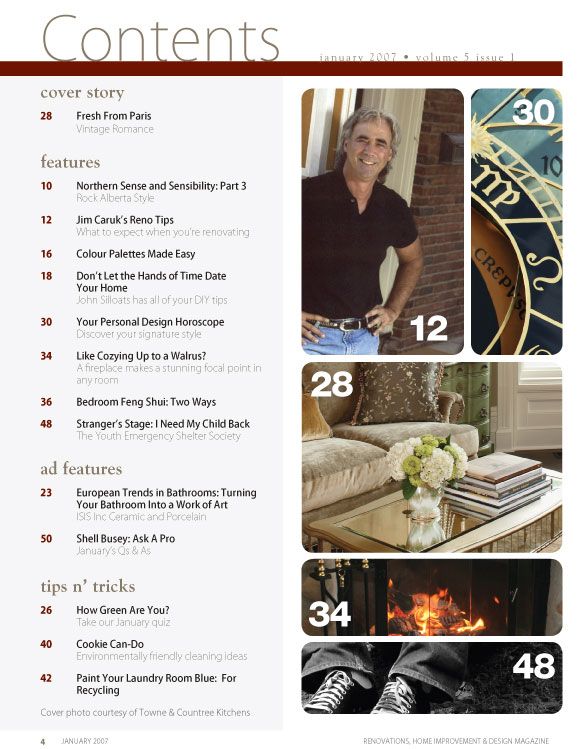
Revisit the presentation on double page spread layouts and do some research of your own.  Here are two slides of some that we found.
Find your photo – lay it out with columns for the article (2-3)
Remember you can use place holder text  i’psum lorem’ to act as the text until the article is fully signed off. Should be in text/type section.
You should have the following asap:
  • 2 x A4 pages side by side in indesign or 1 x A3 landscape
  • Photo (if does not have to be one from the location shoot so can be from the front cover shoot – your choice)
  • Consider where the staples will be i.e. line your photo/headline  and article up carefully so that it isn’t lost in the staple fold.
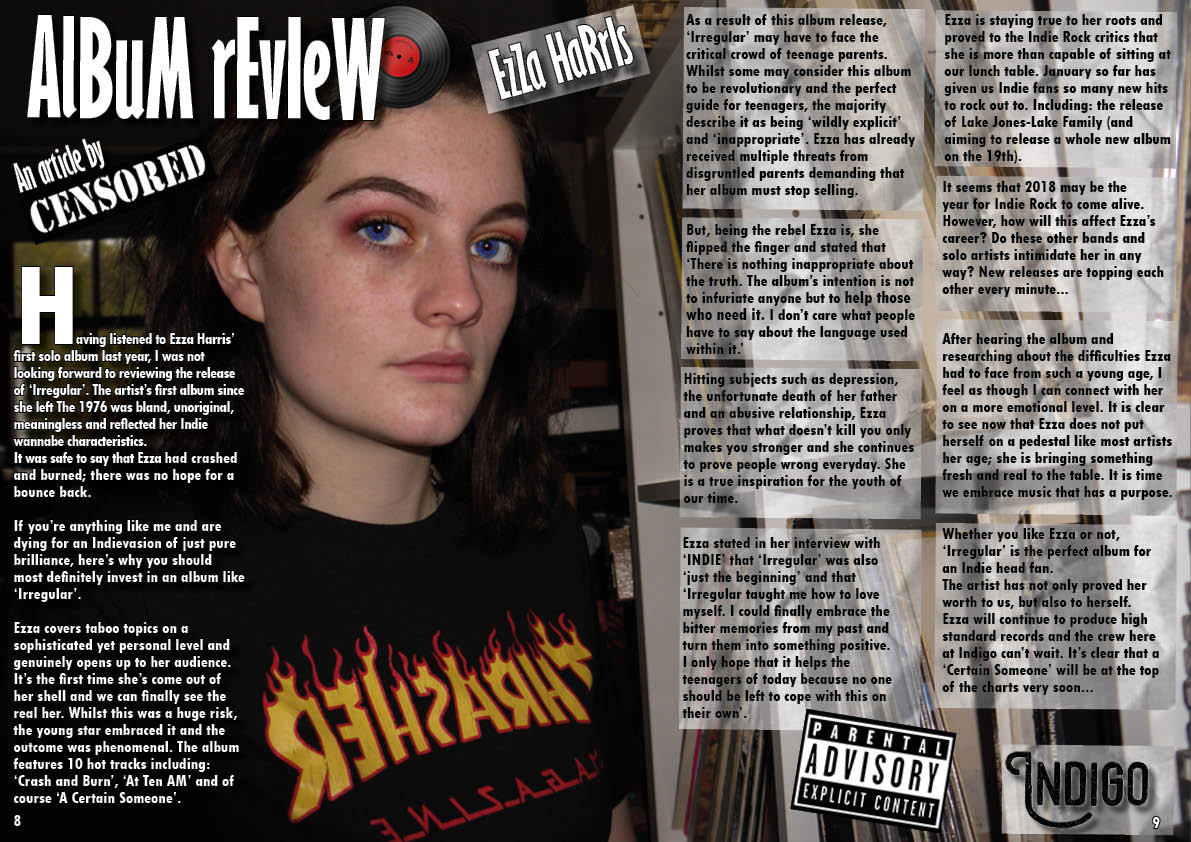
  • Space for the Headline – grabs the attention – alliteration – hyperbole – superlatives to make the reader stop and read on
  • Space for the Standfirst – a short paragraph that expands on the headline and further tempts the reader to read on.
  • Columns/space for the article in paragraphs.
Then you can focus on :
  • Turn off hyphenate – type/tables/paragraph – untick hyphenate
  • Drop capital – indicates where the article starts (on the tab at the top there is an icon)
  • By line – who wrote the article
  • Caption on the photo to anchor it
  • 2 x page numbers bottom left and bottom right
  • Serif text for the copy of the article – easier to read – with ticks and flicks
  • If the whole article does not fit on the 2 pages – don’t worry as you can add…continued on Page XXX…just so long as the whole article is in the blog so that the examiner can read it all in one place.

Remember, your article does not have to fit the two pages – as long as it is in its entirety in the blog, then you can use a …continued on page x

Your article does not need to be about your front page model, but it can be too.

Remember all the technical conventions: standfirst, byline, drop capital, quotes, captions/insets and serif font.

The photo does not have to be cut out but be creative and use photoshop for filters, manipulation etc.


SELF ASSESSMENT 

What do you like x 3

What do you need to do x 5

Tuesday shoot – advice

Advice:

  • If you are not shooting or modelling you should be in your normal lessons – we are trusting you.
  • Do not take non-Media students out of their lessons.
  • Always bring in your own SD card and then download them asap – your teacher will show you where to do this.
  • Get your costumes, make up, props and equipment ready in advance so that you don’t waste time.
  • Keep your article in mind for the DPS and your coverlines on the front page and contents page – what could you do to help support the stories in terms of images?
  • Ensure your PMA is detailed and that everyone knows what is expected of them – collect costumes, props in advance and double check your model knows when they are needed – also watch for double booking.
  • If you can take some group shots, then do – music magazines have groups in them and not just solo artists.
  • You should wear school uniform unless you are in costume for the actual shoot.

Aim:

  • Go for some  ‘standard’ shots of a star who would feature in your magazine – studio, out and about etc. that can be used in the contents page or as insets.
  • Go for some ‘phunky’ photos of another model (if possible) that could also be used in the magazine in the contents page or as an inset somewhere.
  • Remember to take some photos of musical instruments, mikes so that you can turn these into logos, graphics for your pages.

IF YOU CANNOT GET TO YOUR DESKTOP TO DOWN LOAD THEM INTO YOUR D DRIVE FOLDER, MARKED LOCATION SHOOT, THEN FIND ANY DESKTOP IN 70, 71, 73 AND IN THE P DRIVE LOOK FOR:  MEDIA TEMP, YEAR 12 SCHOOL SHOOT, YOUR CLASS AND THEN YOUR FOLDER IN THAT FILE.

PMA and planning for your shoot next week

On Tuesday 7th December, you will be able to be off timetable for 2 periods to take more shots for your magazine. Your chosen models should be from Media if at all possible.

Think carefully about your coverlines in your contents page and your coverlines on the front cover and importantly, the contents of your DPS article. Are there photos that you could do with to help illustrate the ideas?

  • Standard portrait, full length, mid shots, close ups of your model – in and around school, using the studios or the classroom green screen set up.
  • Fun, adventurous photos using another model and props, tricks and techniques inspired by research online for some whacky photos.  See ideas below.
  • You will then need to create a PMA to ensure that your MES, Props, Models and location are all clearly planned and thought through.
  • Then fill in this sheet for your class so that your teacher knows what and where you will be.
  • Your photos should tie in with your Double Page Spread Article and/or some of your coverlines so that there is a link for example:  Your DPS article might be on your star relaxing after a busy tour so you have a fun photo with a blow up flamingo and they are in their board shorts etc, or it may be about them relaxing after a busy tour so you have then floating on a cloud.
  • You will have access to one of the studios or the green screen studio in one of the Media rooms and of course, access in and around school.

Locations around school – suitable back drops for portraits etc

This sheet needs completing. 

Draft Feature Article

KEY TERMS:  HOOK, ENTERTAINMENT, INFORMATION, PERSONAL IDENTITY, SOCIAL INTERACTION, HOOK, STANDFIRST, BYLINE, QUOTES.

The blog post will include:
  • Planning document
  • 1st draft
  • MP3 recording
  • Final draft (post teacher input)

Task 1 – Article planning – this will be embedded in your blog.

  1. Make a copy of this document, Article Idea Development – complete your notes and embed in your blog.
  2. Develop a hook for your article which outlines  your approach.

‘A hook’ is a treatment for an article. It usually is part of the pitch that a writer or journalist will make to their editor before they are given permission to spend time writing the article.

The hook must include:
  1. Who are you writing for?
  2. What is important to your audience?
  3. What news is currently trending?
  4. How are you going to start?

Here is the full article on hooks for magazine articles.

Preparation for writing the article

Choose one of the following tasks:

  • If it’s an interview you should develop a range of questions (and answers), which you can build into your article.
  • If it’s a review of an album or a gig, you should develop some details of the event and elements to review
  • If it’s a general article about a genre of music (10 Best…) you should do some research into the music and famous artists/albums.
  • If it’s a biography piece you need to invent 5-10 interesting life events of your star / band that the audience want to know about.

If your article does not fit into one of these discuss your planning ideas with your teacher.


Task 2 – 1st draft – this will be cut and pasted into your blog.

Transfer your ideas from the planning template and then re-edit, re-craft into a completed article.


Task 3  – MP3 recording – this will be embedded in your blog.

Read your 1st draft out loud and record on a voice memo MP3 and embed into blog. Summarise any changes you want to make.


(Task 4 – teacher feedback)

Submit for feedback from your teacher via classroom.


Task 5- Final Redraft – this will be cut and pasted into your blog.

You can then redraft it after teacher feedback, ready for insertion into your DPS once designed.


EXEMPLAR

HERE ARE LINKS TO PREVIOUS STUDENTS’ WORK:

  1. PERSONAL – ALBUM REVIEW WITH QUOTES
  2. INTERVIEW

Language Analysis

KEY TERMS:  COPY, HEADLINE, STANDFIRST, USES AND GRATIFICATION THEORY (social interaction, personal identity, information, entertainment), HOOK, REVELATION, INTRIGUE, CALL TO ACTION.

Task 1 – LANGUAGE ANALYSIS (Blog Post – article and analysis of it)

Choose one of the double page spread articles below:

  1. Biography 
  2. Intro to a long read.
  3. 10 Tips for Life
  4. Q&A
  5. New Band
  6. Album Reviews
  7. Interview

Use this document to help you unpick (analyse) the article and explore how the journalist is using language to create AIDA and what is in it to fulfill the key criteria of the Uses and Gratification Theory by Blumler and Katz – personal identity, social interaction, entertainment and information?

Your analysis should be between 350-400 words and should be typed into your blog along with an image/link to the article you’re analysing.

Contents Page – Peer Assessment

Scroll through to the Contents page – assessment section.

Read and digest how the examples have been assessed.

Ask a peer from the class to give you some feedback on the relevant sections.

Here is a sheet that you should take a copy of  THAT YOU CAN USE TO MAKE YOUR NOTES/OBSERVATIONS. YOU CAN THEN EMBED THIS AS PROOF OF PEER ASSESSMENT.

Use the key language…

  • Good, really well, very strong, very conventional, fabulous, really well applied, really dynamic, very clear – A grade
  • Clearly, strong, good, satisfactory, conventional, well good sense – B grade
  • Fails to convey, lacks, insufficient, minimal, satisfactory, functional, adequate, staid – C grade.

THEN DO 5 SPECIFIC TARGETS FOR YOUR NEXT DRAFT in light of the feedback from a peer.


Exciting coverlines, headlines, language and tone

KEY TERMS: register, tone, language, imperatives, colloquial language, semantic field, alliteration, hyperbole, create interest and desire.

Always focus on how you are going to speak to your target audience. You need to sell the contents in the coverlines – make people want to buy it and open it up.  You need descriptive, imaginative, eye catching words –

  • hyperbole – there are a million ways to listen to Katy Perry.
  • alliteration – mindless music and maestros
  • colloquial language – ya’ all, u, yeah
  • semantic field (to do with the subject) – verse, chorus, rythmn, tone
  • imperatives – orders – buy now, read on, don’t miss out!
  • Now
  • Hurry
  • Quick
  • Limited
  • Running Out
  • Fast
  • New
  • Deadline
  • Last Chance
  • Final
  • Never again
  • Expires

Must use words for your headlines:

click on the image to see some exciting headline ideas
click on the image to see some exciting headline, caption ideas

If in doubt, find some coverlines from the real examples and borrow the ideas and change in relevant artists etc.


Contents Page – What is a Contents Page and Planning

KEY TERMS:  COVERLINES, AIDA, INDEX, PAGE NUMBERS, INTEREST, INFORMATION, ENTERTAINMENT, ATTRACTION

Compare and contrast some real contents pages – what do you notice that is similar among them all?  Use the real magazines in class.

Menu/Ingredients
  • Editors hello
  • Page numbers
  • Hyperbole and superlatives in headlines
  • Images and word clues
  • Graphic illustrations and designs
  • Reminder of the magazine’s name and mission statement

It will also contain some photos that relate to the listed articles / features.

Example 1
Example 2
Example 3

SOME INSPIRATION

Use some of the ideas in the Headline Grabbers post to craft some intriguing, exciting, captivating captions and cover lines.  And see the previous blog post for coverlines for your front page.

TASKS FOR THE POST

Research, evidence and practice laying out a contents page. Then reflect on the purpose of a contents page, the technical conventions (insets, captions, index, page numbers, coverlines etc).

  1.  1 x slide of inspirational contents pages @ 8 designs – search ‘graphic design layouts for contents pages’ as actual ones are hard to find – can use any genre of magazine
  2. Hand drawn draft layouts x 4
  3. 5 x catchy headlines.
  4. Commentary and reflection Technical conventions of a contents page and an overview of the reason behind them.

Draft 1 – Front Cover – self-assessment

KEY TERMS:  AIDA, ENTERTIAN, INFORMATION, SOCIAL INTERACTION, PERSONAL IDENTITY, CONVENTIONAL, GENRE, TARGET AUDIENCE

Use this as a guide to see how you are doing?

You should aim to give yourself a level/grade at the end of the assessment.

You can copy the main examples but need to then include your own specific examples from your own version.

AND 5 TARGETS

Basics of Photoshop

photoshop

Following on from Serena’s masterclass, you will need to do some research for some tricks and techniques for using photoshop and indesign.

Here is a link to a Youtube site, which offers tutorials on how to use Photoshop .

Here is a slideshare with links to some of the basic skills.

You can manipulate your photo in photoshop before exporting and placing into Indesign.

  • The tool bar at the top has a category called FILTER. In here you will find all kinds of presets to change how your photo looks – adding presets to make it look like a pen and ink drawing, mosaic etc.  You can also use the Liquify tool to alter the image – real photoshop territory and make eyes bigger and legs shorter etc.
  • The other tab on the tool bar called IMAGE options to change the colour to black and white, add gradient shadow to the background and change the exposure etc.

PHOTOSHOP

A key skill to learn in Adobe Photoshop is how to select an area of a photo.

You will do this to extract an element of the photo to be taken somewhere else or to apply an effect to that area of the image alone.

Visit our Faculty of Arts website, where Serena has collated a simple ‘how to guide’ on how to extract an image from Photoshop to use in Indesign.     

This is the technique that Serena taught you today and this is a link to the step by step written instructions.

or see the final page of this presentation for another way.

This is controversial, but you may want to ‘change’ the way your model looks.  Think about the impact this has and how it can relate to Media Ecology – can we really trust what we see today?

Cutting out tricky hair (works really well)

Skip to toolbar