Synaesthesia Soundscape

Synaesthesia is a main part of sound within a thriller because it helps to create images within the audiences heads to what is about to happen. It adds to the tension and the build up of an upcoming scene. It is crucial to keep the audience interested and enable to feel like they are part of the film. For this task we had to analyse some youtube videos and make notes about how we felt and what we imagined as we heard different sounds. We later used these notes to create a Word it out, which is a display of the feelings and ideas gained from the videos we watched. Below, you can find the two videos we watched and the Word it out I created.

Wordle


Draft 2 Feedback

After inserting our titles into our second draft of our thriller sequence, we posted it on YouTube. After we did this we asked other students to comment on our work in particular our titles. The questions we asked are as follows:

  1. How effective are our titles?
  2. What is your opinion on the colour of our titles?
  3. Do you think the positioning of our titles in good?

The order of the videos coincides with the order of the questions. There are four videos because one of the last two videos contain some constructive feedback which we thought we could include as we will be able to resolve this in future drafts.

How effective were our titles?

What is your opinion on the colour of our titles?

Do you think the positioning of our titles in good?

Do you think the positioning of our titles in good?

We chose to use non media studies students for some of our feedback videos as these people fit into the same category as our target audience. This made the feedback even more worth while and allowed us to make the tweaks to our titles. Gaining this feedback was vital as we were able to witness first hand what our target audience thought and what to improve.

Draft 2 – Titles

This is our second draft which we have incorporated titles, our thriller name and an indent intro. We made the titles on Adobe After Effects and have placed them in a variety of positions but there is a trend where you can see most of the titles are in the corners of our opening sequence. This is so the emphasis is still on what is happening rather than the titles. Additionally, we have included more transitions between scenes and we have changed some shots to allow the sequence to flow unlike our first draft. We have corrected what we can following the feedback we gained from draft 1, and await feedback on draft 2 for draft 3. Overall this is an improvement on our first draft and is putting us in the right direction for any further drafts.

After Effects: Titles

Having got to the stage where we are happy with the running order, our thriller was ready for titles to be added. To do this we put our previous draft into Adobe After Effects and added layers of text into our sequence. You can see our title list in a previous post.

In order for Harry, Chloe and I to produce and perfect our titles, we had to use Adobe After Effects and the following specific tools:

  • The animate in presets
  • The blur presets
  • The animate out presets
  • Text tool
  • Drag tool
  • Text customisation tools, e.g. font, size, colour etc

Effects and titles

With the tools in the image above we were able to find the font we desired and the size which fitted. Choosing the right size was important as this would help the title to be eye catching, we also had to ensure that the title wasn’t too big as we didn’t want to distract the audience from the current scene.

Effects 2

Here is an example of how we used our text, using different colours and sizes throughout the sequence to create an engaging theme. We chose to use ‘Orator Std’ as our font in white and red. The white to connote with the innocences of Kit and the red to display the danger and the blood sweat of louis’ character. The titles are in a variety of sizes.

effects 3

This is animation we used as a one off for our main title ‘Transient’. This was because the animation was completely different and made the title stand out more for that reason. Below is our title in a larger size but the same colour red as the rest of our titles.

effects title

We kept the red for names of people within the opening sequence and used the colour white for the position of the person. The variety of length that the title was shown for was down to how long the selected scene was.

Effects 4


Thriller Font Designs

In this task we had to choose a font we felt best suited our thriller and portrayed the meaning we wanted it to.

I felt our thriller title needed to be:

  • Easy to read
  • A word not many people knew
  • Something that added enigma
  • Fitted in with the storyline of our thriller

We decided on the word ‘Transient’ as it is a word not many people knew, but it fits in with the plot of our thriller. The word ‘Transient’  is a person who is staying or working in a place for only a short time.

Below are some of the fonts we may use in our thriller, in the below document we have analysed a few of the fonts we have considered to use for our titles.

thriller titles


Titles Research

Film Title Case Studies

These documents support our research looking at the roles recognised within them, we have created two more case studies so we can compare the similarities and differences between the order and design of the titles. Different genres of films use different designs and animations depending on the plot of the film. This will create different atmospheres, enigmas and tones.

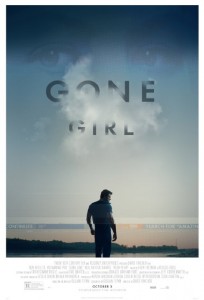
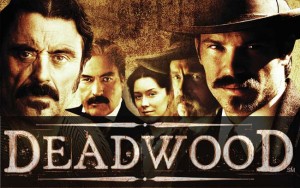
Comparing the case studies allows us to see which transitions, designs and positioning works and would fit with our thriller and the meaning we intended to convey. Please click on the images below to view our case studies of Gone Girl and Deadwood.

Gone Girl    deadwood


Film Title Timeline

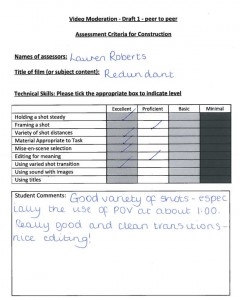
Now we have completed our first draft, as we start to think about our second draft we need to consider titles and how they are presented in this industry. The length of time, transition, appearance and design are all key parts to creating an atmosphere from the beginning of the film.

In order to understand the art of the title we produced a timeline including the action, sound, music, appearance and the order they came in. This will help us during production stages as it gives us some ideas about what names to include, fonts and animations to use. From this task we were able to also see what animations worked and how certain titles and animations created different atmospheres.  Please click on the image below to view our timeline of, Panic Room (2002)
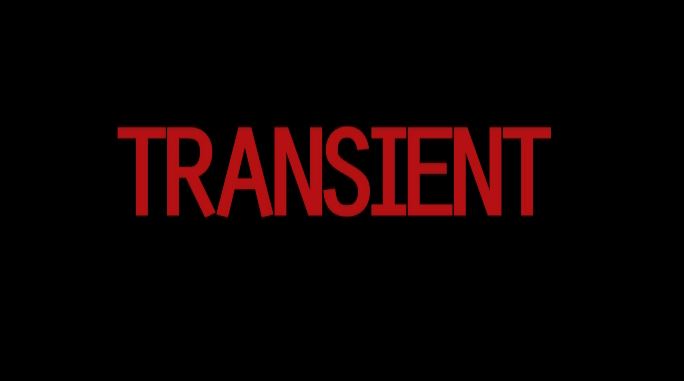
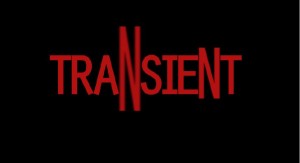
Panic room


Our thriller titles

Having completed the research stage we constructed a document of our titles. From the research we gained an understanding of where to place our titles, what effects to use and a variety of other ideas such as colours. After watching these title sequences we saw many areas in our thriller to place our titles. Below you will be able to find the official list of our thriller titles.

thriller-genre


Draft 1

This is our first draft of our thriller. The quality of our work has changed dramatically compared to our rough cut. We have shortened some scenes, used some better shots, cut out some of our POV shots and created a clearer narrative sense. Looking at our feedback from our rough cut we used too many POV shots so this was important that we considered this and removed some unnecessary ones. We still have to include a close up and a reaction shot which we intend to put in our Second Draft. Below you can view our First Draft on Youtube.


Feedback from YouTube and Targets:

After assessing the feedback from our classmates and other peers on our Draft 1, we are able to come up with some strengths and weaknesses.

Strengths:

  • Good variety of shots
  • Clean and smooth transitions between scenes
  • Clear narrative sense

Weaknesses:

  • To use the same props in each scene (we used a different cup due to previous one being broken)
  • Ensure we have a smooth ending as some shots are jumpy
  • Use the same shots during the ending to keep the quality of our narrative sense

The Feedback we gained came from a sheet including the assessment criteria, technical skills and areas to comment on our work. Please click on the two images to view the feedback sheets.

Feedback monica  Feedback Lauren

Editing Process

Harry, Chloe and I have chosen to use Netflix as our distributor of our thriller. This required us to download the ident from YouTube and implement it into the thriller. It had to be faded out with the music once the first scene came up and our opening sequence music needed to start playing.

edit

Once we had created the titles on Adobe After Effects, we placed them back in Premiere Pro over our product. With both software’s open we could make last minute changes to any of the titles. During the editing process, we used many different techniques to help us work and manipulate all the footage. One of the key tools was the razor tool which allowed us to cut up a single clip without deleting any of it. An example of us using this tool was to show Kit walking past Louis and then the same clip but from Louis’s point of view. The tool to mark in and out of brackets was also very useful as we could cut away at a clip until we had the part we wanted. We used this tool on most of our shots but to be specific, when Kit was walking down Clifton steps. Overall, we learnt how important these tools are in order to achieve narrative sense and a clean edit of our opening sequence.

razor tool

We used the lighting effect to brighten up some shots as well as to darken some shots to create the effects we wanted to show in specific scenes. This improved the image and made them much clearer to see while having some of them darker helped with the mise en scene. For example, one scene we had to darken the brightness as we had a white background from the wall which made the shot too bright and unclear. However we also increased the brightness of the scene where Louis walks through the alley between the building so we could clearly see what was happening. We later went on to using the speed effects which meant we could speed us some scenes to stop them from becoming boring. An example of where we did this was during the scene where Louis stumbles down the stairs.

One of the main tools to help our thriller flow was the video transitions (Cross Dissolve) as this meant our clips would flow smoothly and were able to join the next clip without it feeling jumpy or looking like average work. These transitions made a big difference to our thriller work as they now link together with our titles which we are completing in after effects. The main transition we used was cross dissolve as we found it fitted the best with the outline of our story.

Cross Dissolve

We decided to use fades when putting the music into our thriller. The music we used reflected Louis’ feelings of sadness, it also was a high tempo which is what we needed. By using fades it gave the music a professional feel, also making it smooth.

Additional Shots, Planning and Evaluation

As part of this task we had to make another Production Meeting Agenda which includes the shots we need to get, who we need, what props and costumes they should bring. By having this document we could easily plan the day and stay organised so we don’t get set back or make any unnecessary mistakes. What we have learnt from doing this is that by being organised means you don’t forget any vital shots and everyone needed for the Re-shoot understanding what is expected.

PRODUCTION MEETING AGENDA

Production meeting agenda re shoot

In this task, we also created a shot list for the day. Our rough draft allowed us to see that a few additional shots were needed to complete our thriller opening sequence. Therefore it was important that we made another shot list to follow during the re-filming day.

SHOT LIST

Screenshot of copy of titles

Overall, looking back on the day I feel that we achieved what we needed to allow us to produce the best opening sequence possible. Now being able to see our product grow from the early stages shows how we have learnt many new skills and techniques when editing and methods of production.

Rough Cut Feedback and Targets

rough cut

After completing our rough cut for the opening sequence to the thriller we had created, it was uploaded to Youtube where our classmates were able to comment on what we had produced giving us feedback on what was good and what we needed to improve on. The feedback we received was mainly positive but we need to include more of a variety of shots and make our ending flow to allow it to have narrative sense. One comment mentioned the timing however this is only a rough cut and timing wasn’t the main focus for the task.

Targets for re-filming day:

  • Use a Variety of shots
  • Use more close ups shots
  • Use straight cuts which will help to gain narrative sense
  • Keep the camera steady
  • Use less POV shots so our thriller is less repetitive
  • Include a montage to make our thriller more interesting
  • Direct our actors so they fully understand what we expect them to do