Draft 3 Feedback

This task was to allow our group to gain some extra feedback on our thriller. By completing this task we were able to make small changes to the product before the final deadline. For draft 3, to show different forms of media that we have at our dispense. The feedback we got from this task was while they were watching our thriller meaning it was their first and honest thoughts. It was a great source of feedback as the audience didn’t have the option to watch the thriller multiple times and change their opinion. In this task you can see the initial reaction of our audience which reveals their truthful opinions.

What went well:

  • The colours were in sync
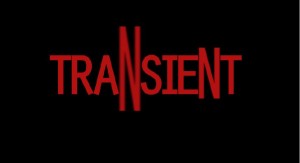
  • The timing and placement of our main title
  • The variety of shots we used
  • The decision we made to include our production company
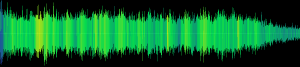
  • Effective foley sounds

Draft 3 – Sound

This is our Draft 3, including sounds to add emphasis and tension to reinforce the idea of a build up within our opening sequence. The sounds we have used are in the background, however this is a draft and it still contains a mixture of sounds from the clips as well as the Foley and background music we have used. We have included different types of Foley sounds, but as an example, one would be the noise of the coins going into the cup. In future drafts this sound will become much clearer. The idea behind the different Drafts is to show progression of our work. We have included the feedback from Draft 2 and now are awaiting feedback for Draft 3.

Sound Effects and Music

After using YouTube, Sound cloud and the microphones, Chloe, Harry and I exported all of our different types of sounds to Adobe Premier Pro. Here we were able to label them as diegetic, non-diegetic or Foley sounds. By using Adobe Premier Pro it allowed us to link these sounds to our thriller along with the videos and titles. Having done this correctly it aimed us towards a finished product awaiting some final feedback.

We used the razor tool to trim the sound clips to get the parts we wanted. This tool made the removal of excess sounds very quick and easy making it more of a precise finish when implementing our sounds.

Razor tool

A more effective tool we used was the YouTube to Mp3 converter which allowed us to convert to copyright free sounds and then save them as Mp3 files. By doing this it made it extremely easier to import them to Adobe Premier Pro.

Yt to mp3

To give us a professional feel unlike some of the other transitions we found that the constant grain transitions worked the best. This became a regularly used tool as it helped to smoothly fade one track into another.

Grain

Foley Sounds

Foley sounds, is the reproduction of everyday sound effects that are added to film, video, and other media in post-production to enhance audio quality. These reproduced sounds can be anything from the swishing of clothing and footsteps to squeaky doors and breaking glass. In order to record our foley sounds we went around the school looking for areas we could use. To be more specific, we were looking for areas where the sound would either be muffled or enhanced because of carpet or concrete.

Coins Dropping on the Floor

Foley chloe

In order to create this sound we used the concrete paving slabs outside of the school as this was the same as the area in town that we filmed in. When we dropped the coins on the concrete we were able to record a clear sound. This made a replica noise to what we heard from the footage we recorded in town.

Louis’ footsteps following Kit

12168914_791344077667250_1840747931_o

We used heavy footsteps inside, on the carpet. We wanted these to be louder then the original sounds so add emphasis to louis’ steps to gain the added effect of him following Kit.

Louis’ footsteps on cardboard

12722261_791344051000586_1439607677_o

This was a softer sound therefore we used the indoor carpet. We did this to add to the atmosphere and to enhance the sound during this scene as it was quiet.

Kit banging on the gate

12499534_791344061000585_2135393786_o

This was intended to be a loud, deep noise however this did not replicate the noise we imagined so we didn’t use it in our thriller. This sound needed to enhance the atmosphere and we felt like it didn’t.

Sound Moodtrack

For this task we used YouTube and Sound cloud to find music and sound effects for our opening sequence. The key in this task was to find copyright free music. We had to hunt for sounds that would emphasise our key events, reactions and objects.

This is one of the pieces of music we planned to use in our opening sequence as it added to the suspense and the anticipation of the audience.

The sound below is of a man heavily breathing, we planned to use when Louis chased Kit. We felt that it increased the speed of the situation and helped to show how desperate Louis was to get revenge.

We thought the use of a heartbeat sound was key during our final scenes leaving the audience on the edge of their seats. A non-diegetic sound creating an emotional response from the audience also making sure we used a variety of sounds.

We considered a harsh beat for our opening sequence as we thought the beats were suitable to our thriller as there are some rises in tension as the sequence progresses. A diegetic sound to represent a dangerous environment.

We thought about some chase scene music to give the idea that kit might escape which is what he is trying to do.

From this task I have learnt how to import music and the significant changes the music adds to our thriller. We did this because it helps to add emphasis and significance to the overall thriller and communicate additional levels of meaning for our target audience. I looked at sound effects that had connotations of tension and uncertainty. As a group we were also looking for high definition sound we felt we could recreate as part of our Foley sounds. This was the dropping of coins into the cup and the kicking of the coins. When implementing the sounds we may have to edit using audacity to create the atmosphere we imagined.

Soundscape Running Order

We have created a document to show the running order of the sounds within our thriller. These sounds have been used to help create an atmosphere and tension, the sounds we have used fit well with the speed and the genre of our opening sequence. The sounds can help enhance the audiences reaction to visual effects, for example when Louis is drunk and begins walking after Kit. The majority of the sounds we have used are diegetic sounds like hands banging on a gate, a padlock rattling and some background noise to provide density and a dramatic feel to our opening sequence.

This task was relevant to my thriller because it made sure we had considered a variety of sounds and ordered them corresponding to our thriller sequence. We were able to easily see each sound that we had considered, thinking about where we were going to put them and why.

Below you can find our soundscape running order by clicking on the image of an exemplar soundscape.

Soundscape

Synaesthesia Soundscape

Synaesthesia is a main part of sound within a thriller because it helps to create images within the audiences heads to what is about to happen. It adds to the tension and the build up of an upcoming scene. It is crucial to keep the audience interested and enable to feel like they are part of the film. For this task we had to analyse some youtube videos and make notes about how we felt and what we imagined as we heard different sounds. We later used these notes to create a Word it out, which is a display of the feelings and ideas gained from the videos we watched. Below, you can find the two videos we watched and the Word it out I created.

Wordle


Draft 2 Feedback

After inserting our titles into our second draft of our thriller sequence, we posted it on YouTube. After we did this we asked other students to comment on our work in particular our titles. The questions we asked are as follows:

  1. How effective are our titles?
  2. What is your opinion on the colour of our titles?
  3. Do you think the positioning of our titles in good?

The order of the videos coincides with the order of the questions. There are four videos because one of the last two videos contain some constructive feedback which we thought we could include as we will be able to resolve this in future drafts.

How effective were our titles?

What is your opinion on the colour of our titles?

Do you think the positioning of our titles in good?

Do you think the positioning of our titles in good?

We chose to use non media studies students for some of our feedback videos as these people fit into the same category as our target audience. This made the feedback even more worth while and allowed us to make the tweaks to our titles. Gaining this feedback was vital as we were able to witness first hand what our target audience thought and what to improve.

Draft 2 – Titles

This is our second draft which we have incorporated titles, our thriller name and an indent intro. We made the titles on Adobe After Effects and have placed them in a variety of positions but there is a trend where you can see most of the titles are in the corners of our opening sequence. This is so the emphasis is still on what is happening rather than the titles. Additionally, we have included more transitions between scenes and we have changed some shots to allow the sequence to flow unlike our first draft. We have corrected what we can following the feedback we gained from draft 1, and await feedback on draft 2 for draft 3. Overall this is an improvement on our first draft and is putting us in the right direction for any further drafts.

After Effects: Titles

Having got to the stage where we are happy with the running order, our thriller was ready for titles to be added. To do this we put our previous draft into Adobe After Effects and added layers of text into our sequence. You can see our title list in a previous post.

In order for Harry, Chloe and I to produce and perfect our titles, we had to use Adobe After Effects and the following specific tools:

  • The animate in presets
  • The blur presets
  • The animate out presets
  • Text tool
  • Drag tool
  • Text customisation tools, e.g. font, size, colour etc

Effects and titles

With the tools in the image above we were able to find the font we desired and the size which fitted. Choosing the right size was important as this would help the title to be eye catching, we also had to ensure that the title wasn’t too big as we didn’t want to distract the audience from the current scene.

Effects 2

Here is an example of how we used our text, using different colours and sizes throughout the sequence to create an engaging theme. We chose to use ‘Orator Std’ as our font in white and red. The white to connote with the innocences of Kit and the red to display the danger and the blood sweat of louis’ character. The titles are in a variety of sizes.

effects 3

This is animation we used as a one off for our main title ‘Transient’. This was because the animation was completely different and made the title stand out more for that reason. Below is our title in a larger size but the same colour red as the rest of our titles.

effects title

We kept the red for names of people within the opening sequence and used the colour white for the position of the person. The variety of length that the title was shown for was down to how long the selected scene was.

Effects 4