Photoshop manipulation

Standard

You can manipulate your photo in photoshop before exporting and placing into Indesign.

  • The tool bar at the top has a category called FILTER. In here you will find all kinds of presets to change how your photo looks – adding presets to make it look like a pen and ink drawing, mosaic etc.  You can also use the Liquify tool to alter the image – real photoshop territory and make eyes bigger and legs shorter etc.
  • The other tab on the tool bar called IMAGE options to change the colour to black and white, add gradient shadow to the background and change the exposure etc.

Creative backgrounds for the DP

Standard
  • DP Backgrounds – be creative – get out and take shots!

    Click on this link to open a file with all kinds of backgrounds that I took at home last night. As black canvases they are not particularly exciting but take them into photoshop and play with the filters and liquify and you could end up having some really funky backgrounds for your Digipak.

    You have to get some shots in – experiment and look for angles, perspectives, textures and composition of random objects.


  • Contact Sheets

    Standard

    How To:

    Make sure ALL of your photos are in your project folder in the D Drive.

    1. Open Photoshop & Your Blog
    2. Go to File>Automate
    3. Select Contact II
    4. Choose the Folder where the images are
    5. Select how many rows and columns for you contact sheet 4×6 is OK, but depends on the number of photos.
    6. Export as a PDF & Jpeg and upload to your blog.
    7. Below the contact sheet – put the image(s) that you are going to use in your design

    Digipak – PMA, Risk Assessment + TEMPLATES

    Standard

    This week you should be planning, executing and producing your Digipak.  Make sure your planning is precise and comprehensive. All planning documents should be uploaded to the blog. You will have to organise your group, models and performers. Remember you have fewer lessons this week so you need to work in a focused manner.

    Attached to this post are links to shot lists, agendas and digipak templates.

    You should also use Adobe Indesign to create your templates. You can choose one from the list.

    Use Photoshop to amend, edit and manipulate your photos and Indesign to construct the actual Digipak.

    You must also include your contact sheets in the blog and give an overview of which shots you finally choose and why. Make copies of the PMA and RA sheets.

    Production Meetings Agenda

    Risk Assessment

    4 Pane

    4 Pane

    Front Cover

    Back Cover + Folds

    Inlay Behind CD

    Inlay Front

    These links may be helpful in setting up the templates so that your work is the correct size in Adove Indesign although there is one in there already as a template.

    https://support.discmakers.com/hc/en-us/articles/209098677–Using-our-Templates-with-Adobe-Photoshop

    http://www.discmakers.com/templates/digipaks.asp

    USING THE STUDIO AND FLASH PHOTOGRAPHY – demonstration workshop later this week.

    Photographic Inspiration

    Standard

    This website has lots of ideas from artists and media makers around the world. It might just offer you some inspiration for your MES – remember simple but meaningful use of MES could make all the difference: some broken plates, antique books, a bright red balloon, tattered armchair, sleek hair do, interesting window frame, bright red lipstick, beaten up car etc.

    However, be careful not to over stretch yourself. Look at previous student’s work and see what is likely and possible. You may have to ‘cut your cloth’ (plan one’s aims and activities in line with one’s resources and circumstances) and do something simple and brilliantly as opposed to attempt something spectacular but badly.

    Here are some links to some specific pages that could whet your appetite:

    Continue reading

    Digipak Photo Mock up and Feedback

    Standard

    You need to create a digital ‘PHOTO MOCK UP‘.

    For this exercise you can borrow images.

    It is this version that will need feedback.

    Exemplars here and here.

    • Place the BORROWED photos in a clear CD cover and take photos of how it looks.
    • Then create a tally chart – list @ 6 possible music genres (including your one) and ask @ 20 students what genre they immediately see, sense, read when looking at the digipak.
    • Reflect on the results. Are you on the right track? Have you got the right style, fonts, images to convey the star image and genre?
    • Have a selection of adjectives, responses that you are hoping that the audience will pick when decoding the DP prototype and add in some that you don’t want them to read into it. then get them to circle 5 or so. If their responses are right, then you are on the right track – if not, then you will have to redesign.
    • If so, you now need to get out and start making the actual DP.

    We will be moving on to Production Meeting Agendas, Risk Assessment and first shoots very shortly so make sure you have caught up on all your posts.

    Digipak Genre and Moodboard

    Standard

    • After considering how genre is reflected in the design of a Digipak, you will now have to create your own individual moodboard to collate ideas for your Digipak cover.
    • As a group you will then reflect on your own ideas and choose aspects of them to follow through to a Digipak mock up as the next task.

    Remember you are creating an album cover for the band/performer – not just the song you have done your music video for, although this will feature in the song list.

    You should consider all of the following and find images, ideas to illustrate the feel of the Digipak design. We do not want it just to be a printed board though this time; it will require you to be experimental, creative and consider the overall vibe, feel, image, ideologies of the band/performer.

    1. Images – MES, locations, characters, designs, graphics, illustrations, photos etc
    2. Typefaces
    3. Colour Schemes
    4. Inspirational Digipacks – something similar?
    5. Logos
    6. Copy Ideas – text etc.

    LOOK AROUND FOR INSPIRATION – DON’T JUST GOOGLE! and add in BUZZ words.

    REREAD YOUR MISSION STATEMENT – THE BOARD SHOULD REFLECT THAT USP, THEIR VIBE, THEIR BRAND.

    This moodboard should be 3D so should include collage material that you stick on to it and then take a photograph and embed on to your blog. Include textures i.e. leaves, material, objects, artefacts that all help connote, communicate the brand identity of the album.

    For example a piece of stone might indicate that the star is urban, hard, aggressive, modern whilst a piece of red velvet might communicate the star is self-indulgent, arrogant, wealthy, extravagant. The more you think about the star’s brand, image the easier this will be.

    LOOK AROUND FOR INSPIRATION – DON’T JUST GOOGLE! and add in BUZZ words for a busy, brainstorm of exciting ideas – you can annotate directly onto the board or once you have taken a photo of it for inclusion in your blog, you can annotate in indesign or photoshop.

    • Colour Scheme Designer (Mixes colours and find complementary ones)
    • Colour Lovers ( a brilliant site with pallettes hex codes (copy and paste in Photoshop)
    • Flikr (great images)
    • Pintrest (good for typefaces, textures, design ideas…)
    • Behance (Lots of portfolios of work from inspirational creatives)
    • Typography to inspire (100 great pieces of typography to feed your inspiration)

    LOOK AROUND FOR INSPIRATION – DON’T JUST GOOGLE! and add in BUZZ words for a busy, brainstorm of exciting ideas.

    Image result for 3d moodboardsImage result for 3d moodboardsImage result for 3d moodboardsSee the source image

    Image result for 3d moodboards

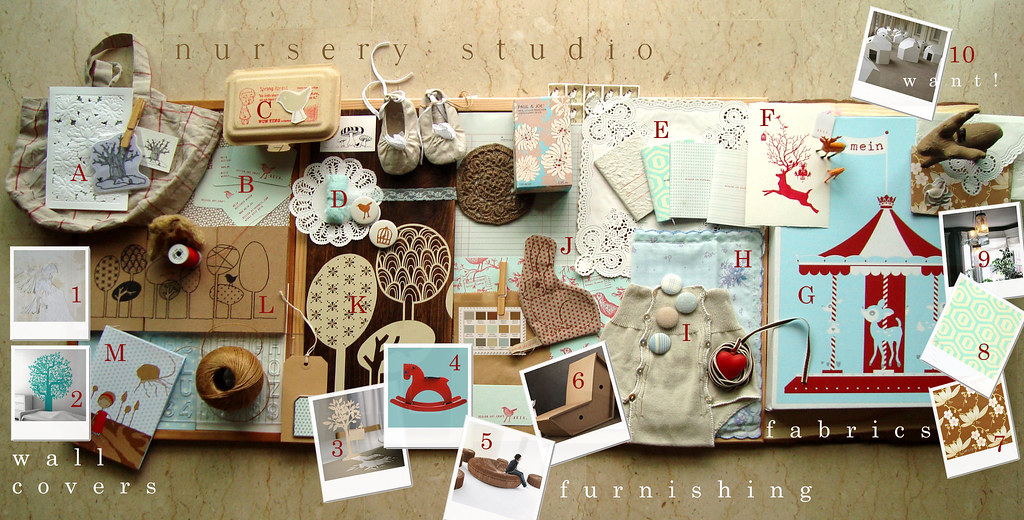
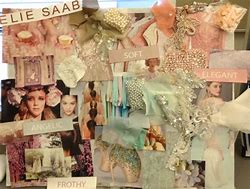
    The overall feel does not mean that if there is lace on the moodboard or a leaf, that you will have to include that on your digipak cover – but the feel, imagery, ideas, connotations will transfer over.

    HAVE SOME FUN!

    Digipak – Previous Student’s Work

    Standard

    Choose a DP cover from the display on the wall. Mrs Cobb will point out the ones that achieved Level 4 as clearly it is this level that you will be aspiring to achieve.

    Then search for that blog so that you can use the images in your post.  Or take a photo and embed that.

    Go to www.blogs.grammar.sch.gg and search for the site in ‘blogs’. There are some paper copies around but you will still have to find the images on their blogs to copy and embed.

    Using the four general assessment criteria in the slideshow below, explain how the students skills are evident in their digipacks. Be specific with examples from their texts and what they have done.