Prelim Taks Lip Syncing Exercise

Below is the lip syncing video which I created on WeVideo, I played with a variety of clips recorded at the green screen studio, to try and produce the best work possible, as a beginner.

Lip syncing is a very important part of a music video. Artists pre-record their tracks and later add them to the video which they have created and match up with lip syncing. A good attempt at this means it will look believable and be professional. It allows the artists to portray emotions and represents their star image as they would like. It is crucial they make it look as real as possible and match it to the lyrics, if not they may cause a distraction away from their image. Their appearance also plays a big role and if they do not match the voice then the accuracy if the star image will not match.

What went well?

  • variety of shots and angles were used
  • lip syncing was in time, most of the time

What could’ve been better?

  • if the lyrics were revised and known better
  • avoid over pronunciation of the words as it can make it look fake
  • to show confidence and energy to present a better performance and make it look exciting
  • more transitions, it was something I struggled to incorporate and work between the different shots.

This was a perfect task to complete in order to get an insight into the first steps of creating a music video. Focusing forward I know exactly what needs to be improved on and worked towards when it comes to creating own. I need to ensure my artists has revised the lyrics and to spot (and subsequently avoid) over pronounced words when shooting.
Prelim Task Mood Montage

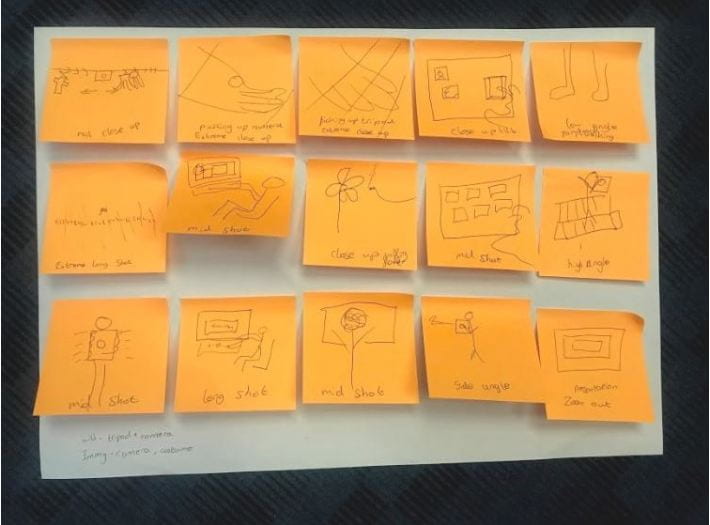
In groups of 4, our task was to create our first montage piece, we chose the theme of ‘practice makes perfect’ and ‘determination’. In order to show our theme we decided to create and montage of a montage about the production of it, we wanted to show the passion and the amount of features which needed to be included when creating one. We created a storyboard in advanced so we knew what we were doing, therefore not missing anything out. It also benefited us when we came to creating the montage as we knew what order all the shots went into. After the planning we then went out and filmed our shots.


Above is the final product, I worked along side one other group member to make this. The opening instantly gives the feeling of determination and continues to represent it until the end. I think my montage has an impact in representing the theme. This was mainly due to the style of editing, its fast movements from (00:04-00:07) showed the character getting things done in order to prepare, a sense of progression is created from these fast movements. However, within this montage is several transitions, it makes some of the shots seems very quick paced and busy so it something that can be improved and avoided throughout the rest of the project. There were no repeated shots in my montage as everything only needed to be done once e.g. collecting equipment. Although, some shots which I could’ve done to further communicate my idea was maybe to show the setting up of the equipment, I felt as if we only showed the gathering of the equipment and then went straight into the actual production part.

This task gave me my first insight into Adobe Premier Pro, I managed to learn some of the basics and it has given me a starting point for this project. There is a lot to work on in order for me to create the best piece possible but it is something I will be able to do, when it is time to create my final product.