Category: Component 3 (page 3 of 5)

Specsavers Feedback

My partner and I were given the opportunity to meet with a professional from specsavers to discuss what we have produced so far and receive feedback on what could be done to improve our music video. The feedback that we received helped my group to use wide variety of effects and tools within premier pro. We were shown how to use effects such as echo in order to create a Narrative with a prominent meaning. This effect has now been used on our party scene to help create meaning and atmosphere within the scene. We were also shown how to use Key Frames, this will help us to jump or zoom during clips which helps us to use a wider range of shots and angles. Finally we were also shown how to add transitions between clips to help the video keep moving. By allowing specsavers to view our video, we have been able to fix tiny mistakes that we as a group have missed as well as being able to gain an insight into what works and what doesn’t work within our music video. Through having this session with Specsavers, my partner and I have been able to create three targets to focus on.

  • The use of Key Framing for movement throughout clips.
  • Adding certain effects to create atmosphere during specific narrative scenes.
  • Use a variety of transitions between scenes/clips to keep the video engaging and interesting.

The guidance and feedback that we have received has been very helpful and has allowed us to make improvements that have bettered the quality of our video. As we continue into our next drafts, we will consider these targets and keep improving our music video.

Music Video Draft 2

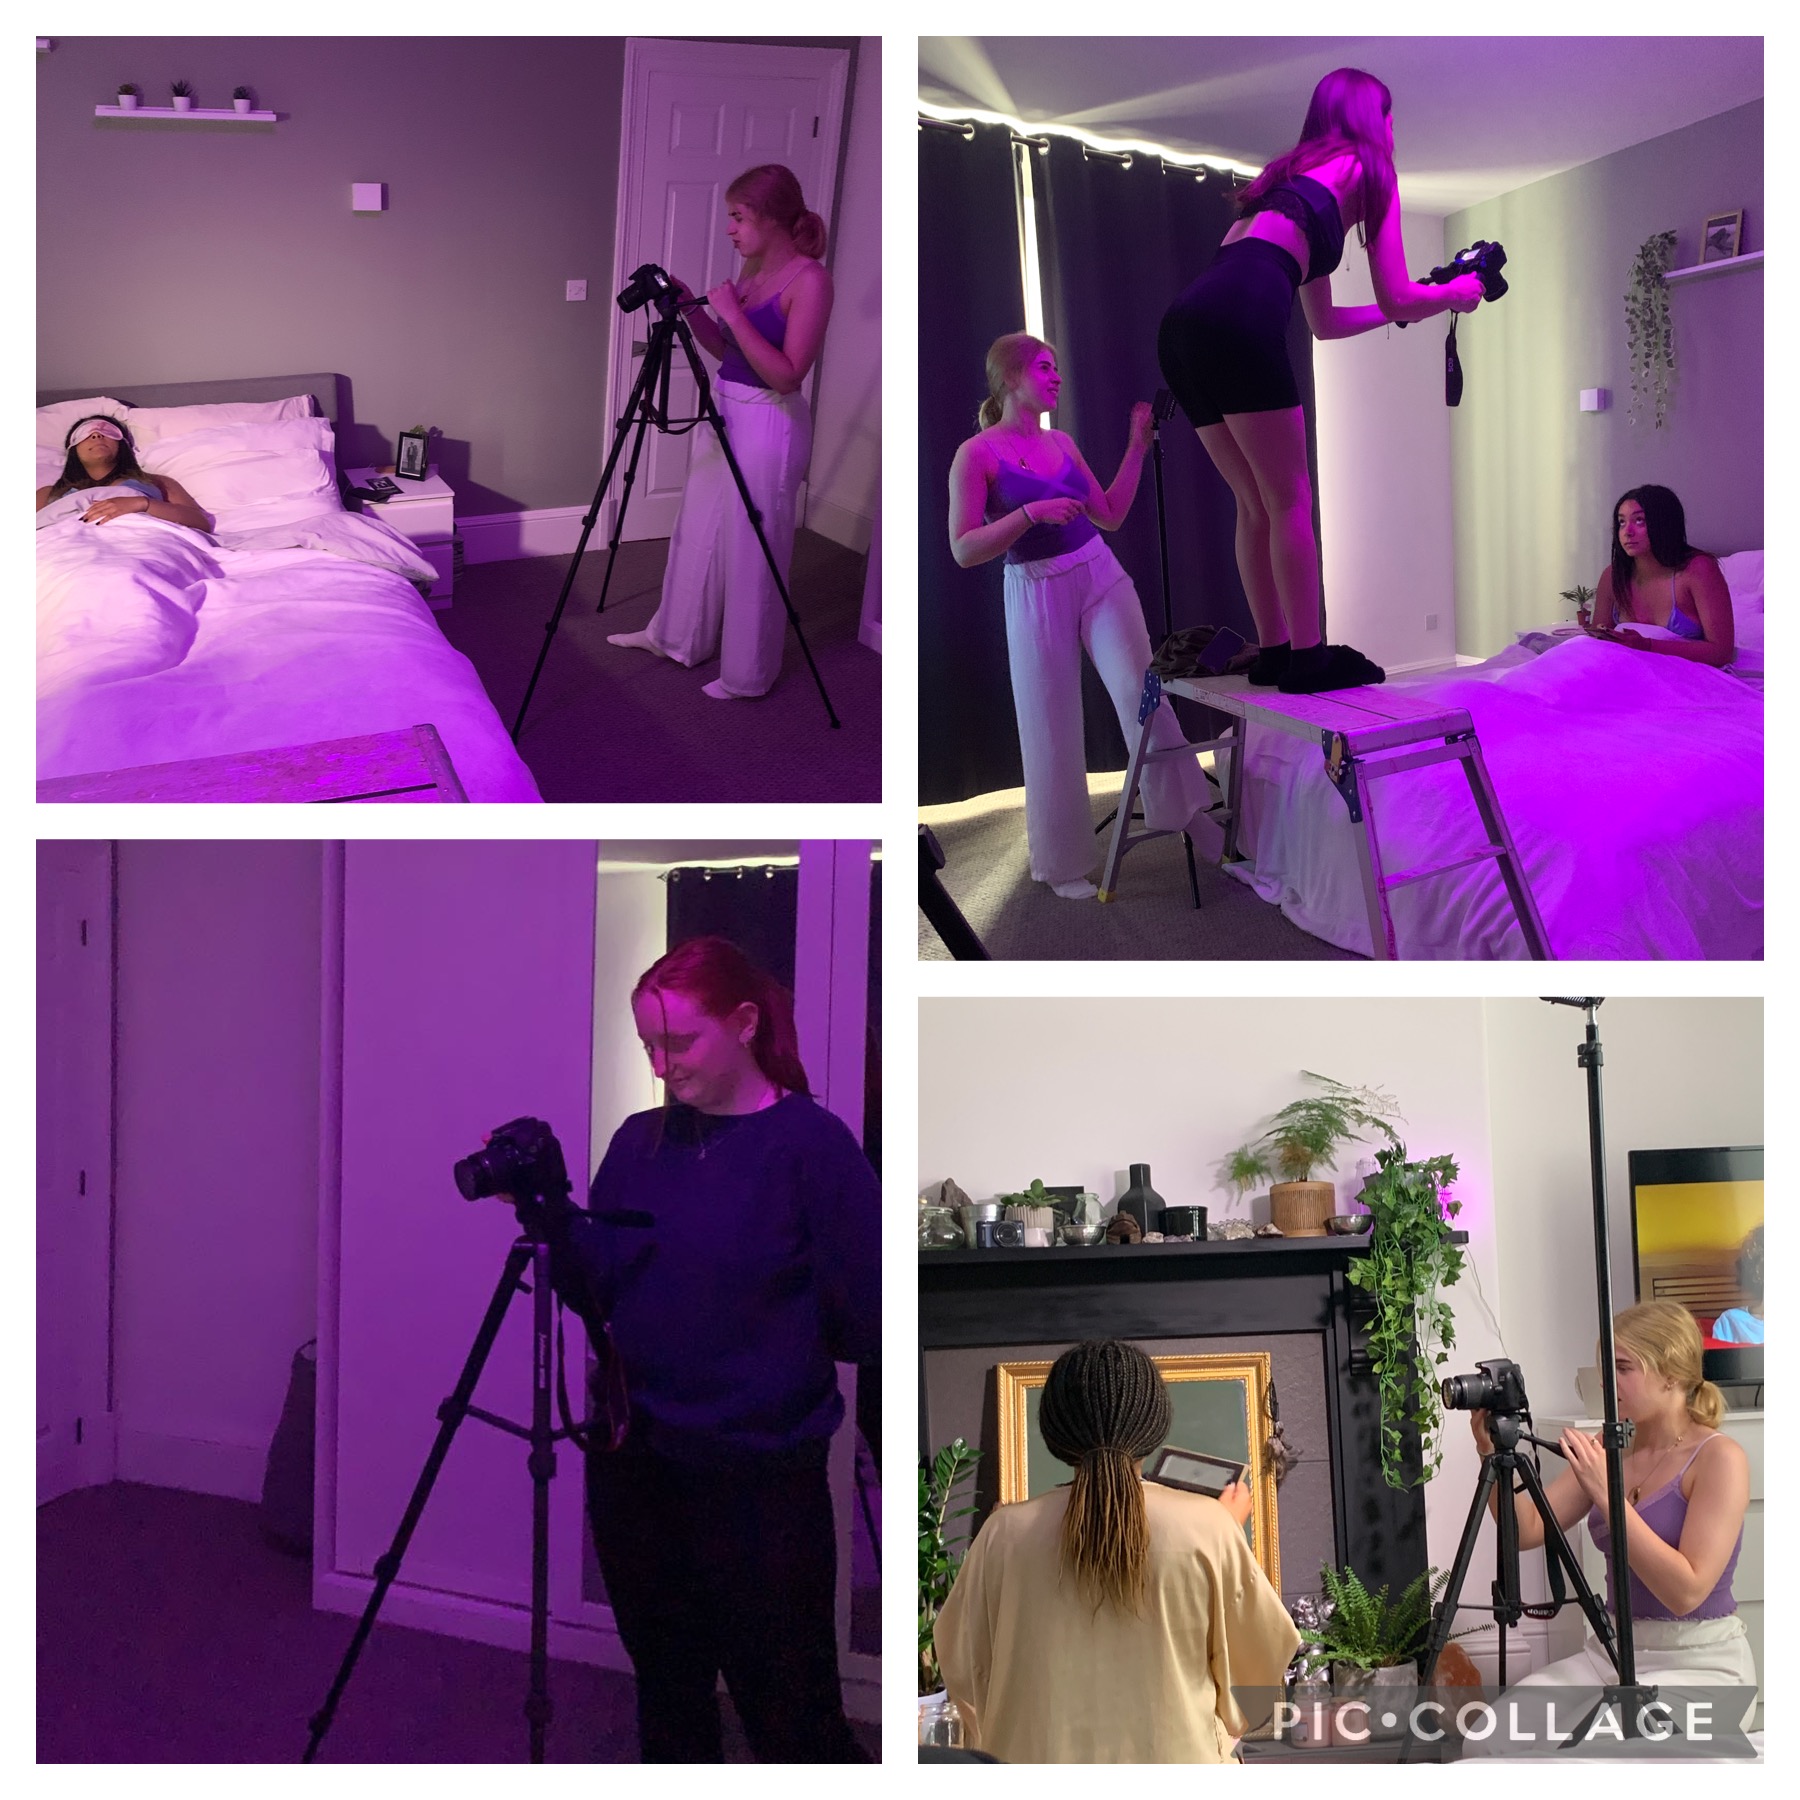
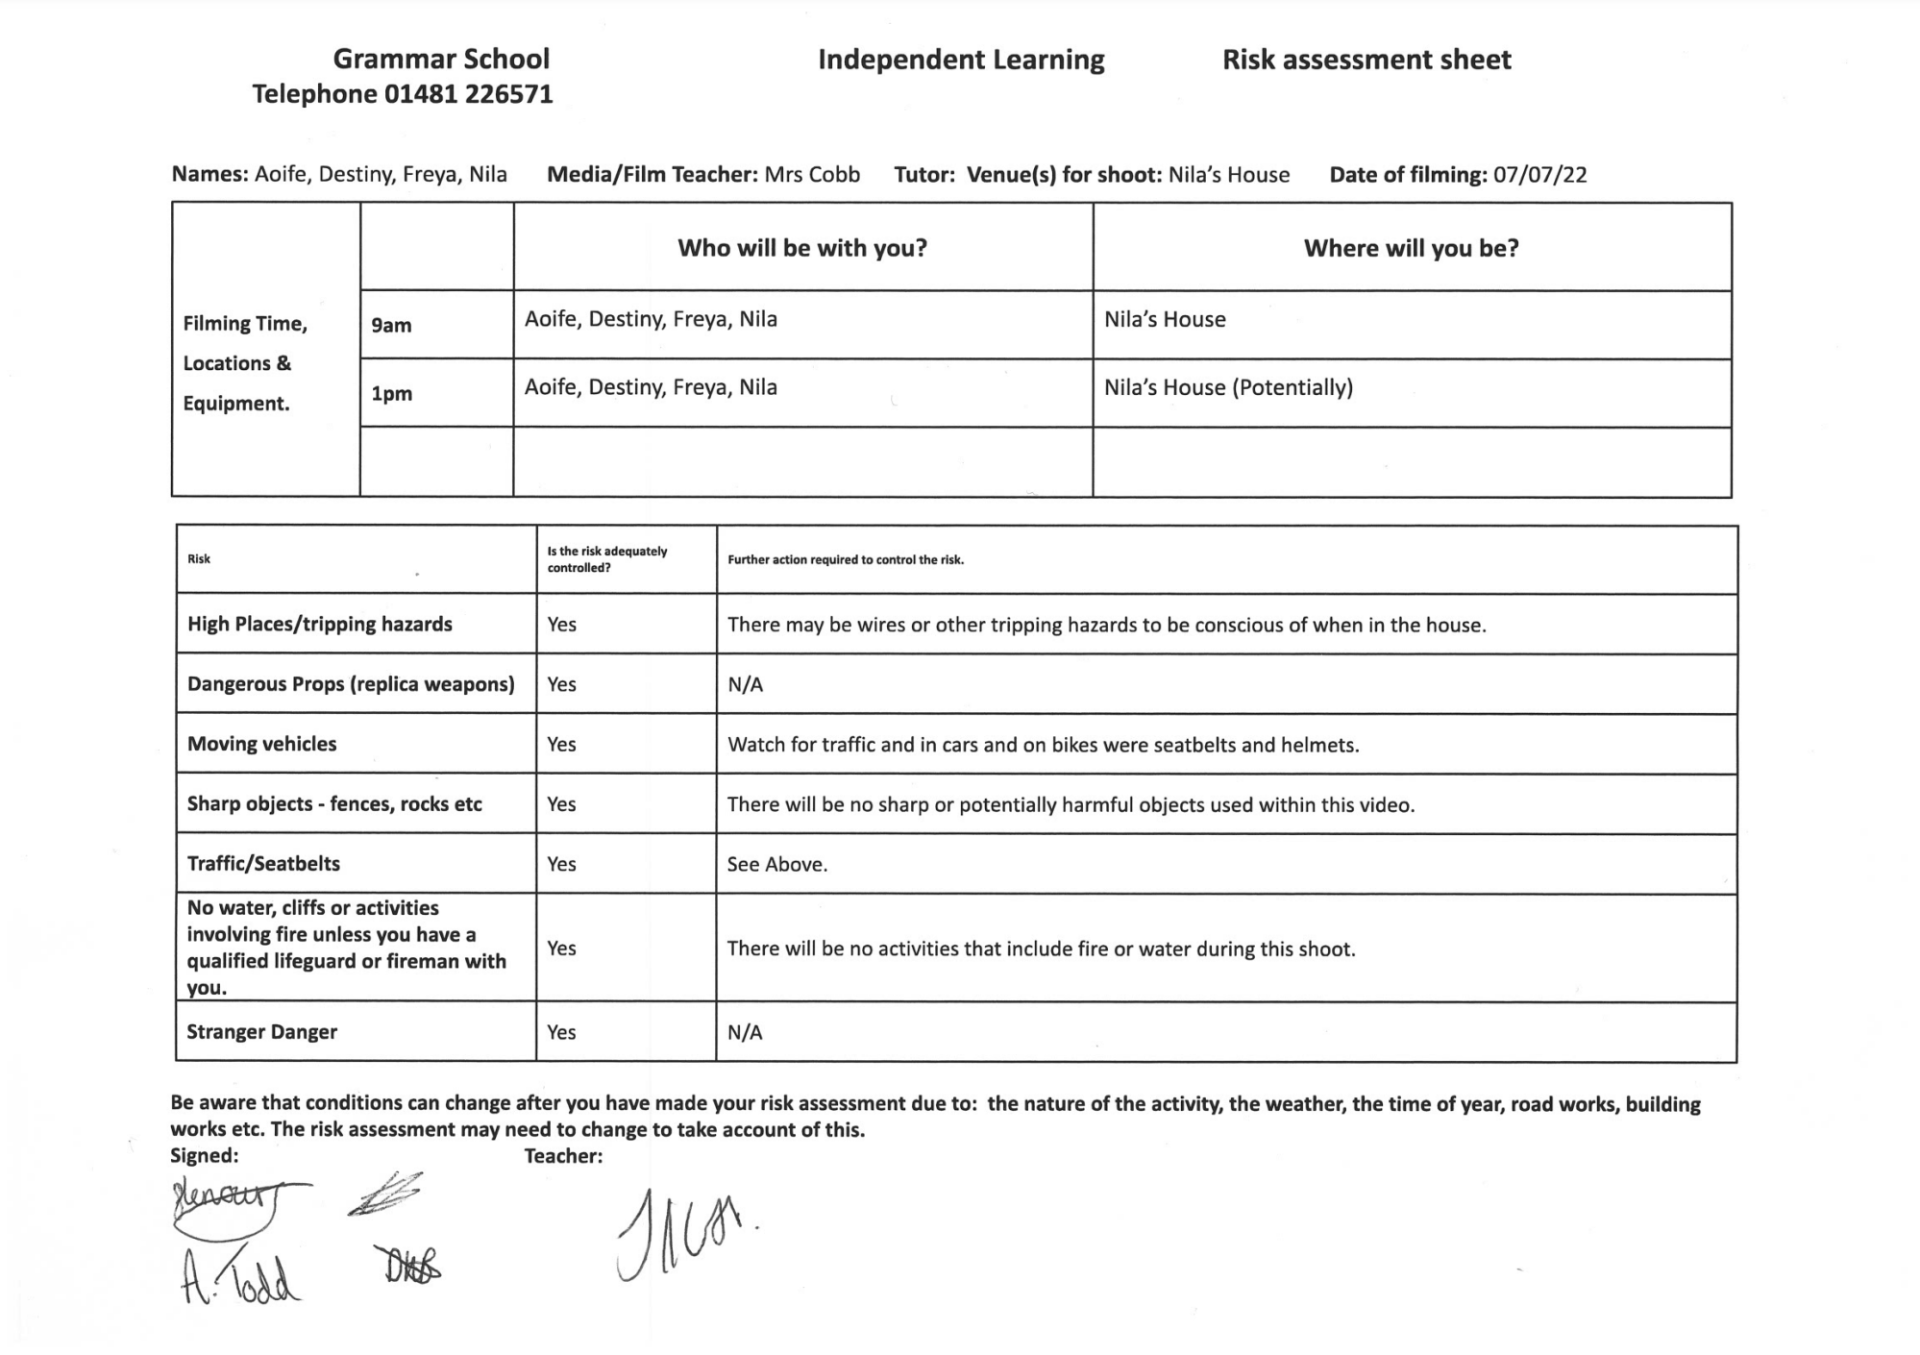
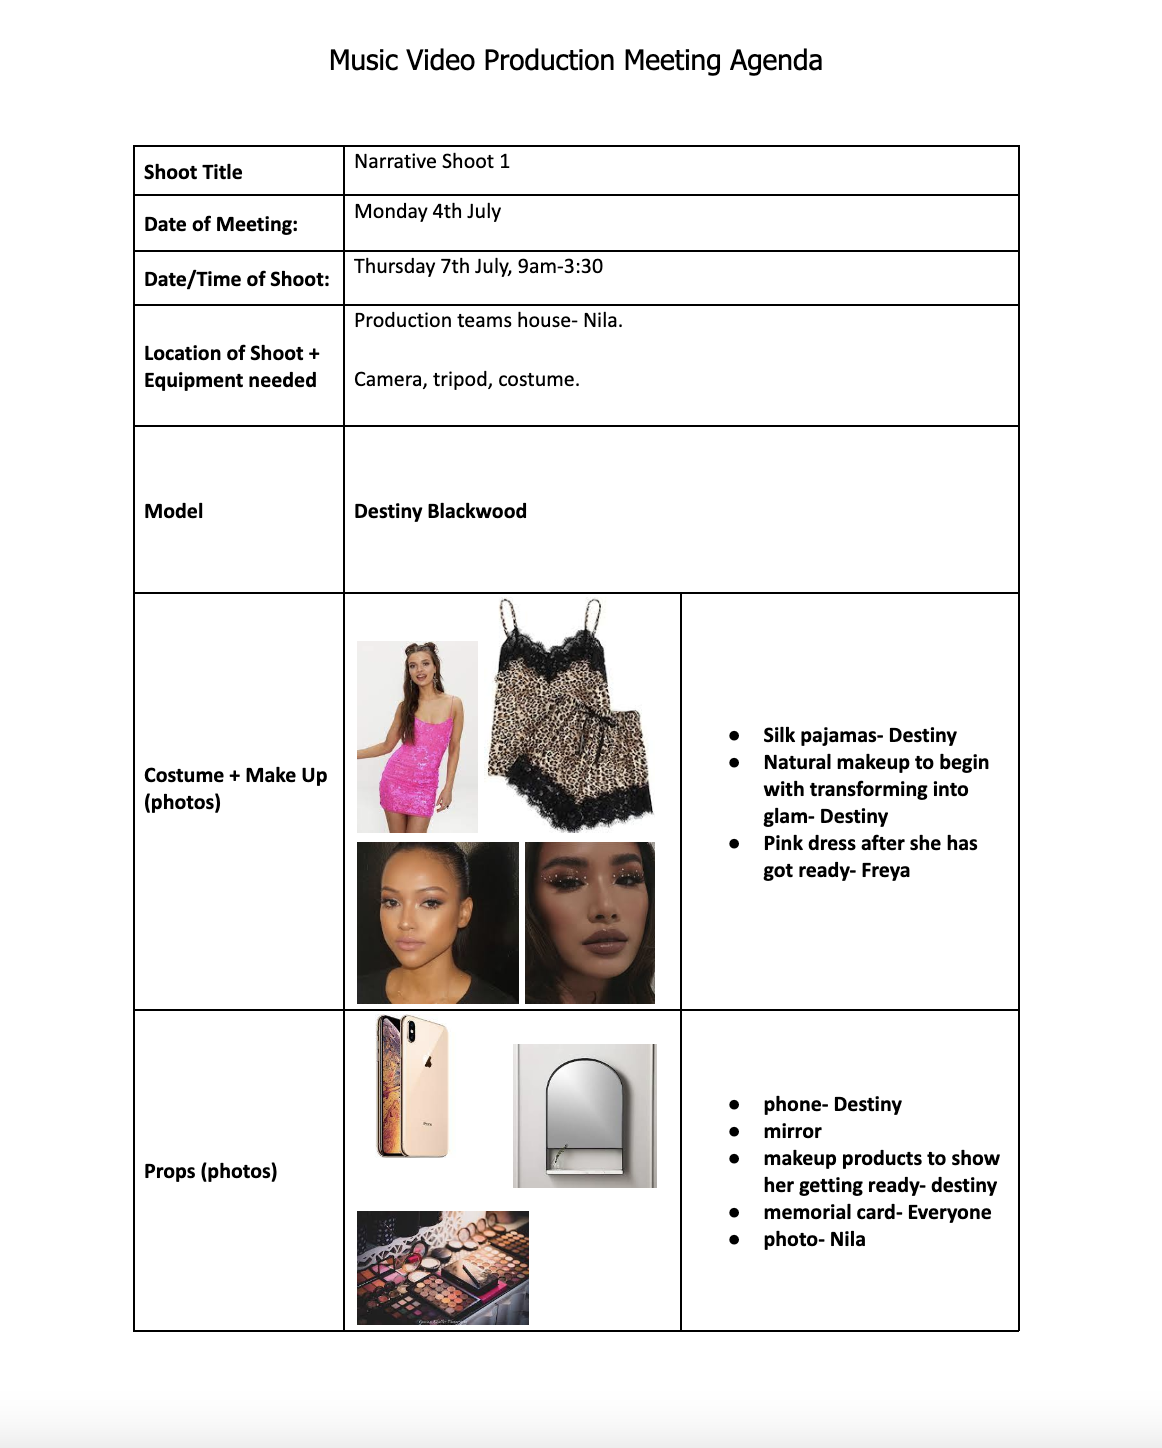
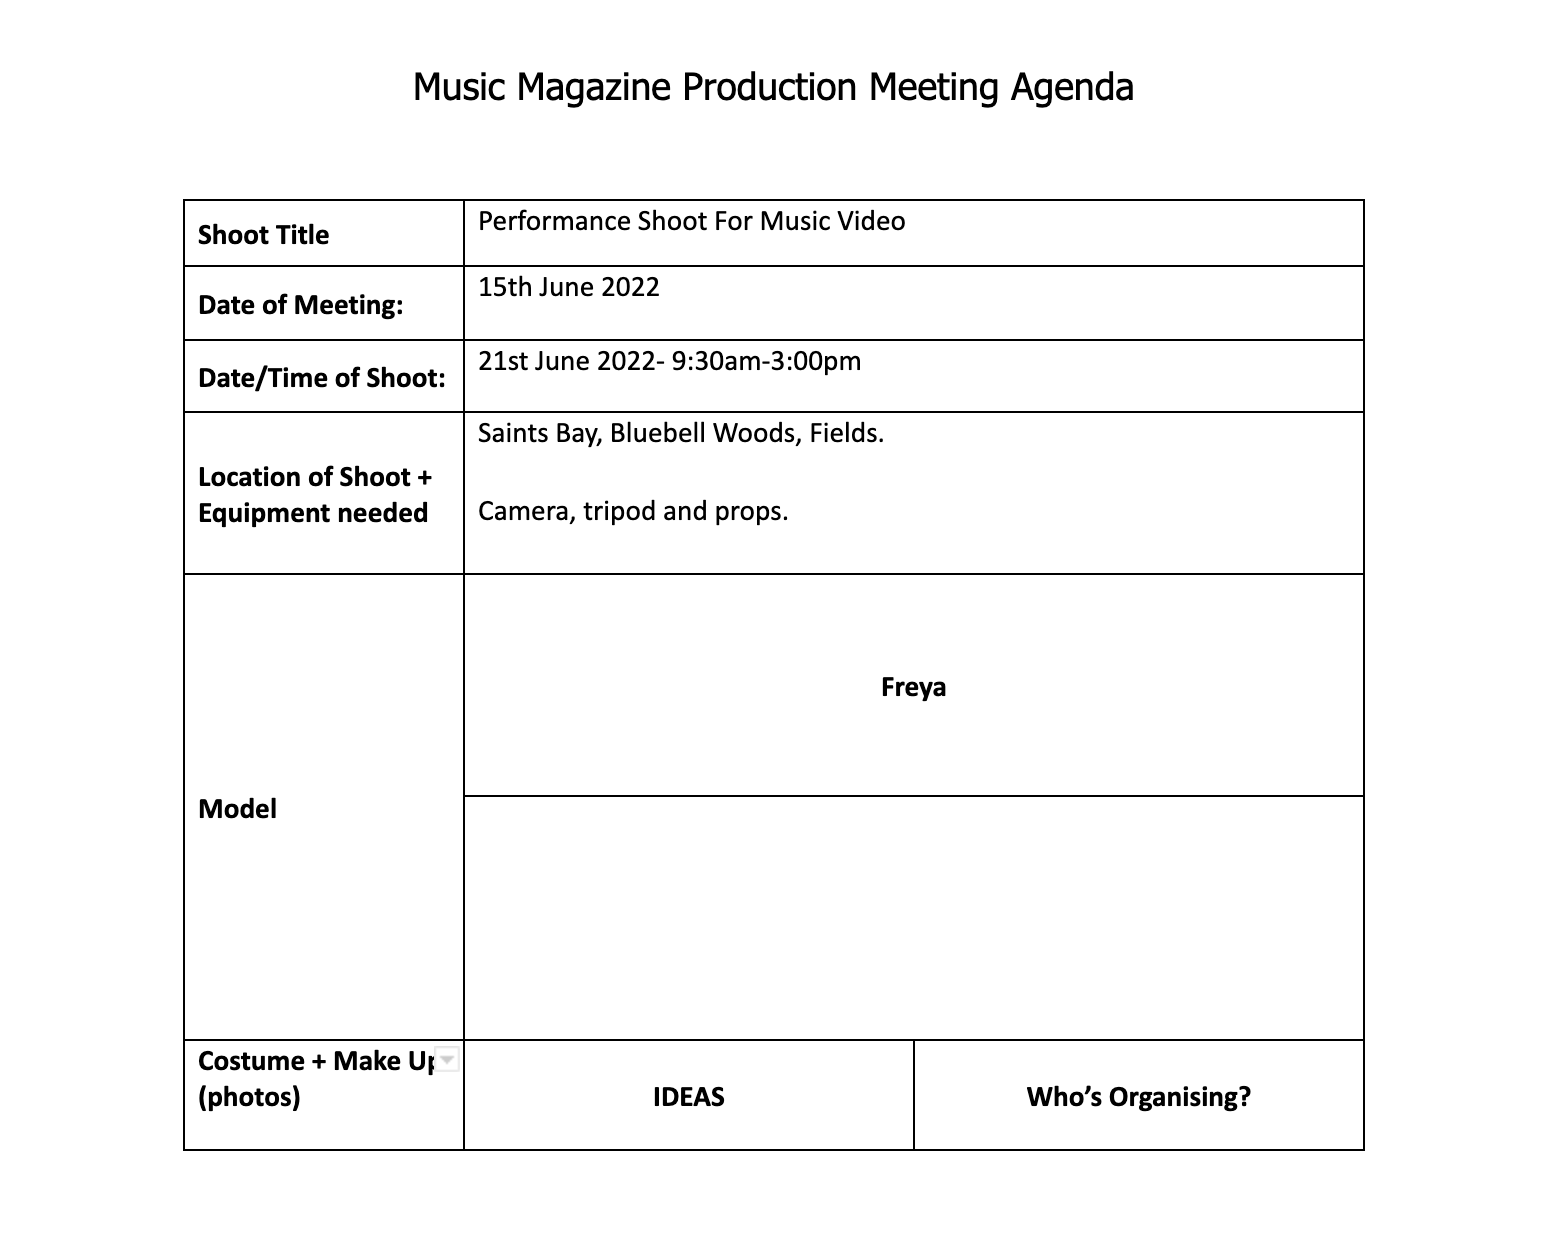
Over the summer holidays, we were able to gather all the footage that we needed to be able to complete our music video. In order to complete our five shoots during the summer, our group as a whole had to be organised, knowing when and where we were filming and what was required for them to bring. Due to our prior organisation we were able to have multiple successful shoots.

As we have now gathered all of ur footage, we have split our group into two pairs to ensure that editing is split fairly and that we are all able to contribute our editing skills equally. Embedded below is the second draft of our music video which now includes our narrative aspect as well as our performance aspect. Our second draft is nowhere near completion, however it is important at this stage of editing to grasp an idea of what we need to improve upon to move forward with our video and anything extra that my partner and I want to add, this includes any extra features we want to incorporate such as transitions, colour effects and other filters.

Our Second Draft:

Now that we have created a rough edit of our performance and narrative, we now need to go through the assessment criteria to ensure that we include everything and anything that has not yet been included is thought about later on in our next drafts. In order to keep our audience engaged throughout the video, we need to use a variety of shot distances and angles. Thankfully whilst collecting our footage, we thought to film from a variety of different distances and angles which allows us to have variety throughout our music video helping to make it visually pleasing and exciting to keep our audience engaged.

Self Assessment Sheet:

What Went Well:

  • Our narrative and performance footage blends well together, and there is no confusion between the two parts.
  • There is a clear, well planned storyline which minimises confusion.
  • Most of our performance footage is synced up to the soundtrack.
  • The variety of shot distances and angles helps to portray a clear star image and keeps the video exciting.
  • Mise en scene helps to portray our storyline and keep it moving whilst not having it being the only feature of the video.

What We Could Improve:

  • We need to edit to the beat more as we continue to edit our video.
  • Some of our performance aspect is out of sync with the soundtrack, so that will need to be fixed.
  • We need to think about adding effects such as filters or colour correction to improve the quality of our video.
  • One of our performance shoots is yet to be included in the video. In doing this we will be able to use performance footage that matches the feel of parts of our narrative footage.
  • My partner and I need to add a strong beginning and ending to our video to draw in our audience and leave them feeling satisfied.
  • We need to consider parts of our party scene and see what works within our video.

Teacher Feedback:

Now that we have submitted our first draft to our subject teacher, we have been given feedback on what could be improved within our video.

  • Add some close ups of our performer instead of just midshots.
  • We need to not jump between the footage of our performer with a mic and without a mic for consistency.
  • When our actor opens the curtains, flash to a white screen to add to this part of the video.
  • Consider if some elements of our party scene are completely necessary as some parts seem comical.
  • Improve upon some of the lip syncing elements and make sure they’re all in time.

Now that we have been able to reflect on the progress we have made. We are able to begin to focus forward to the improvements that need to be made to fulfill the assessment criteria. Our rough draft above has allowed us to focus on what we need to include and has given my partner and I time to focus on the tiny details that improve our video and help to it work.

Shoot 2 Reflection (Narrative)

When the day of our narrative shoot arrived, we were able to have a day that ran smoothly and quickly. This is down to our prior planning through the use of a narrative photo board and well as a production meeting agenda. During this shoot we were able to gather a wide variety of  shots that were composed using different angles and distances. In doing this we were able to get the ‘money shots’ that we had aimed and planned for on out shot list. During this shoot, we were all able to constructively contribute ideas to the video, and we were all able to have a go at filming and demonstrate our skills using a DSLR camera, apart from Destiny as she was our actor. Included below are some images from our second shoot.

What Went Well:

  • We were able to follow our narrative photoboard and shot list which made sure filmed all essential shots.
  • Our prior planning allowed us to use our time wisely and collect all footage.
  • As a group we all contributed ideas as to how things could be done during the shoot.
  • Our model was confident and showed a mature attitude throughout, portraying her character well.
  • The workload throughout the shoot was shared effectively allowing for the day to be a smooth process.
  • The use of both natural and artificial lighting during our shoot allowed our footage to have a sense of professionalism and fit well with our narrative.

Improvements To Be Made:

  • We need to gather a wide variety of shot distances such as extreme close-ups and close-up to help portray the emotion of the narrative more effectively.
  • We need to ensure that when filming there is not equipment such as lighting and tripods in the background of our footage to save time on reshooting.
  • We would like to gather more movement shots of our model, such as her walking out the door as we were unable to film this at our current location.
  •  In our next location shoot, we will need our actor to show a wider range of emotion as to help portray our narrative more effectively.
  • To ensure that all shots on our narrative list are filmed, in order to help us during editing with things such as continuity and to help our video flow.

Risk Assessment (Narrative)

Exactly like our first shoot, we had to create a risk assessment so that we are able to carry out our shoot safely as well as being aware of any possible risks that could occur. It is extremely important to that we created this risk assessment as a production groups so that everyone is aware of all outcomes so that our shoot can run smoothly. We have identified one hazard of wires on the floor which could cause people to trip, so we will make sure to take extra care when filming. Included below is our risk assessment for our narrative shoot, each of us have signed it and our teacher is also aware.

Please click on the image to view the PDF

Production Meeting for Shoot 2 (Narrative)

To have a clear plan and to be organised within our group, we need to create another production meeting agenda but this time for our narrative shoot. By planning through the use of a PMA, we will have a clear idea of what each person will be responsible for, which will allow us to have a productive shoot. Attached below is our groups agenda:

Please click on the image to view the PDF

In this document we have included the props and costumes needed, the dates and times of the shoot, and the location of our shoot. It includes a clear plan of what everyone is responsible for. I am responsible for providing the camera and batteries as well as the tripod.

By giving everyone a specific role within the group, everything is shared equally between us, and it makes sure that the responsibility is not on only one person’s shoulder. Having a production meeting agenda allows us to be thoroughly prepared before our shoot, this means that we are able to have a productive and professional shoot.

Video Narrative Photo Board/Shot List

In order to create narrative sense and structure throughout our video, it is important as a group that we created a detailed plan to follow during our shoot. Together we created a shot list and photo board that includes every variety of shot we intend on filming, it also includes the locations that we are going to film at as part of our narrative. By creating this, we will be able to focus on the MES and other important aspects of our shoot.

The idea of creating a narrative photo board it to help when it comes to editing. By listing what variety of shot angles and distances we need to film, we will be able to compile our footage together much more easily. A shot list will also help to ensure that we get multiple “money shots” of our actor in all our filming locations.

Our music video will be made up of four different narrative elements: a bedroom scene, a party scene, a car scene and a kitchen scene. When filming in these locations, we will focus on getting the main shots on our list and if we have time get any other shots that may be useful such as reaction shots, high angles, close ups and tracking shots. In doing this we are able to focus on the conventions and elements within pop that need to be portrayed throughout our music video. By having a wide variety of footage we will be able to follow our narrative structure during post production.

Focusing forward, we will be doing the majority of filming during the summer holiday, we will refer to our shot list to ensure that we have all the footage required when we return to school in september which will help to produce us to produce a music video of professional quality.

Music Video Draft 1 – Rough Cut

As we are now onto the post production element of our performance shoot, we have created a rough cut of our music video using Premiere Pro. By using our previous understanding of the software, we were able to choose different clips to be used throughout our song. As we gathered enough footage during out first shoot, we were able to complete a full rough cut of our performance video, this was down to our organisation as we gathered a variety of shots for the entirety of the song.

Our First Draft:

What We Did Well:

  • We were able to edit to the beat and the lip syncing mostly matches the audio.
  • Editing to the beat helped us to move between clips easily.
  • We have used a variety of shots and angles that help to effectively portray our star image.
  • Our variety of shots allows for movement within the video that helps to keep the audience interested.
  • Both my partner and I were able to have a go at editing in Premiere Pro, which helped our understanding of the software preparing us for our next edit.
  • We have displayed the correct repetoire of elements for our chosen genre through the use of Mise en Scene, Lighting, Costumes, Mode of Address and Acting.

Targets to Improve:

  • We could have chosen clips that have better lighting or adjusted the lighting in some clips to improve their quality.
  • To help keep the audience engaged we need to move between clips quicker.
  • We need to use the tools available to us on Premiere Pro to help sharpen our clips.
  • One of the clips used is blurry and should be replaced during our next edit.
  • With our understanding of the software, we can now begin to add effects and filters to help create a professional look.
  • Next time, after exporting our video from Premiere Pro we need to make sure that our audio and video are synced.

Shoot 1 Reflection (Performance)

On the day of our first shoot, everything was able to run smoothly and effectively due to our organisation and communication as a group. Before we began recording, we ensured that we had all the relevant equipment that would be needed, and that our performer was ready and our MES was properly represented. As a group we found our first shoot was successful, as we managed to get a variety shots and angles of our performer that we will be able to use in our final video.

Our first shoot started at about 9am when our group arrived at our first location of the day (Saints Bay). It was at this location that we filmed the majority of our footage. After we wrapped up shooting at this location, we went back to school and uploaded our footage so that we were able to film more in the afternoon. After doing this we went to our second location ( a field close to the Val De Terres) and remained there for the rest of the day. We ensured that between the people in our group that everyone had a chance to film. However as our performer was a member of our group, she was unable to film during this shoot but we have ensured that when it comes to filming our narrative she will have a chance to film.

Images from our first shoot – 

What Went Well –

  • We used out time efficiently which helped us to gather a variety of shots and angles.
  • Our use of communication and organisation allowed us to have all our props and equipment ready to go on the day.
  • Our locations and our props worked well together and fit our genre.
  • Our performer was confident and knew the lyrics of our song which will helps when it comes to editing.
  • Every member of our group was able to express their opinions during the shoot which helped us to create new ideas.
  • Our star image was portrayed effectively.

What We Could Improve –

  • The lighting of our first location was too bright, which made it hard to see the performers face in some shots.
  • The fabrics and props that we had on the day were not incorporated into the music video enough.
  • Even though we have a wide variety of shots and angles, there is still room to improve.
  • Unfortunately in some shots the wind was quite strong which meant the performers hair was in her face.
  • In some shots the lighting or other factors meant the footage is not able to be used, so we will need to record more.
  • In some shots where the tripod is not used, the camera was very shaky which means unfortunately some of the footage isn’t well shot.

Now that I have reflected on our first shoot, I have been able to gather elements that need to be improved and that can be thought about the next time we film. Reflection is crucial as it allows us as a group to understand how we can fix what went wrong. After reviewing our footage as a group, we have decided to go out in out own time and record more for a higher quality and to give us more options when editing. When we do this we will focus on our points of improvement such as Lighting and props, so that our we are happier with our outcomes.

Production Meeting for Shoot 1 (Performance)

To prevent confusion and have a successful performance shoot, as a group we created a production meeting agenda (PMA) as a guide of what we would need for the first shoot of our music video.

Within the PMA we outlined costume and makeup ideas, as well as what props and equipment will needed to be brought with us on the day and who is responsible for it. We have also planned the three locations we will be shooting at and have considered all risks and possible outcomes of our locations. I have been allocated the responsibility of  bringing the appropriate camera equipment and the day. By allocating different responsibilities to each-other we have been able to equally share the workload and have ensured that everyone has something to bring on the day.


Risk Assessment (Performance)

To minimize the level of risk during our performance shoot, we have to carry out a risk assessment as a group and evaluate all possible risks of the locations we will be using.

Please click on the image to view the PDF

Above we have identified the possible risks we will have to watch out for which include the cliffs around saints bay, any rocks on the beach as well as being careful of moving vehicle’s and strangers. By collectively evaluating all possible hazards, we are able to create a safer environment for our performance shoot.

Older posts Newer posts
Skip to toolbar