Design Skills 2
These are some of the skills I learn’t while creating and experimenting with the first draft of my music video:
Firstly, before I get into what I achieved I will talk about Lenny and Elliot who came in from Specsavers and taught the class how to create different effects. They provided us with a video before they came:
This was helpful because it taught us to organise our material and keep it in a controlled environment. My group and I did this immediately to help keep everything in folders and to help us when looking for a certain clip.
The first skill I have learn’t is how to change the opacity of your image and make it spin. First I had to click on the clip and clip the opacity button. When the opacity button is selected firstly you can change what shape you have over your image. For example I chose a circle then you can then change the mask feather which can blend the background in with the image.
To get the image t0o spin I created a frame at the begging of the clip where the clip was in its original position and another frame at the end with the clip in the ending position I wanted. I also chose what speed I wanted the image to move.
This helped with our genre since we wanted her to look alternative and catch the audience out.

Next I would like to talk about how to replicate the clips. This was very easy since all I had to do was click on the clip and chose the replicate option in effect controls. I then chose to replicate the image by 4.
This helped with the star image because our artist wants her views to be heard so there are multiple of her to enforce that.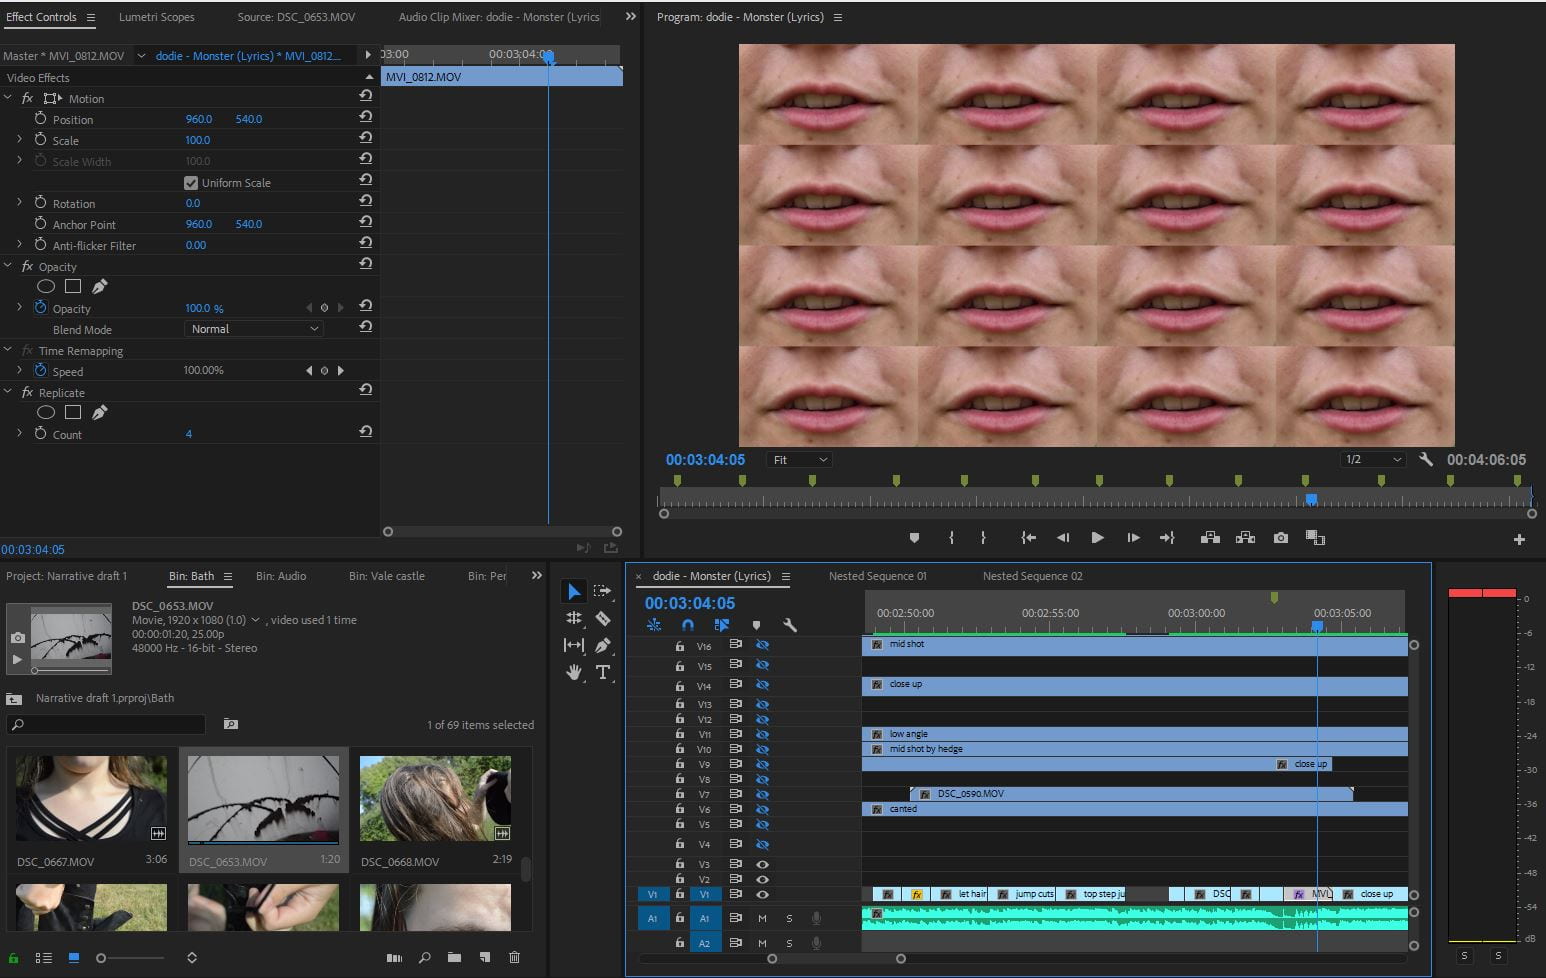
Then I am going to talk about how to change the brightness and contrast of your clip. Here I had to select my clip again and put a brightness and contrast effect on it. When the effect was on I got to choose how much brightness I wanted and could play with different levels.
This helped our genre since it looked edgy and helped move the narrative in the music video along.
The last effect I would like to talk about is when we placed the opacity circle from before into another clip to look like a reflection in the glasses. We did the same as before with the opacity but changed it so it had less opacity. This way the image would look like it was in the glasses.
This helped with our star image since she felt like she was being watched all the time.