Music Video Draft 2
For our draft 2 we made some changes whilst also adding in some new footage. This included the sock puppet narrative footage from shoot 2; we also experimented with some colour filters on some of the narrative shots. Overall I think the layer over the narrative shots needs to be more obvious compared to the performance segments so that the difference is more clear and the dream-like flashback idea is more clearly portrayed; the layer also should be over every narrative shot instead of just a few so these improvements can be made in draft 3.
Something that was a positive change we made for draft 2 is we added some shots as the music fades away into instrumental at the end. I think these shots are effective because they seem candid and off-guard which fits in with the slow conclusion of the song. The performer slowly walking away from the camera at the end also illustrates this well because it clearly shows that it is the end of the story.
Draft 2
Shoot 2 reflection (narrative)
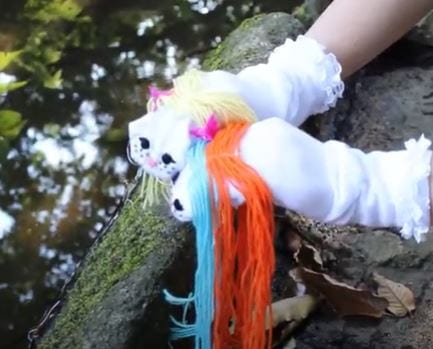
For this shoot we focused on the sock puppet element of our video which is the narrative segment. We decided to use sock puppets to convey our narrative in a child-like way, using props also removes the problem of having acting which is a bit too confusing or looks fake. The story-line we intended to convey was the progress of the star’s relationship, from her and her partner meeting to them slowly growing apart which is an amplification of the story told in the lyrics of the song.

What went well?
One thing that was a positive about shoot 2 is that we were able to shoot a large amount of footage with a large variety of shots and locations, giving us more choice in what to use when drafting our video.
The positioning of the shots was also ideal in most of them which was an issue we were worried about when working with the sock puppets as the perspective could have been off, however this turned out to go well.
What could’ve gone better?
The camera’s memory card ran out of storage towards the end of our shoot so next time it would be helpful to have an extra one on hand or delete some unwanted footage prior to the beginning of the shoot to ensure we have enough space for all the shots we would like.
Sometimes it was hard to express the desired expressions in the sock puppets ‘faces’ so we had to make sure it was very obvious what they were doing and give them specific actions. This could be improved upon by finding a better way to represent the emotions of the video through the puppets.
Design Skills 2
After working in Premiere Pro for longer now I have become aware of many more functions the program has which have helped me to add some more meaning to the narrative of the video through the camera and effects. Meaning can be made through camera by what an effect can represent, for example, different colours/filters can each create a different mood or meaning.
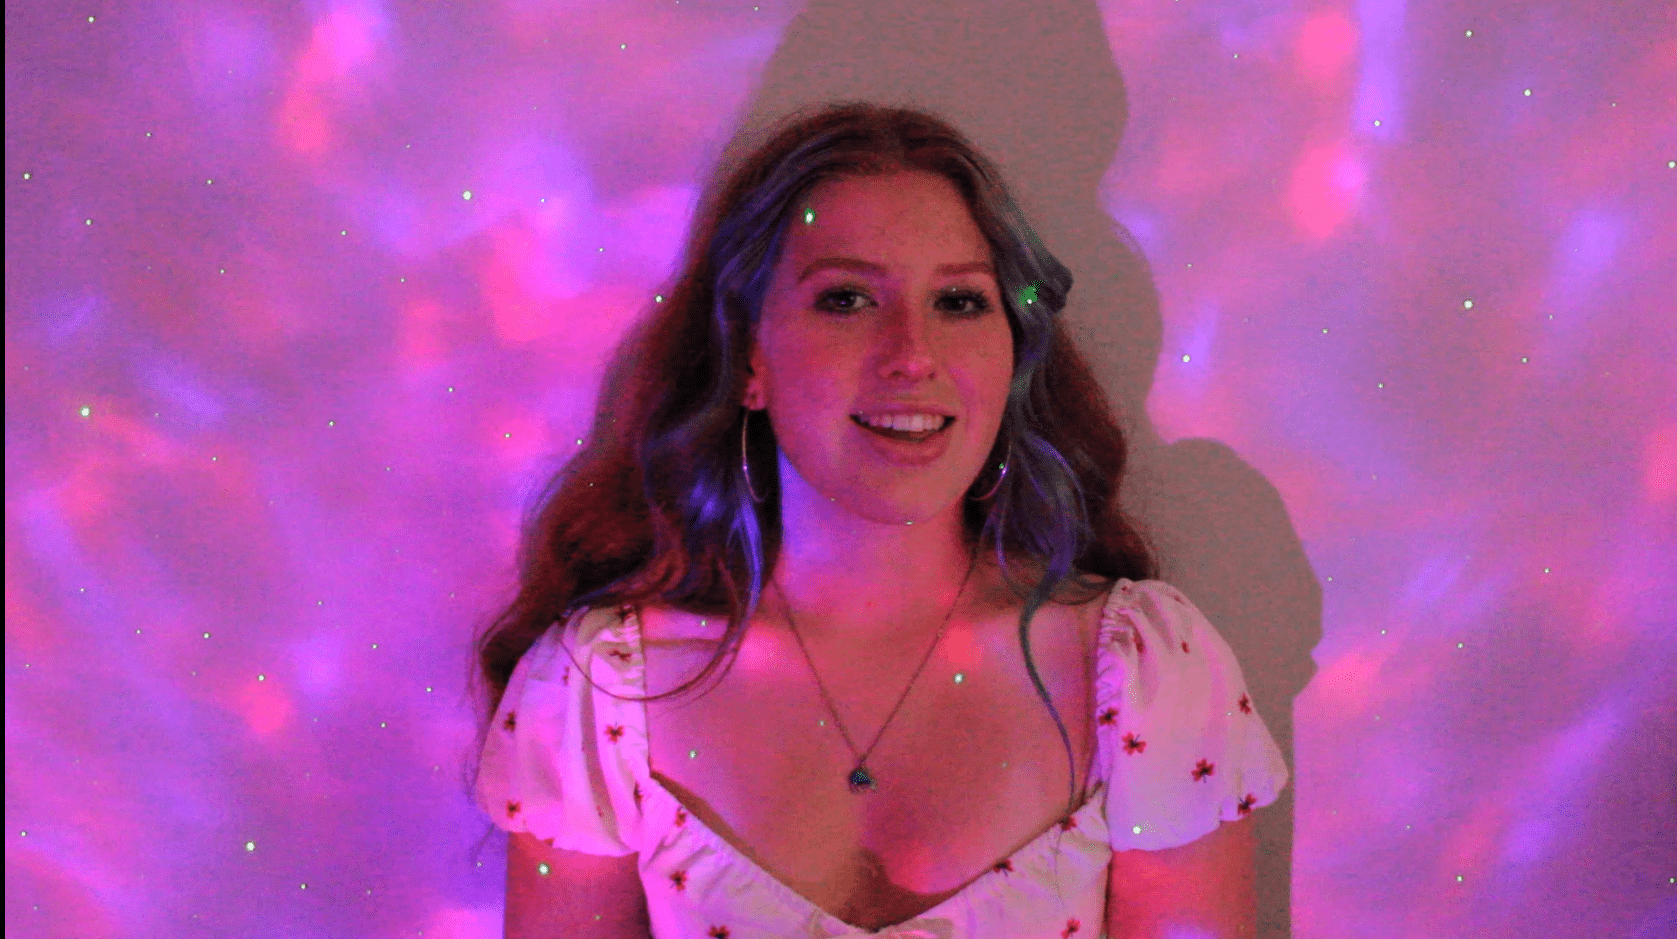
 To elaborate on this, one tool I’ve found really helpful is the Lumetri colour application which we used to add a filter of colour over some shots using an adjustment layer. This tool allows you to add a wash of any colour you like by adjusting the colour wheels to find the exact colour you want. This was perfect for the shots of the sock puppets as we wanted them to have a dream-like feel and wanted the audience to perceive them as flashes of the star’s past relationship. Giving the sock puppets shots a pink hue with Lumetri colour connoted the idea of the relationship being looked at ‘through rose coloured glasses’; insinuating how perfect it seemed.
Another tool which we will use to add meaning is the zoom tool in Premiere Pro to create a gradual push in effect to some of our shots. This will help us to create meaning by allowing us to draw attention to parts of certain shots, for example, the polaroid camera on the line of the lyrics which mentions it. The push in effect can also be used in the shots of the star lying on the ground; a gradual zoom on this will make the shot feel more surreal and entrancing which will draw the viewer in. This will also help connote the dream-like themes of the video.
Risk Assesment
It is important for us to make a risk assessment sheet before going on a shoot external to school because we must ensure that we are filming in a safe environment. Since this shoot is just using props many risks can be avoided however one risk we must still be careful of is when filming by water just to make sure we don’t slip and fall in.
Click on the image below to see the full risk assessment:

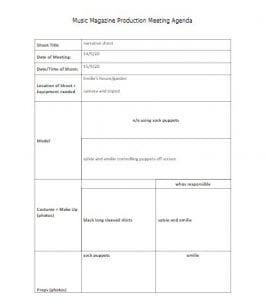
Production Meeting for Shoot 2 (narrative)
For our second shoot we only had the narrative section of the video left to film. For this segment of the video we decided to use the props of sock puppets to act out our idea instead of the star, this is because we wanted to add a more playful and childish element to the video. Not using the star for these sections also helped with continuity as it was shot a few months after the first one there had been both changes to the model and to the weather for shooting.
It’s important to make a PMA document before every shoot because it ensures that everyone involved is on the same page about what the goal for the shoot is. It also ensures that everyone is prepared with everything they need for the shoot eg. cameras, tripods and props.
Please click on the image to see the full PMA
Design Skills 1
Premiere Pro is a new program to me and so I’ve found many different features in it which I can use to make my music video look more professional and to help convey my star image better.
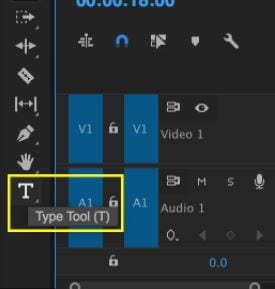 One tool I’ve used in Premiere is the text tool. This tool is how we’re planning on adding a title card to the beginning of the video to introduce the song. The text tool was helpful because it allowed us to choose what font and colour we wanted our text in; it can also be used to add a drop shadow or adjust the spacing of the letters which meant we could get the exact font we envisioned. This will contribute to a more cohesive music video because our song title card will match our mise-en-scene and we have also learnt how to place it in keyframes so that it appears on screen to the beat of the song.
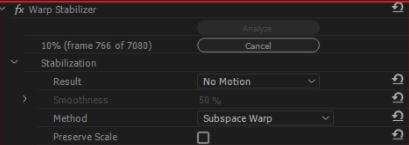 A second tool I’ve learnt to use in Premiere is the warp stabilizer which has been really helpful to correct footage which we want to use but is not completely stable. This tool helps to focus the shot onto a certain point and from that stabilizes the video around it which was useful when we had a shot that we needed to use turn out a little shaky. This tool helped to make the video look well shot throughout and get rid of some minor filming errors without having to reshoot.
Music Video Draft 1- Rough Cut
This is the first draft of our music video which is simply our footage cut and lip synced to the song. This cut is very rough but can be used as a template for later when we add more footage, especially narrative, and start fully editing and piecing the video together.
Even though this is no where near finished, making this draft showed us exactly where we wanted the video to go and whether we had the shots we needed to create the video we envisioned. It also helped us to see what limitations we were facing with the footage (eg. marks on the camera) so we know what we need to be conscious of during our narrative shoot.
Shoot 1 reflection (performance)
Unfortunately the weather was not sunny as we wanted for our shoot so we couldn’t get all of the performance shots we needed meaning we had to run the performance shoot over a couple of days. However, in our first shoot we were able to get multiple shots with my projector which made for mise-en-scene that really fit the dream-like feel of our video.

These photos from the filming at my house show the background we got from using the projector which I think makes a more interesting performance shot than just a blank wall. The star stickers on my face also added to the nighttime/daydream atmosphere we were trying to achieve which I think we did. One thing that could’ve been improved upon in these shots however is getting more variety of shot angles and camera distances because we did only get mid shots and the close up pictured which gives us less variety to work with.
When the weather cleared up we then finished our performance shots at Emilie’s house by using her garden as the mise-en-scene we needed for most of the shots in our visual shot list. This day our aims were to get film which fit the nature oriented and playful side of our music video.
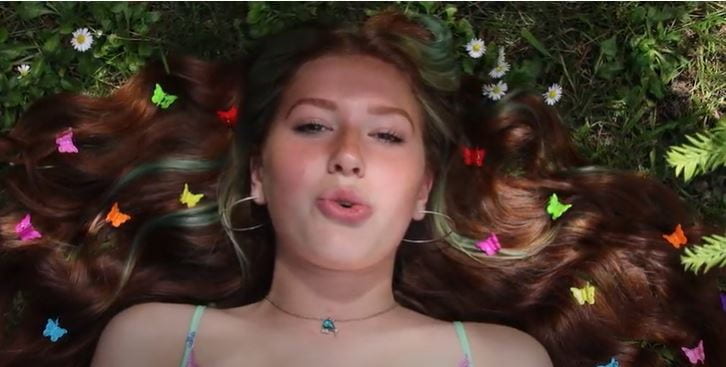
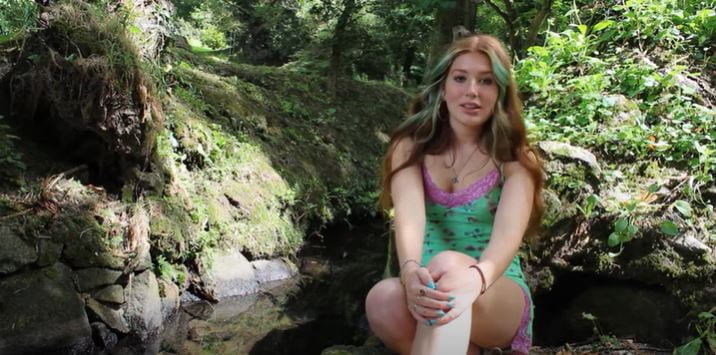
This shoot went really well because we were able to get all of the shots that we couldn’t get the first time round and we also got a couple more that we just came up with on the day. A target for next time is to clean the lens before filming because in a couple of shots there is a mark on the lens that we can’t get rid of, luckily it isn’t the noticeable.
Production meeting for shoot 1 (performance)
Production meeting agendas are an integral part of planning a shoot because they ensure all mise-en-scene decisions are made and prepared for in advance. We also needed to make sure that any camera equipment we needed was accounted for so to avoid any incidents on the day of forgetting kit. Our plan was to shoot at 2 locations, inside and outside, over the course of 2 days. This meant that we had plenty of time to play with difference performance shots in each location. Our aim for this shoot was to get all of the performance shots so that next shoot all we need to film are the sock puppet illustrative shots.

Star image- the performer
The performer of our song is Claire Cottril, professionally known as Clairo. I have analysed her star image to focus on what the common conventions for an indie star are and how she presents herself as a meta-narrative. This concept describes what makes the star a star, meaning what makes up their brand and how they present themselves to appeal to their target audience.
Richard Dyer came up with the reception theory as an answer to how a star should present themselves. This was that the star should be relatable to their audience so they feel connected to them and thus remain loyal fans; whilst also being distant and alien to the public in order for them to feel extraordinary and special. I think Clairo fits this star image well because she still acts like a normal teenage girl (her target audience) whilst also being able to switch to a professional singer.
From making this collage of Clairo’s star image I can see how I need to construct mine for my music video. I think it will be important to keep the playful, childish feel that she presents continuing through my star because it very much fits with the tone of the song and the child-like simplicity of the lyrics. I think the most important thing I need to take forward from this star image research into production is the feeling of being relatable whilst also feeling surreal and exaggerated in order to make a successful star. This can be achieved through our costume and overall styling of our star by elevating what a typical teenager would wear.